Original: $161.37
-65%$161.37
$56.48The Story
Product Size
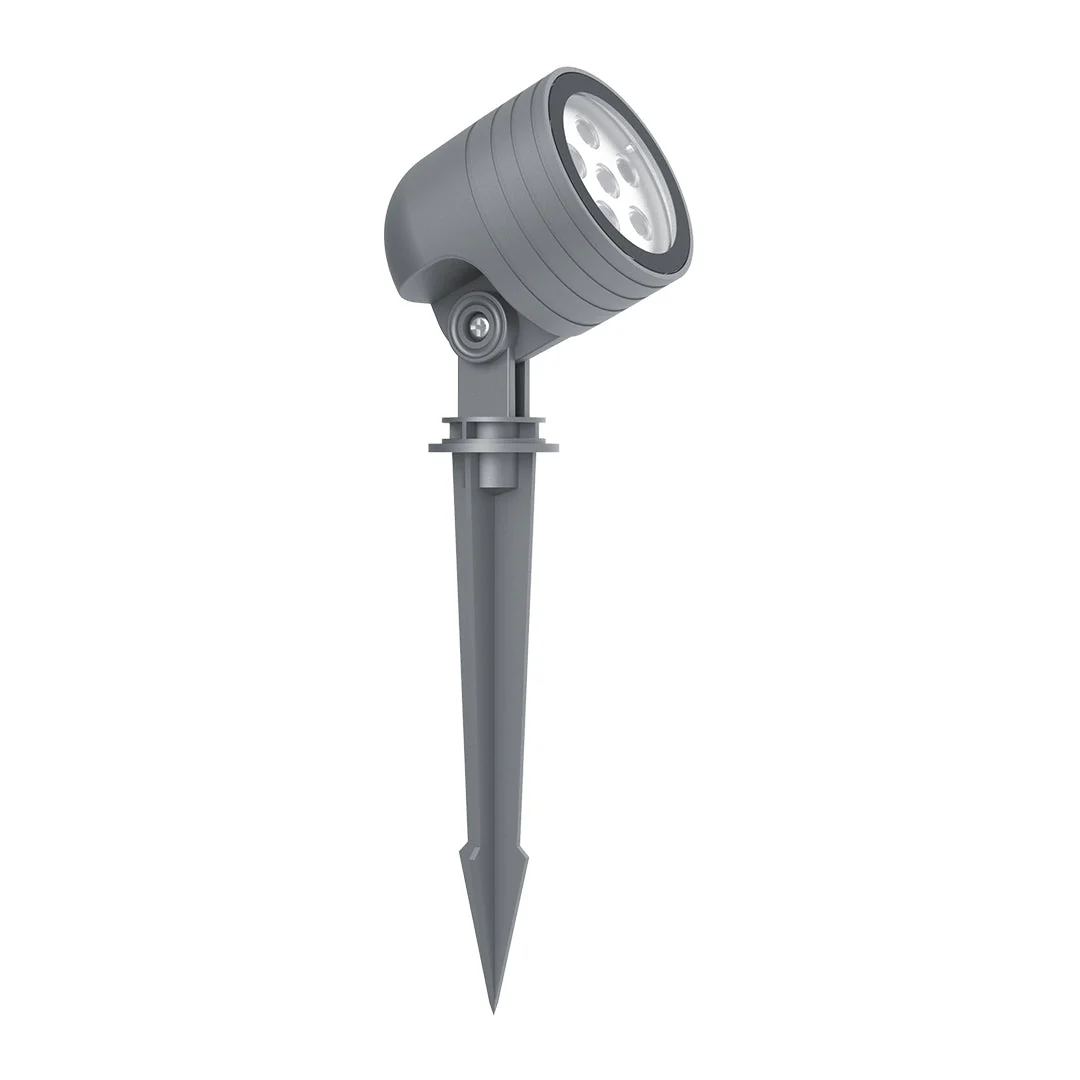
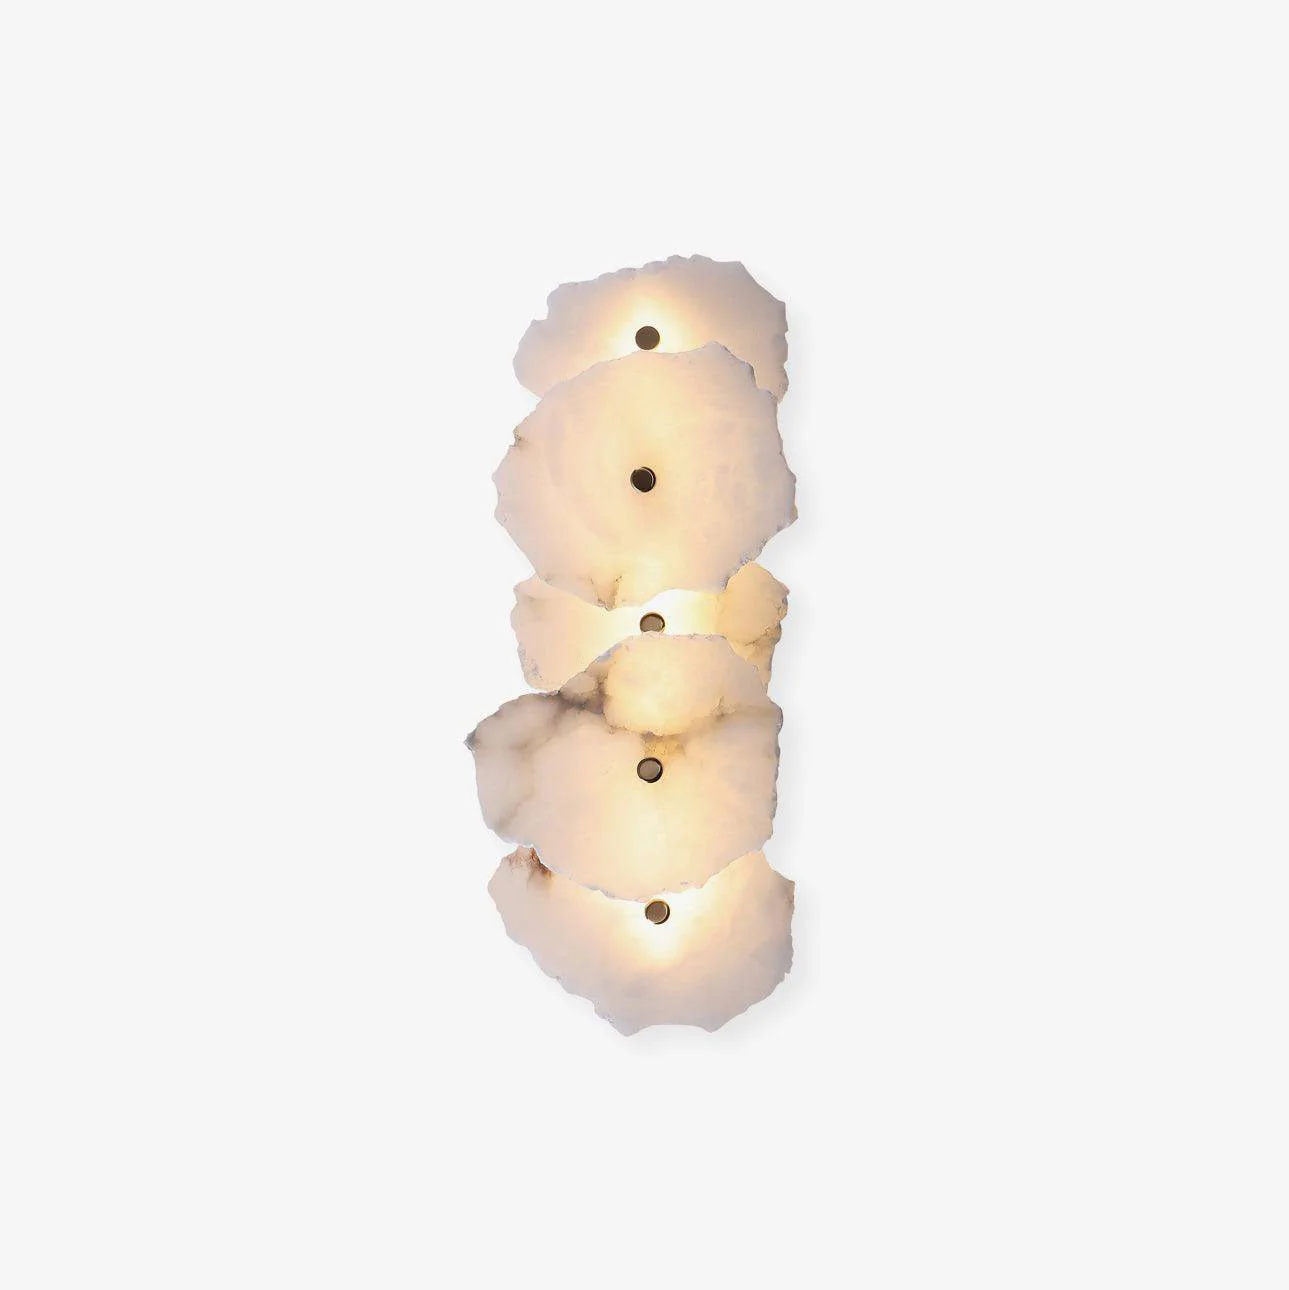
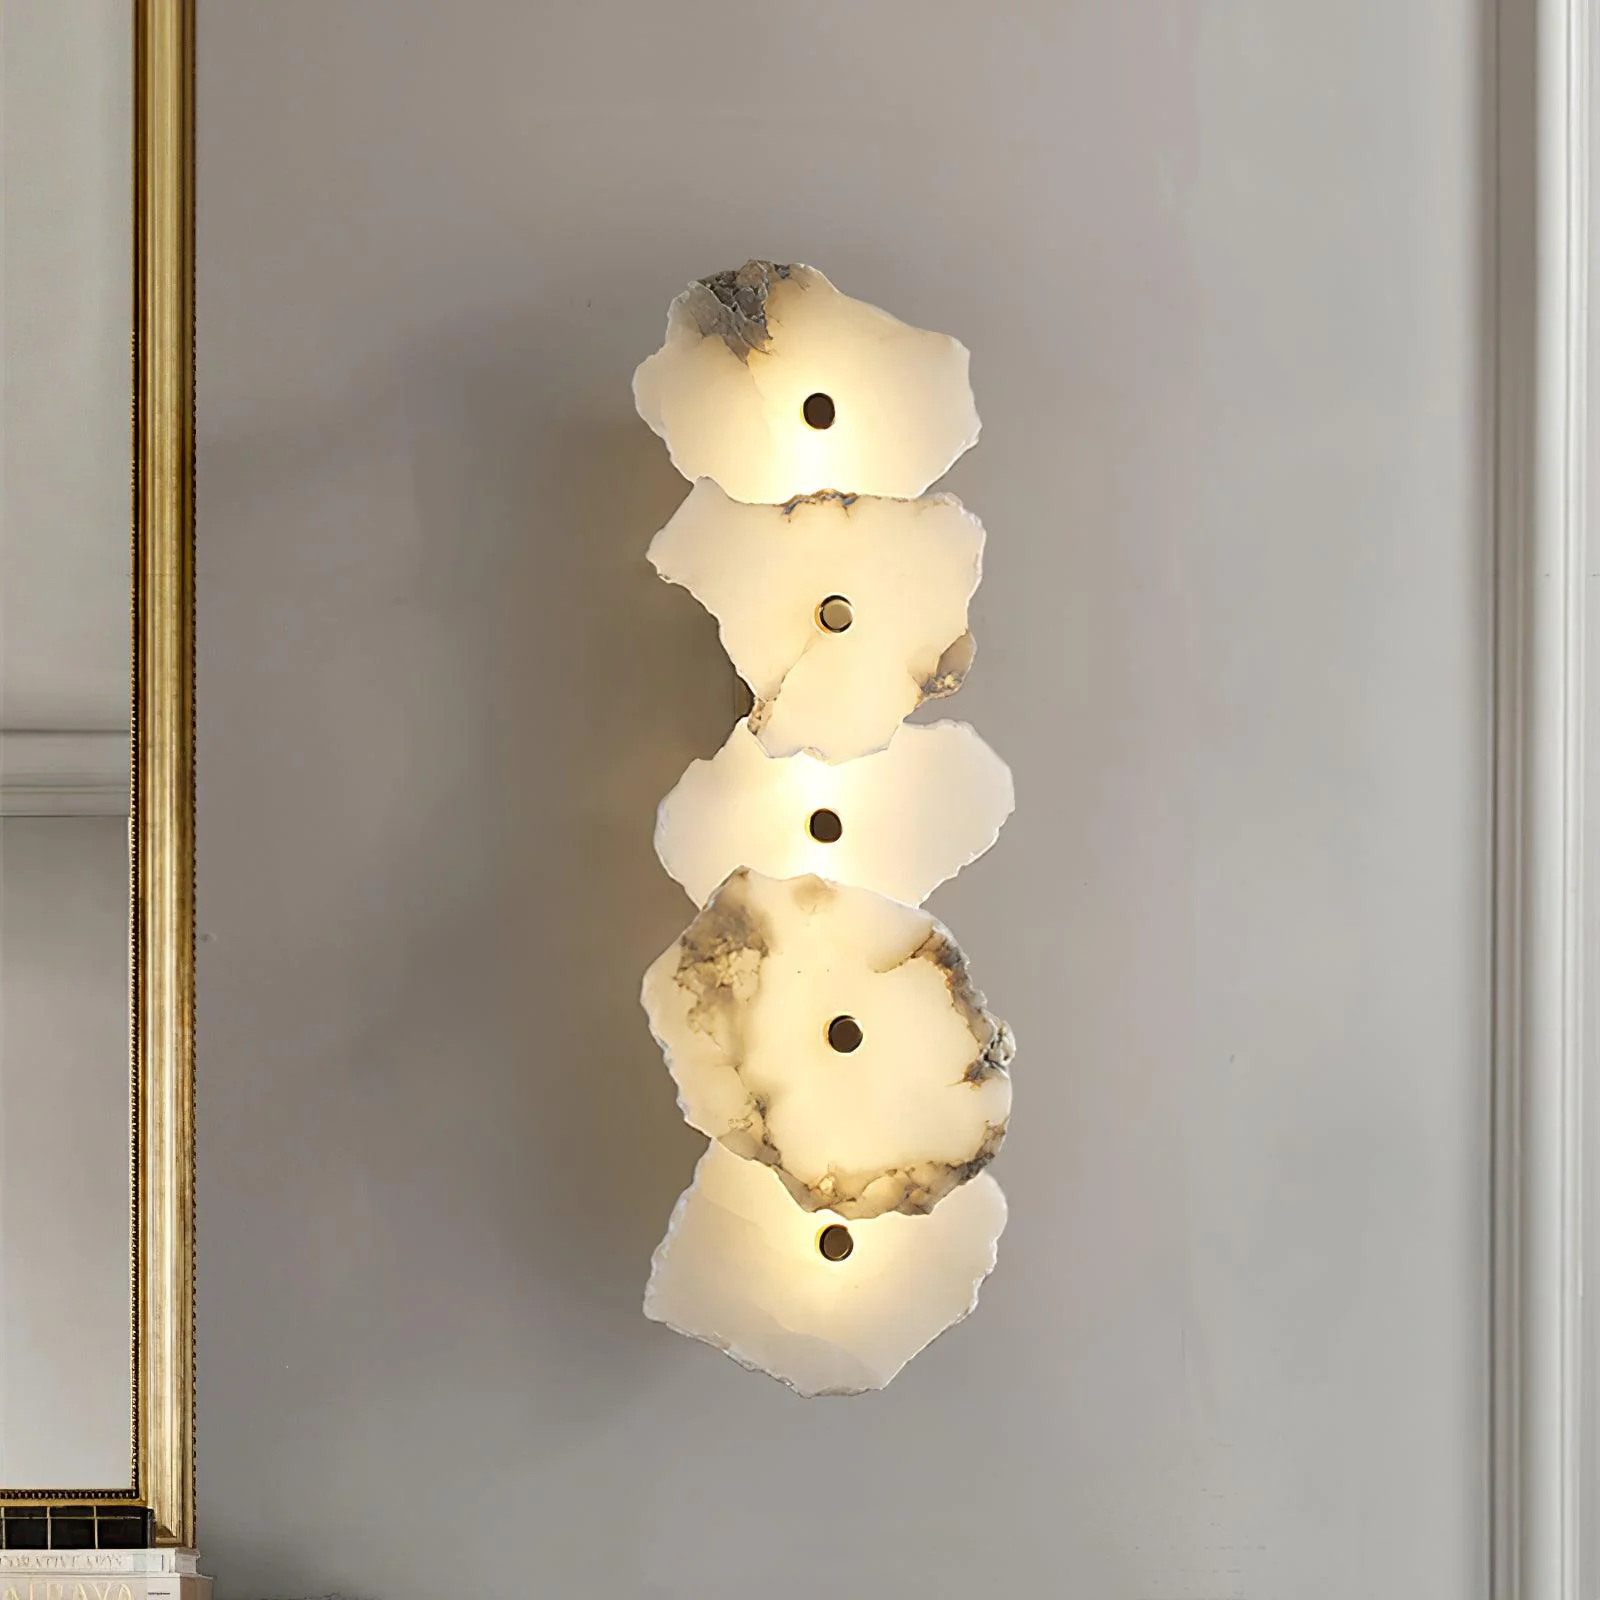
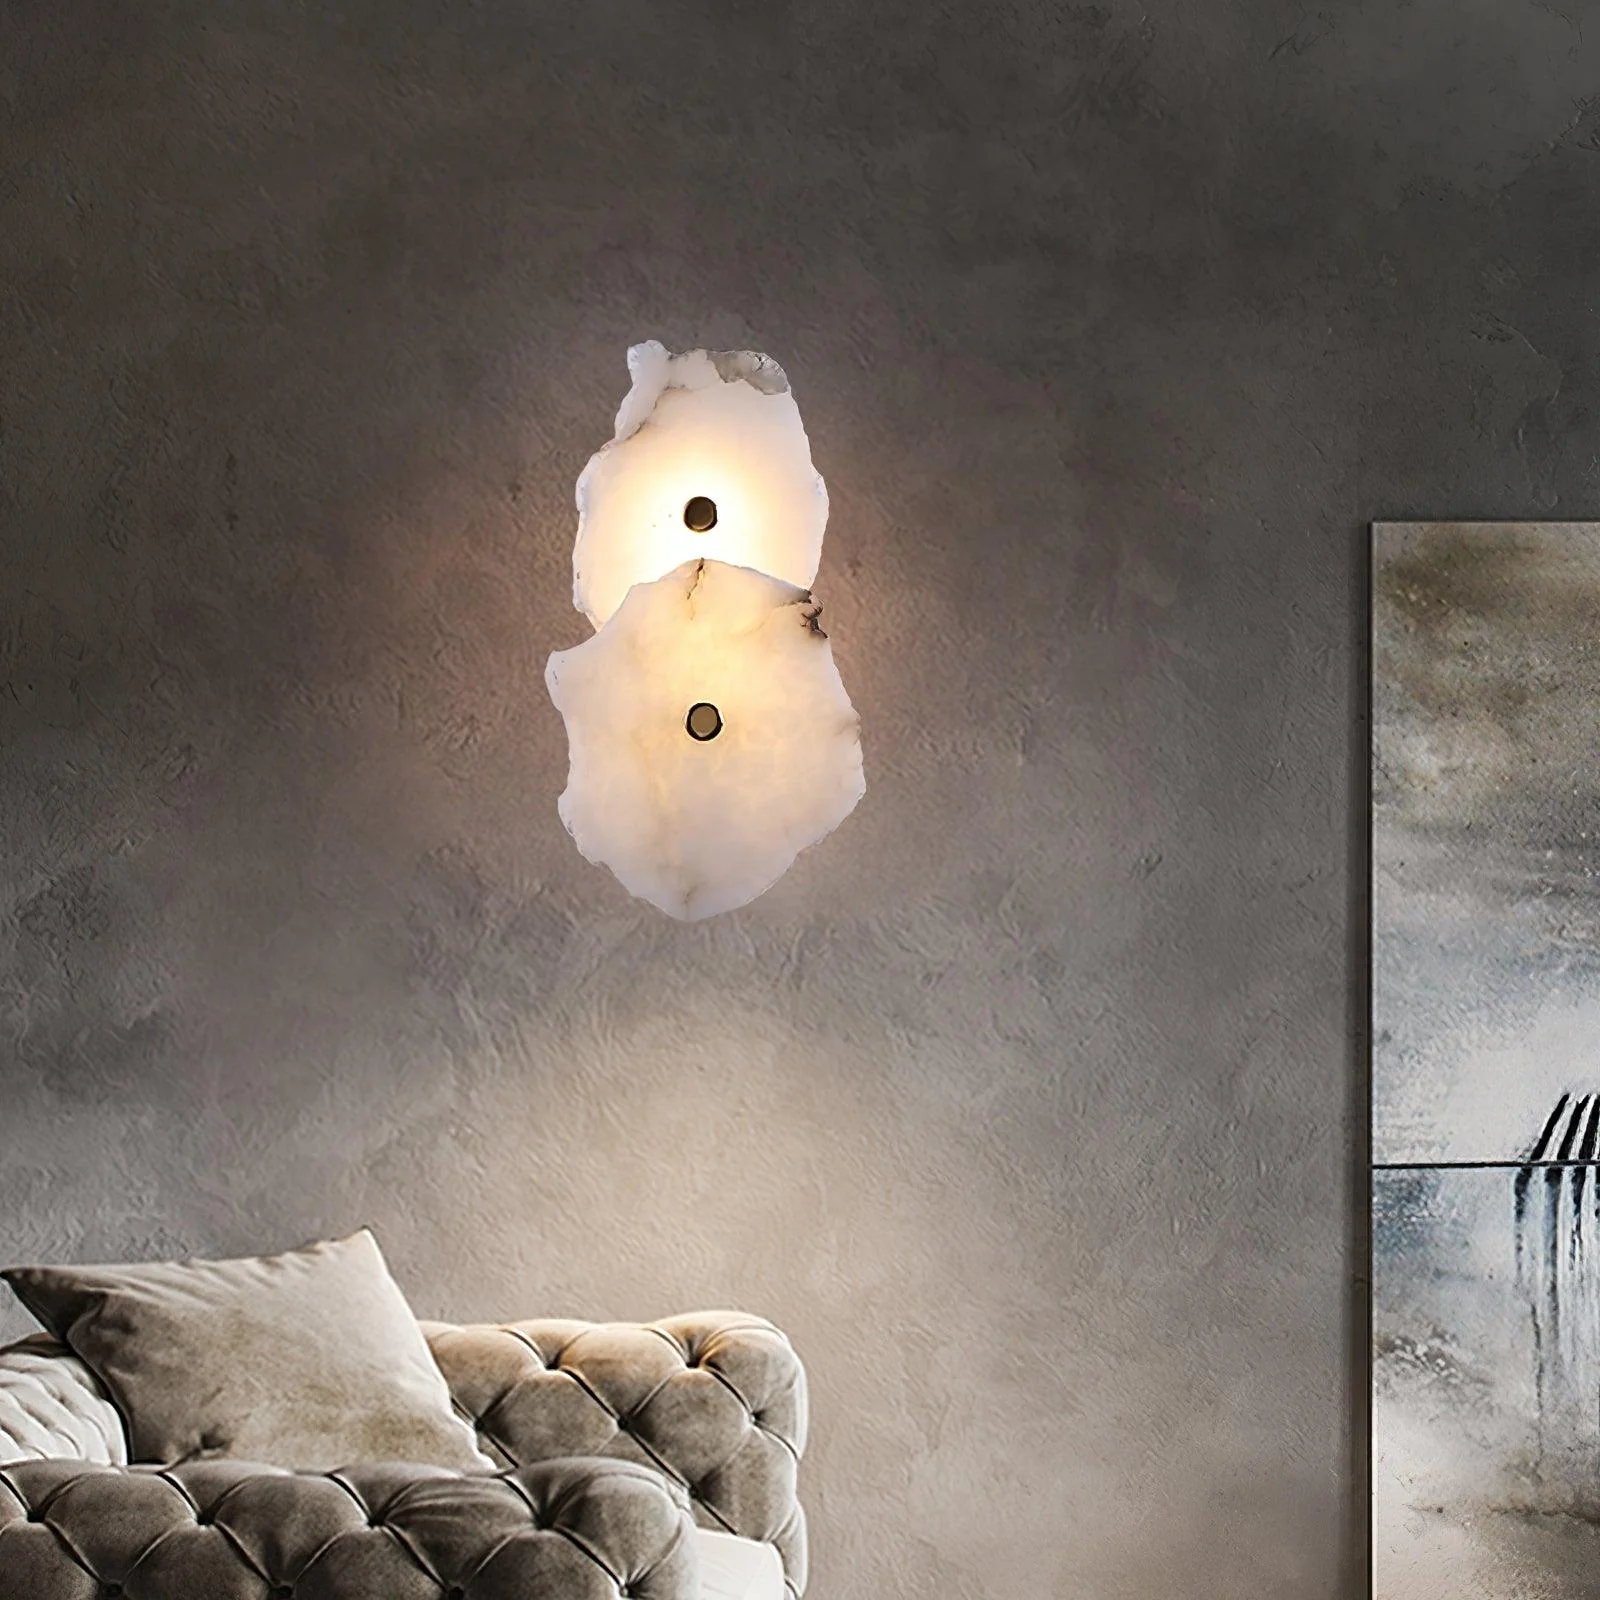
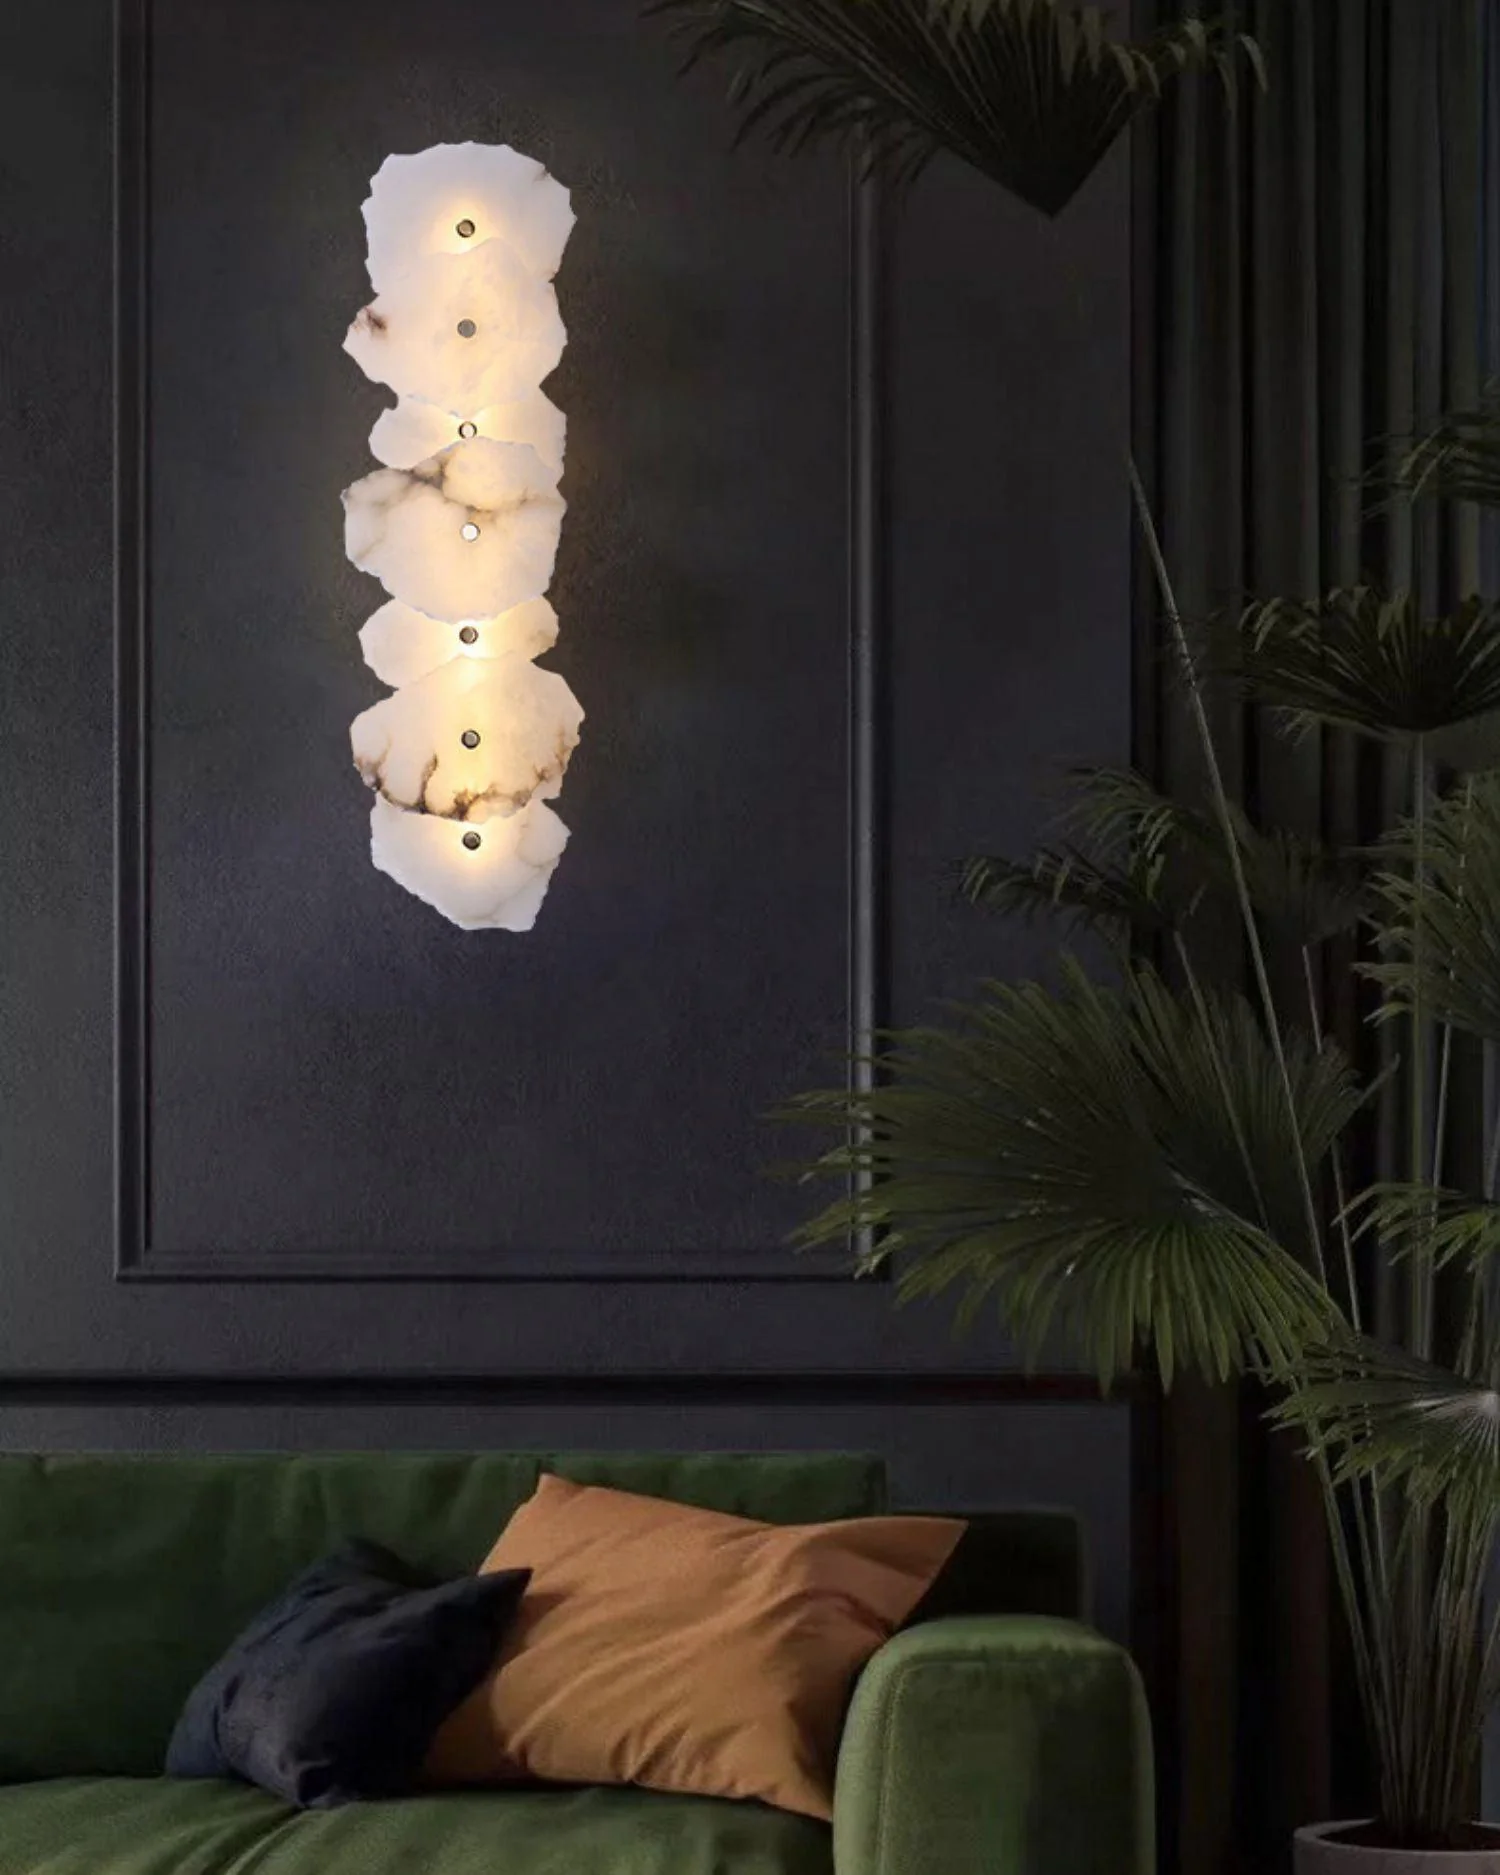
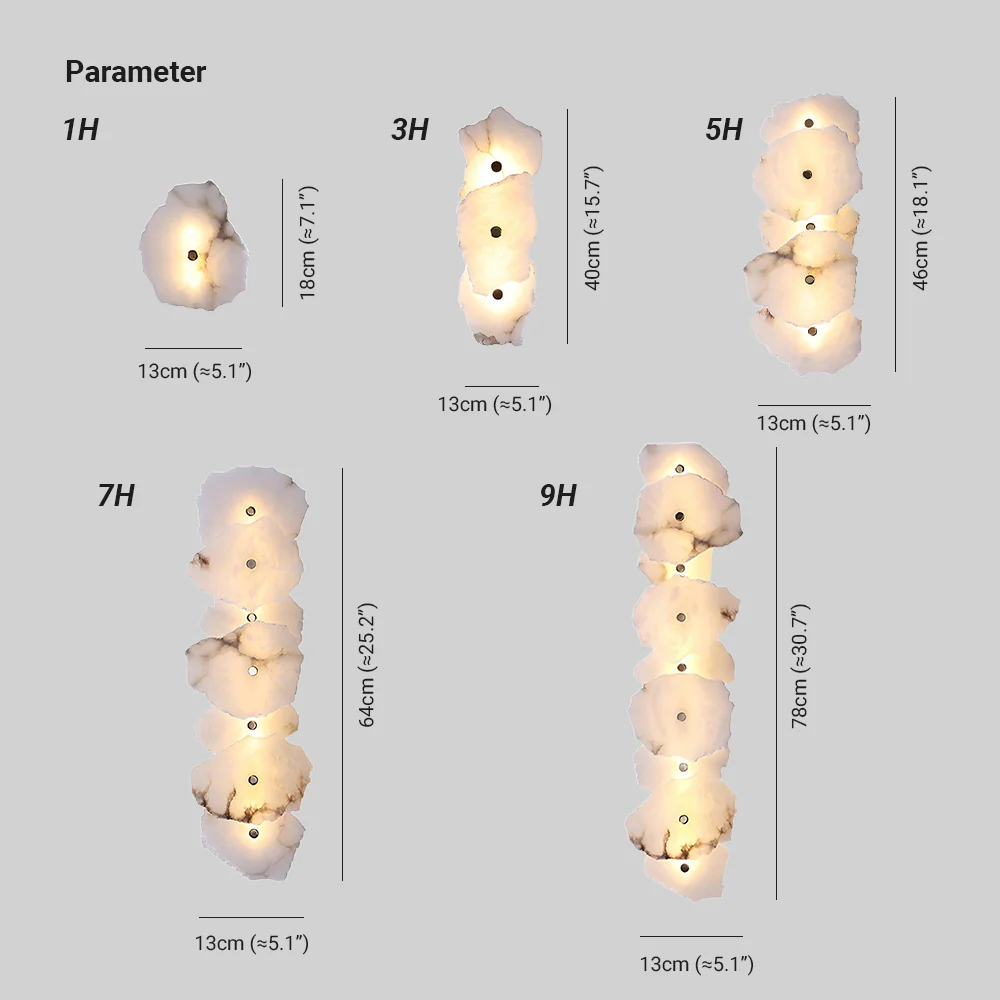
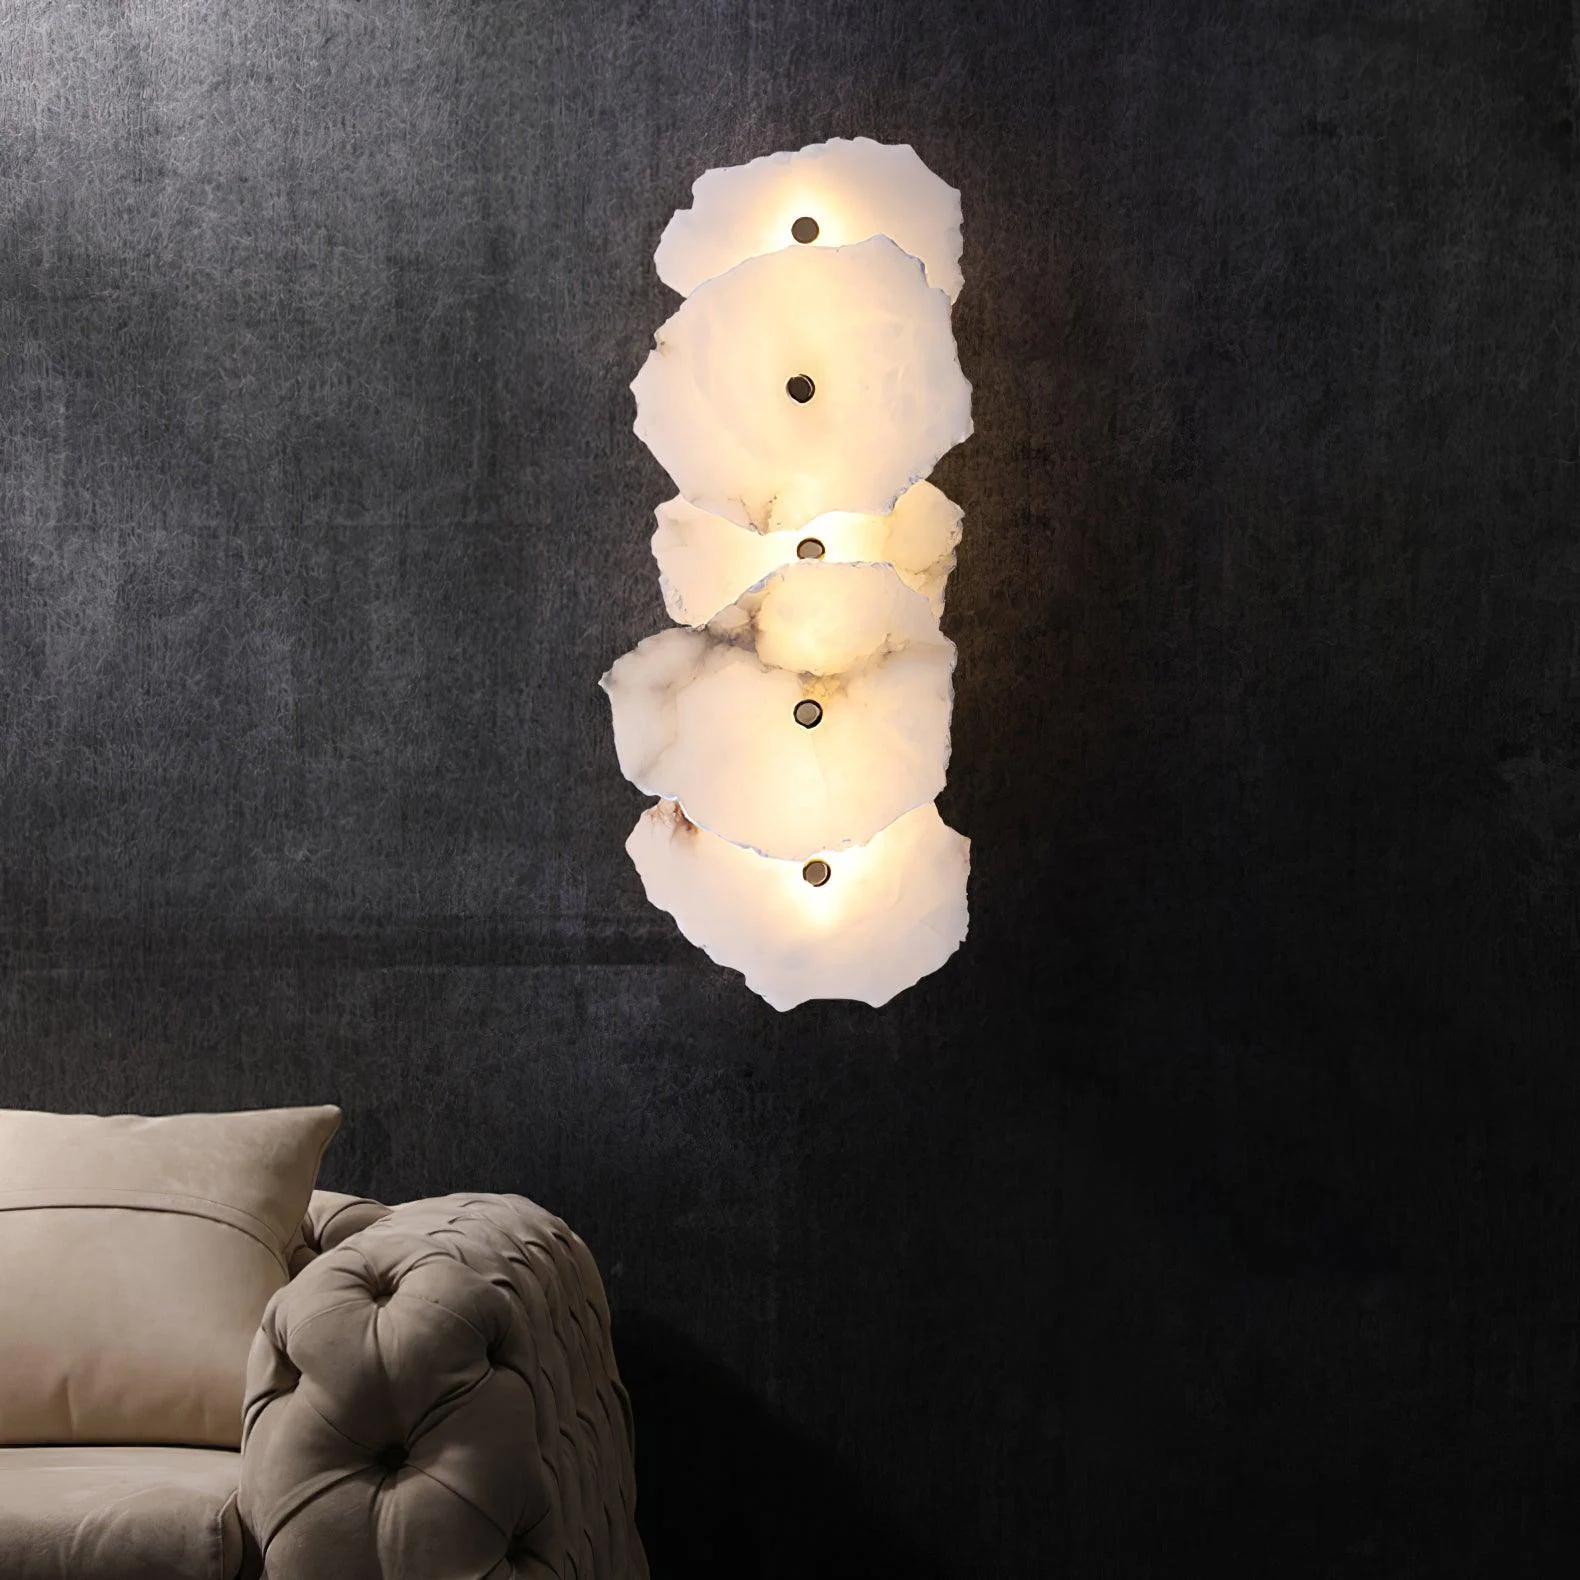
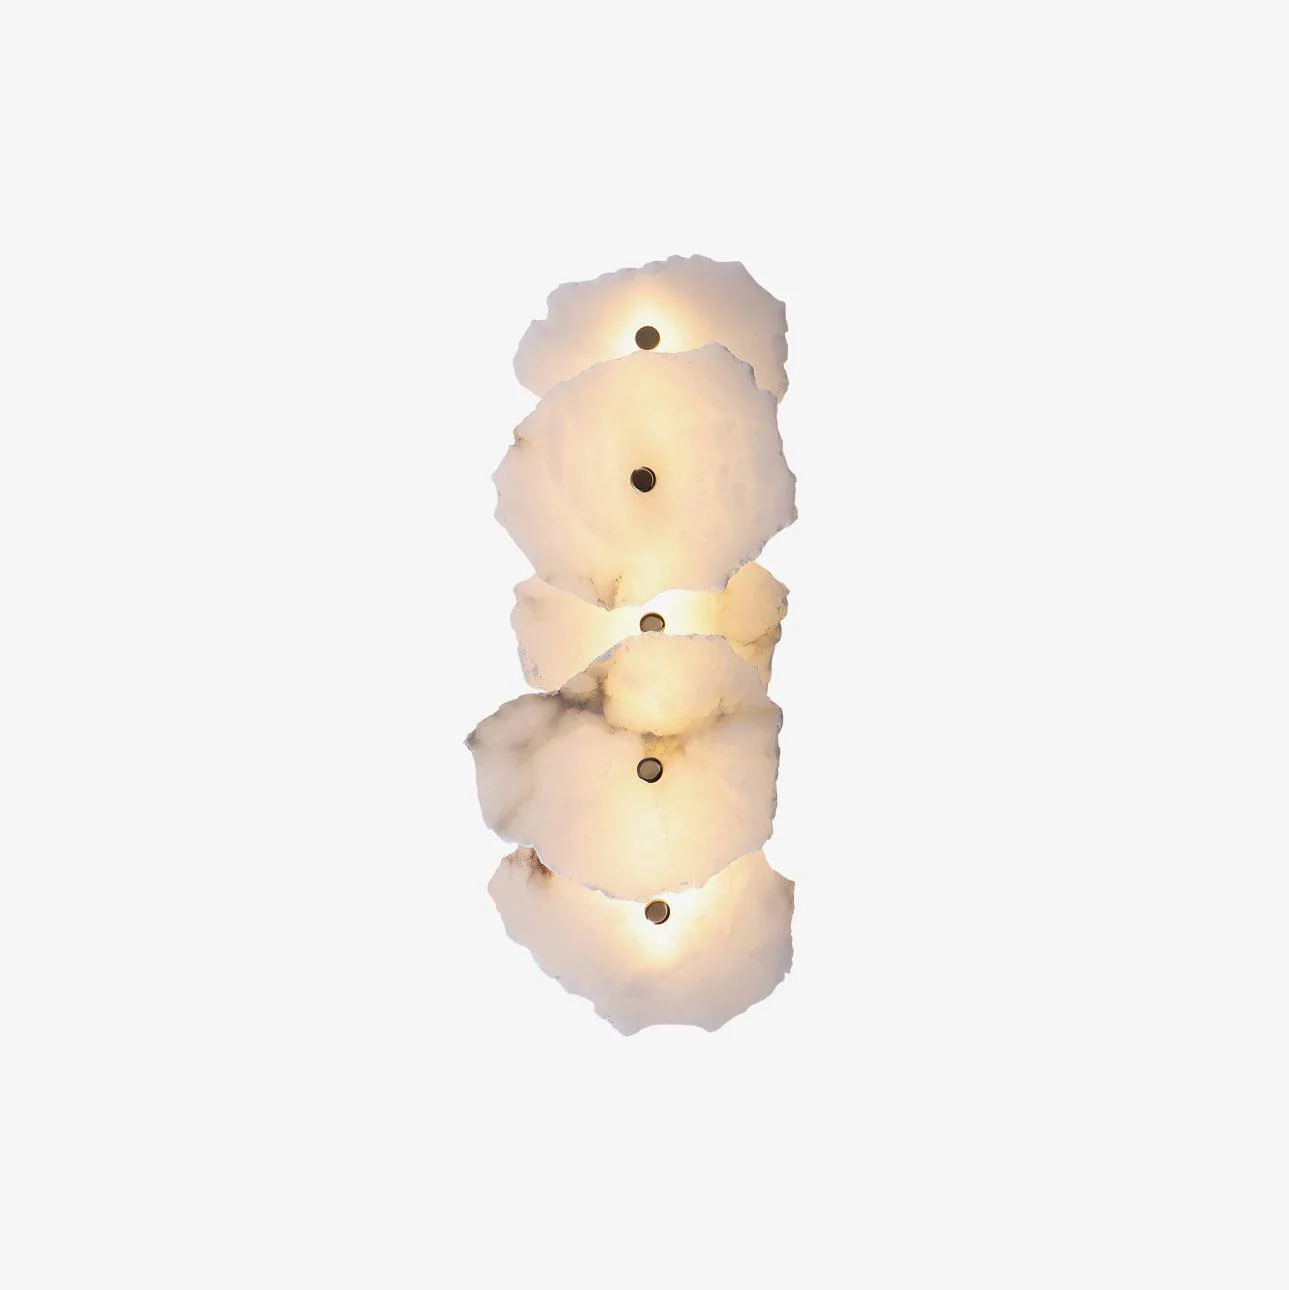
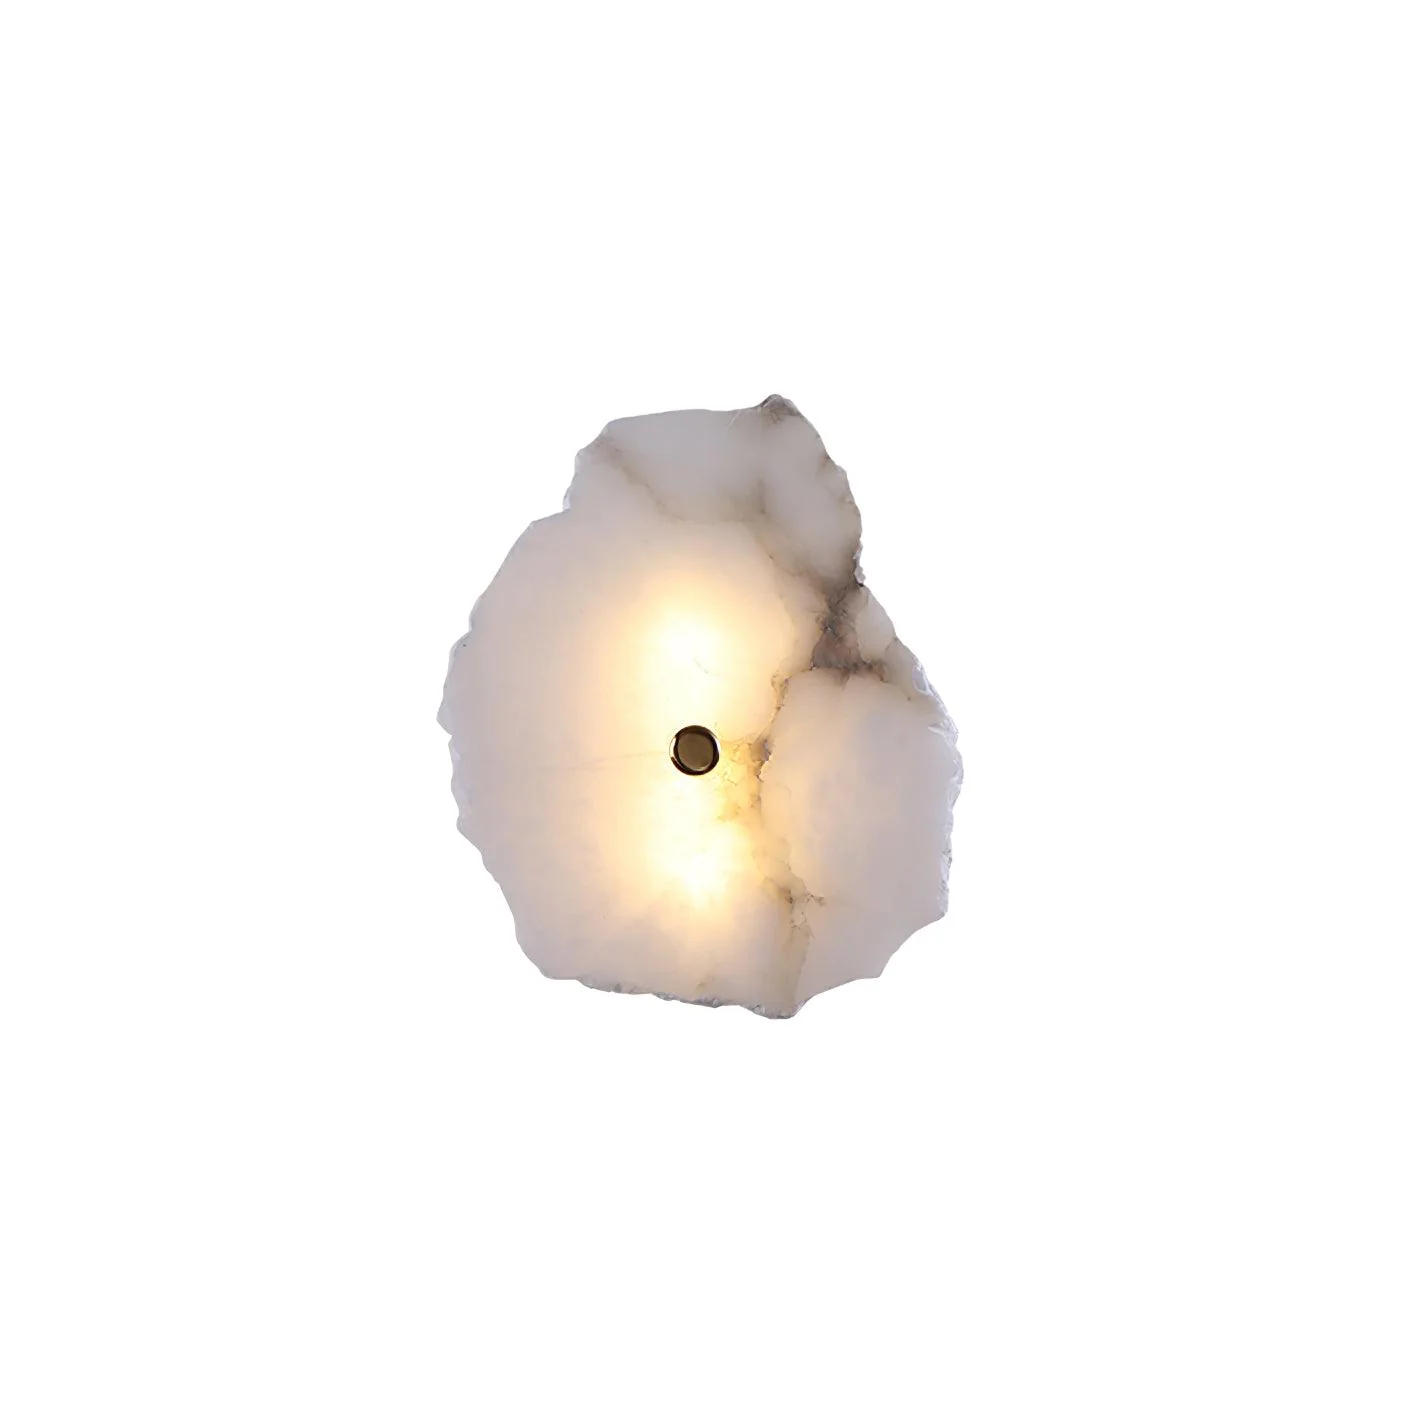
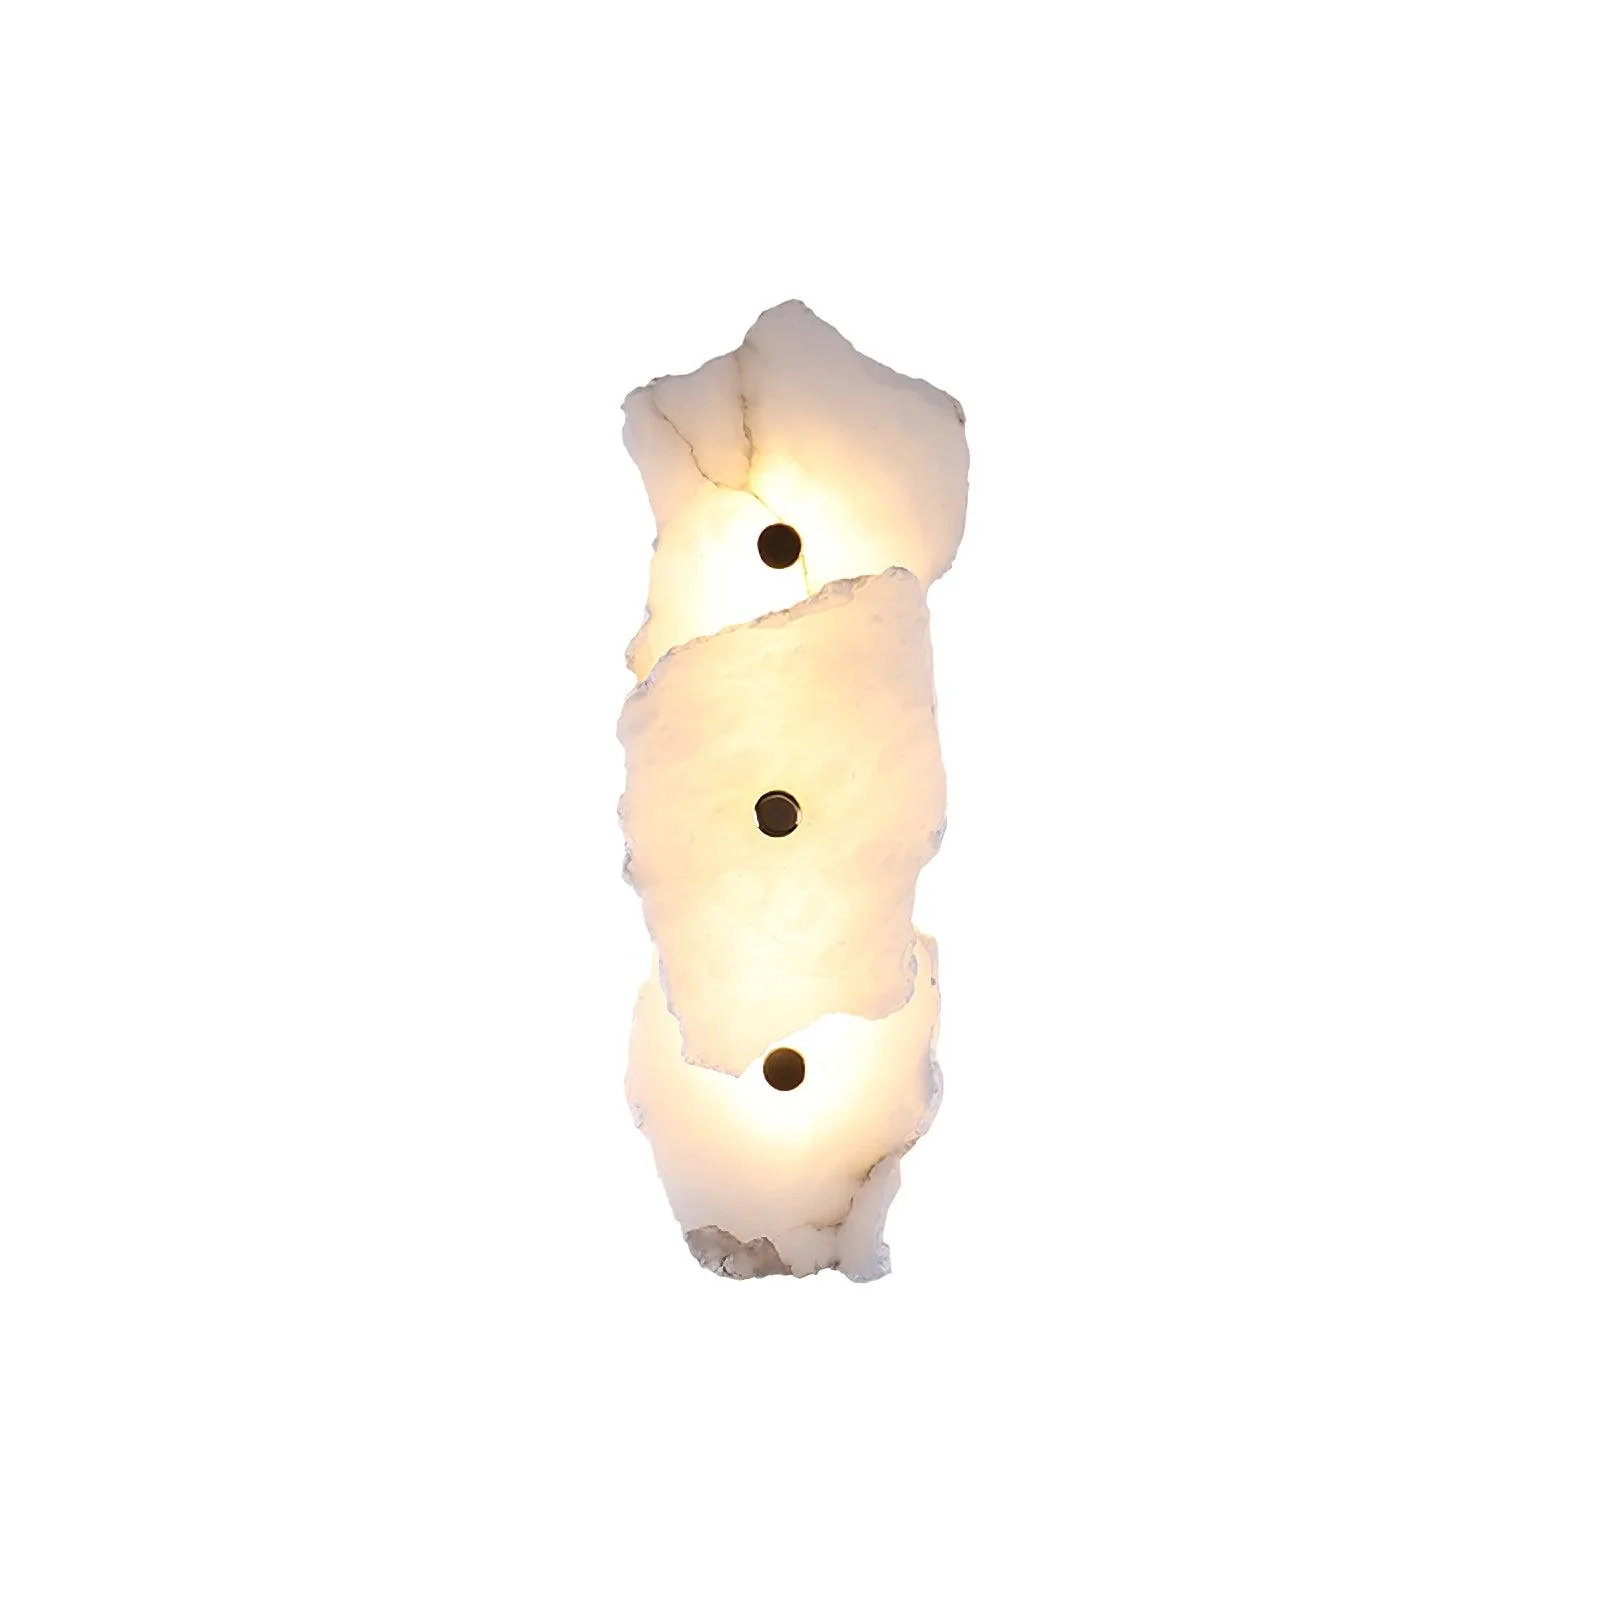
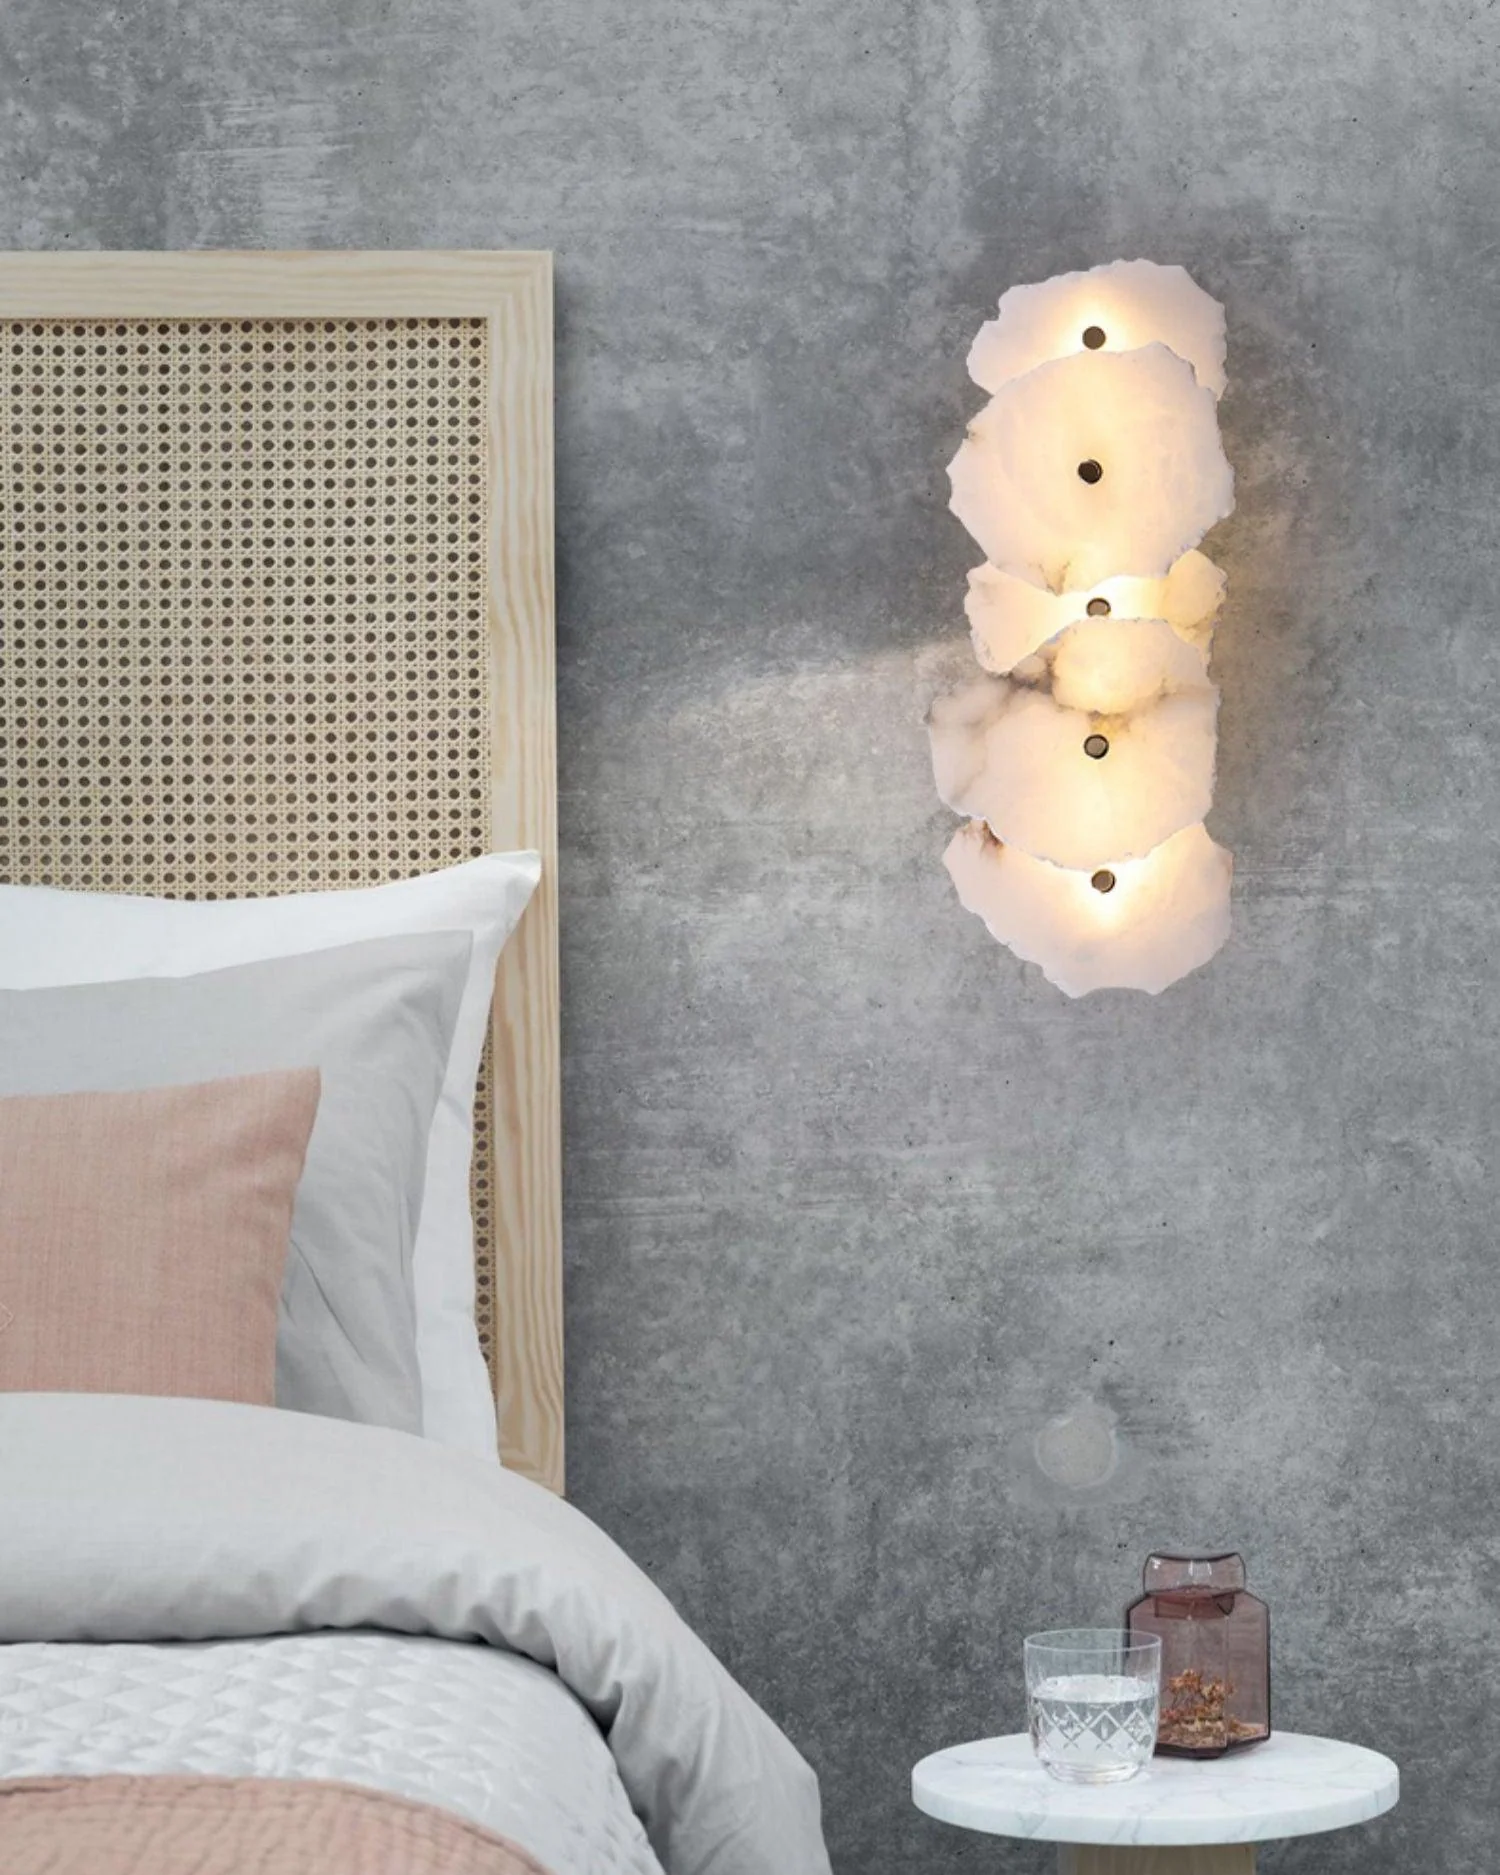
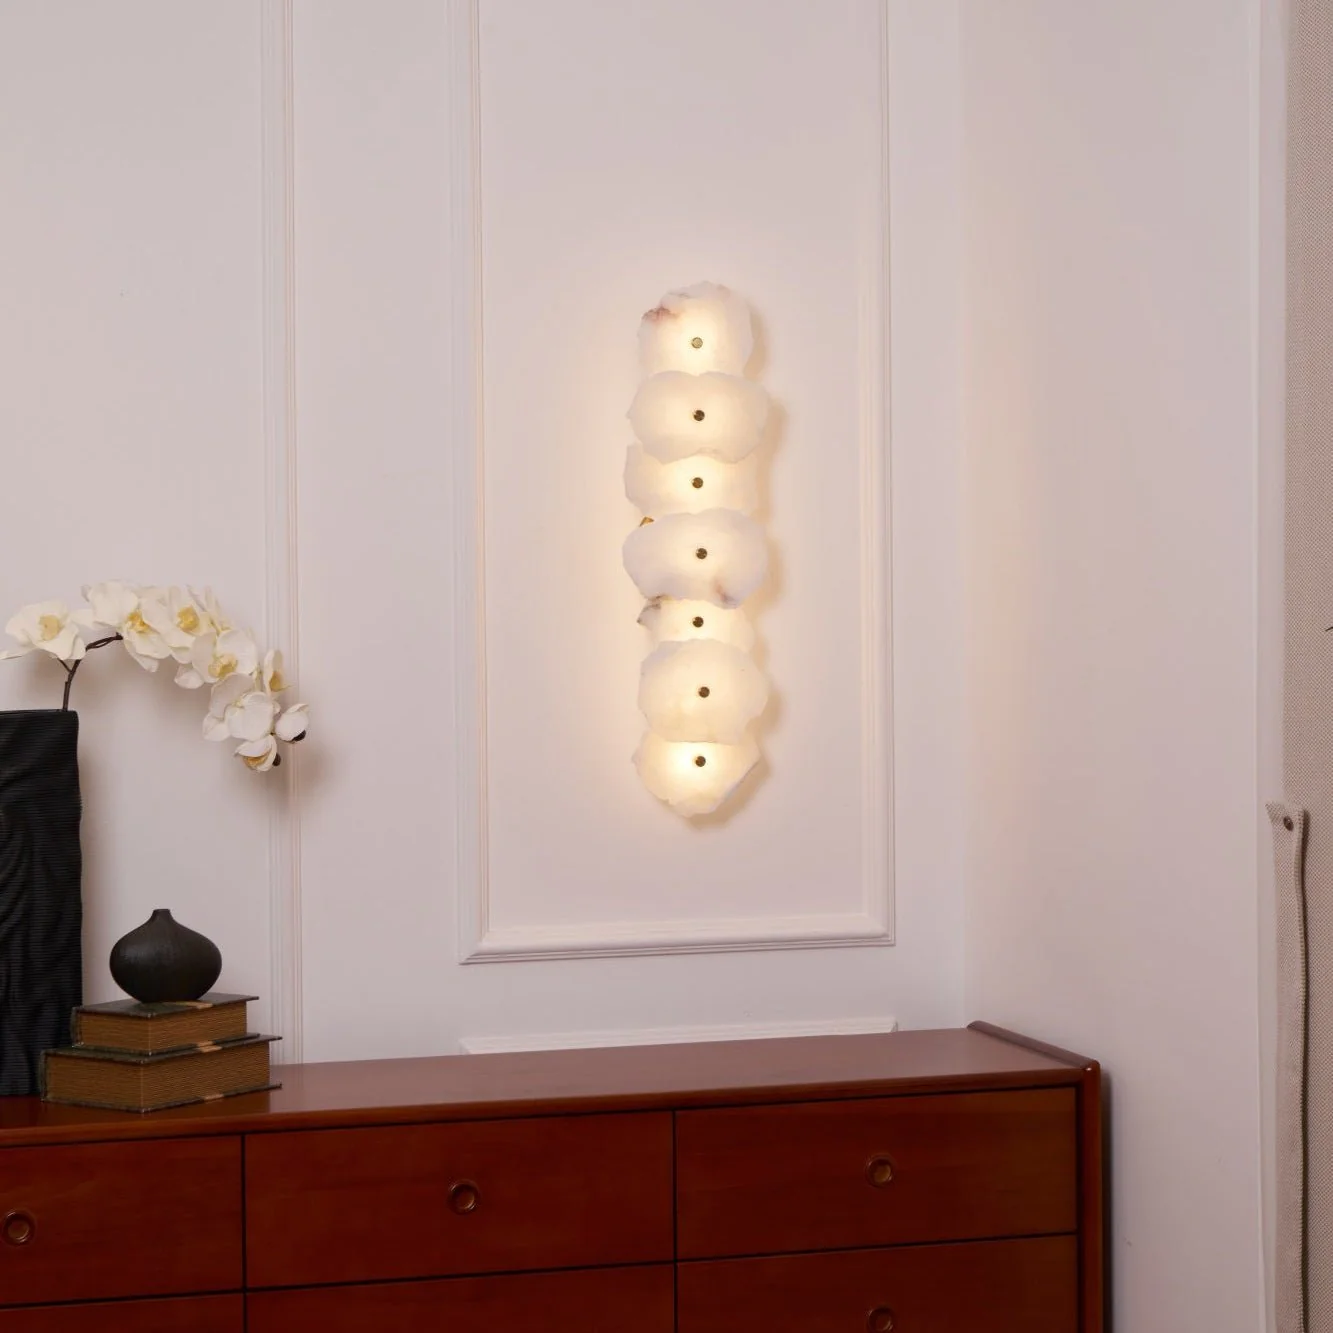
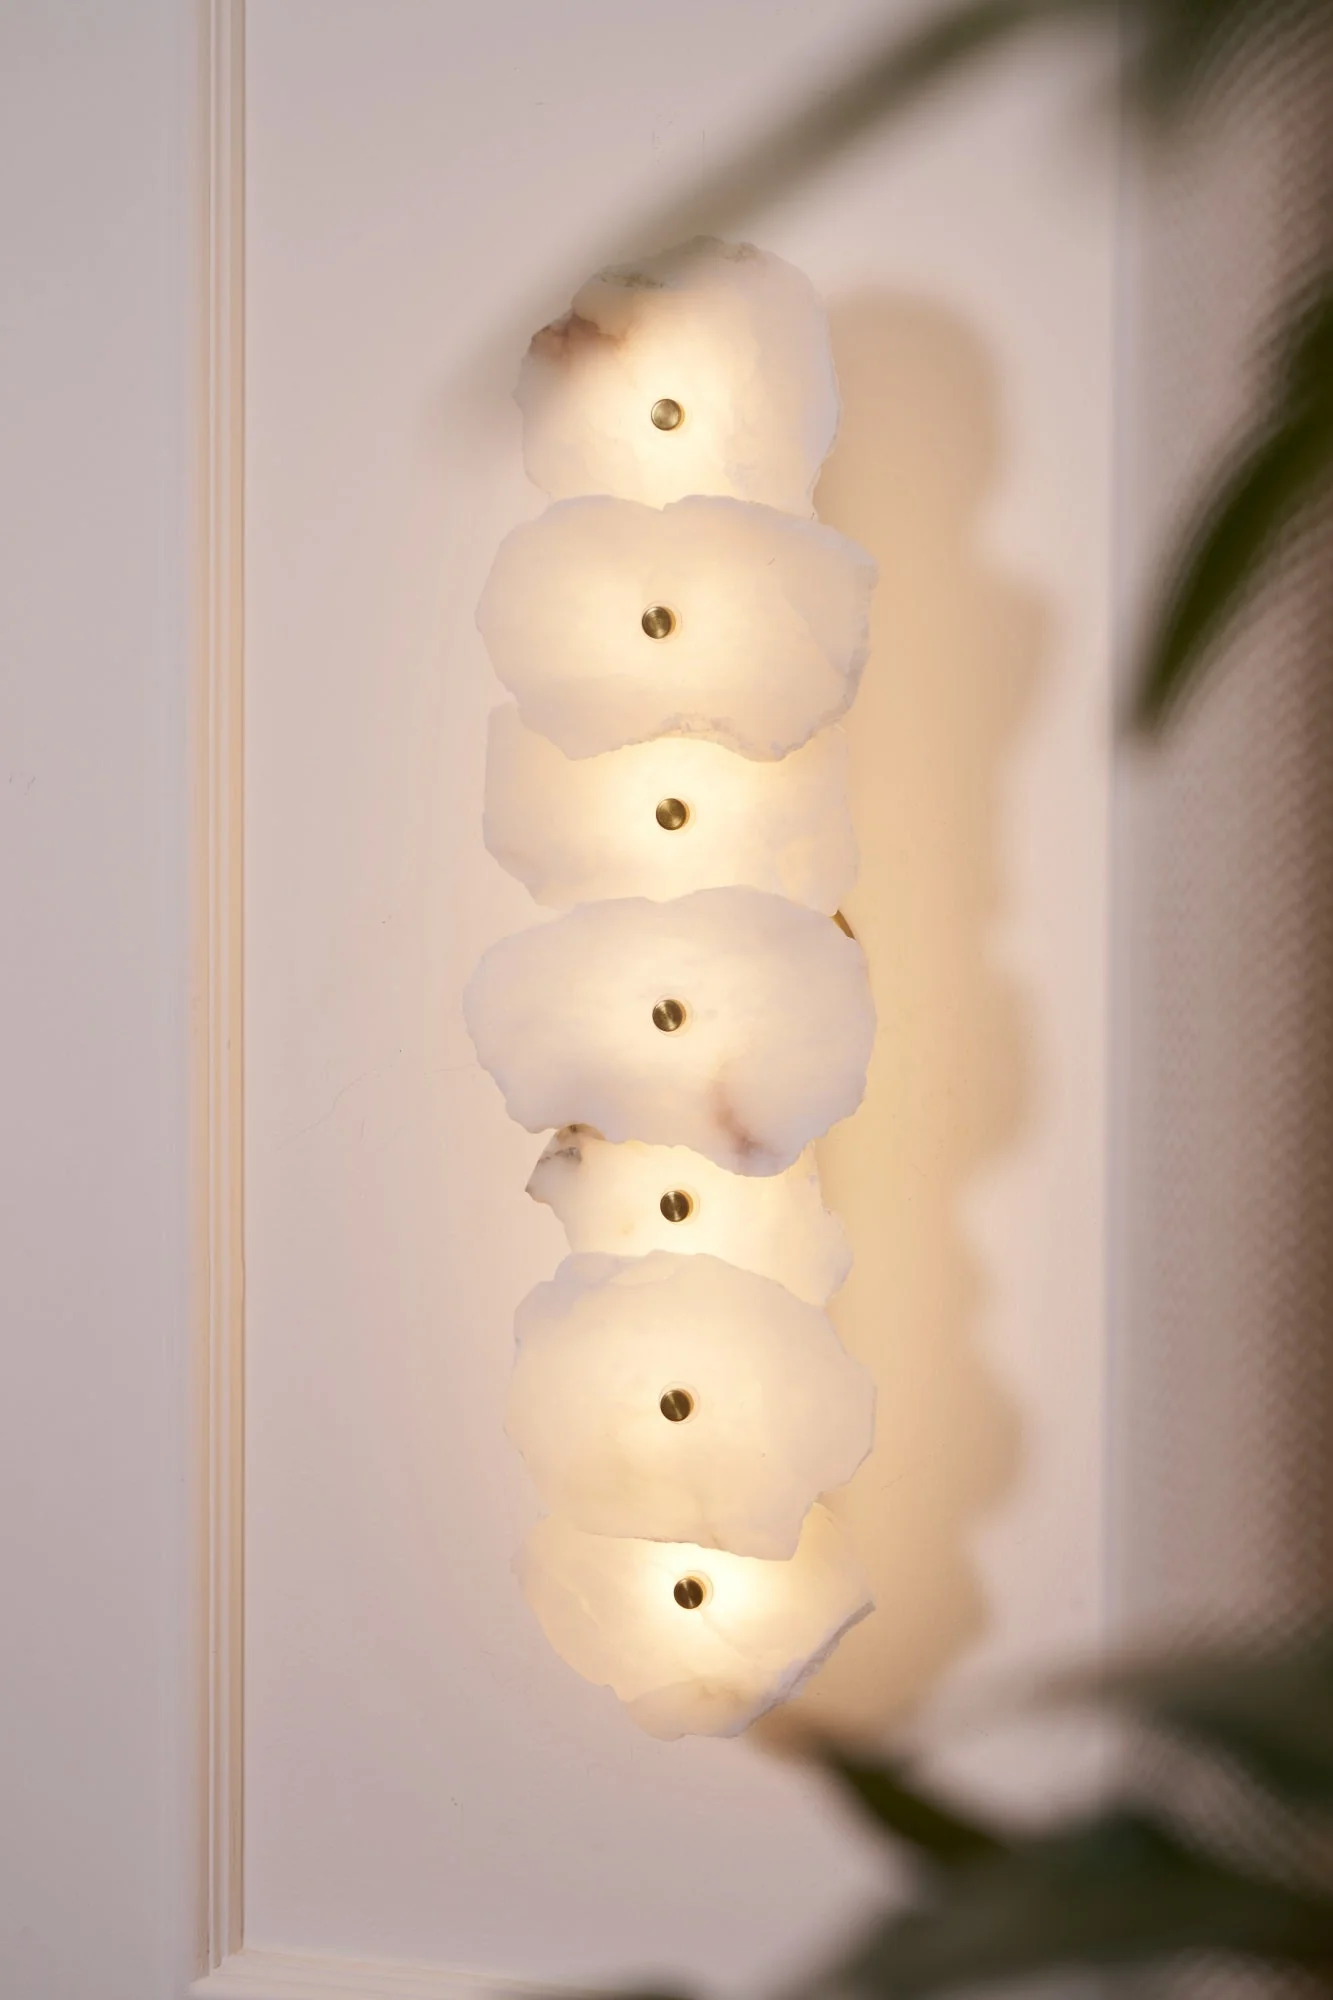
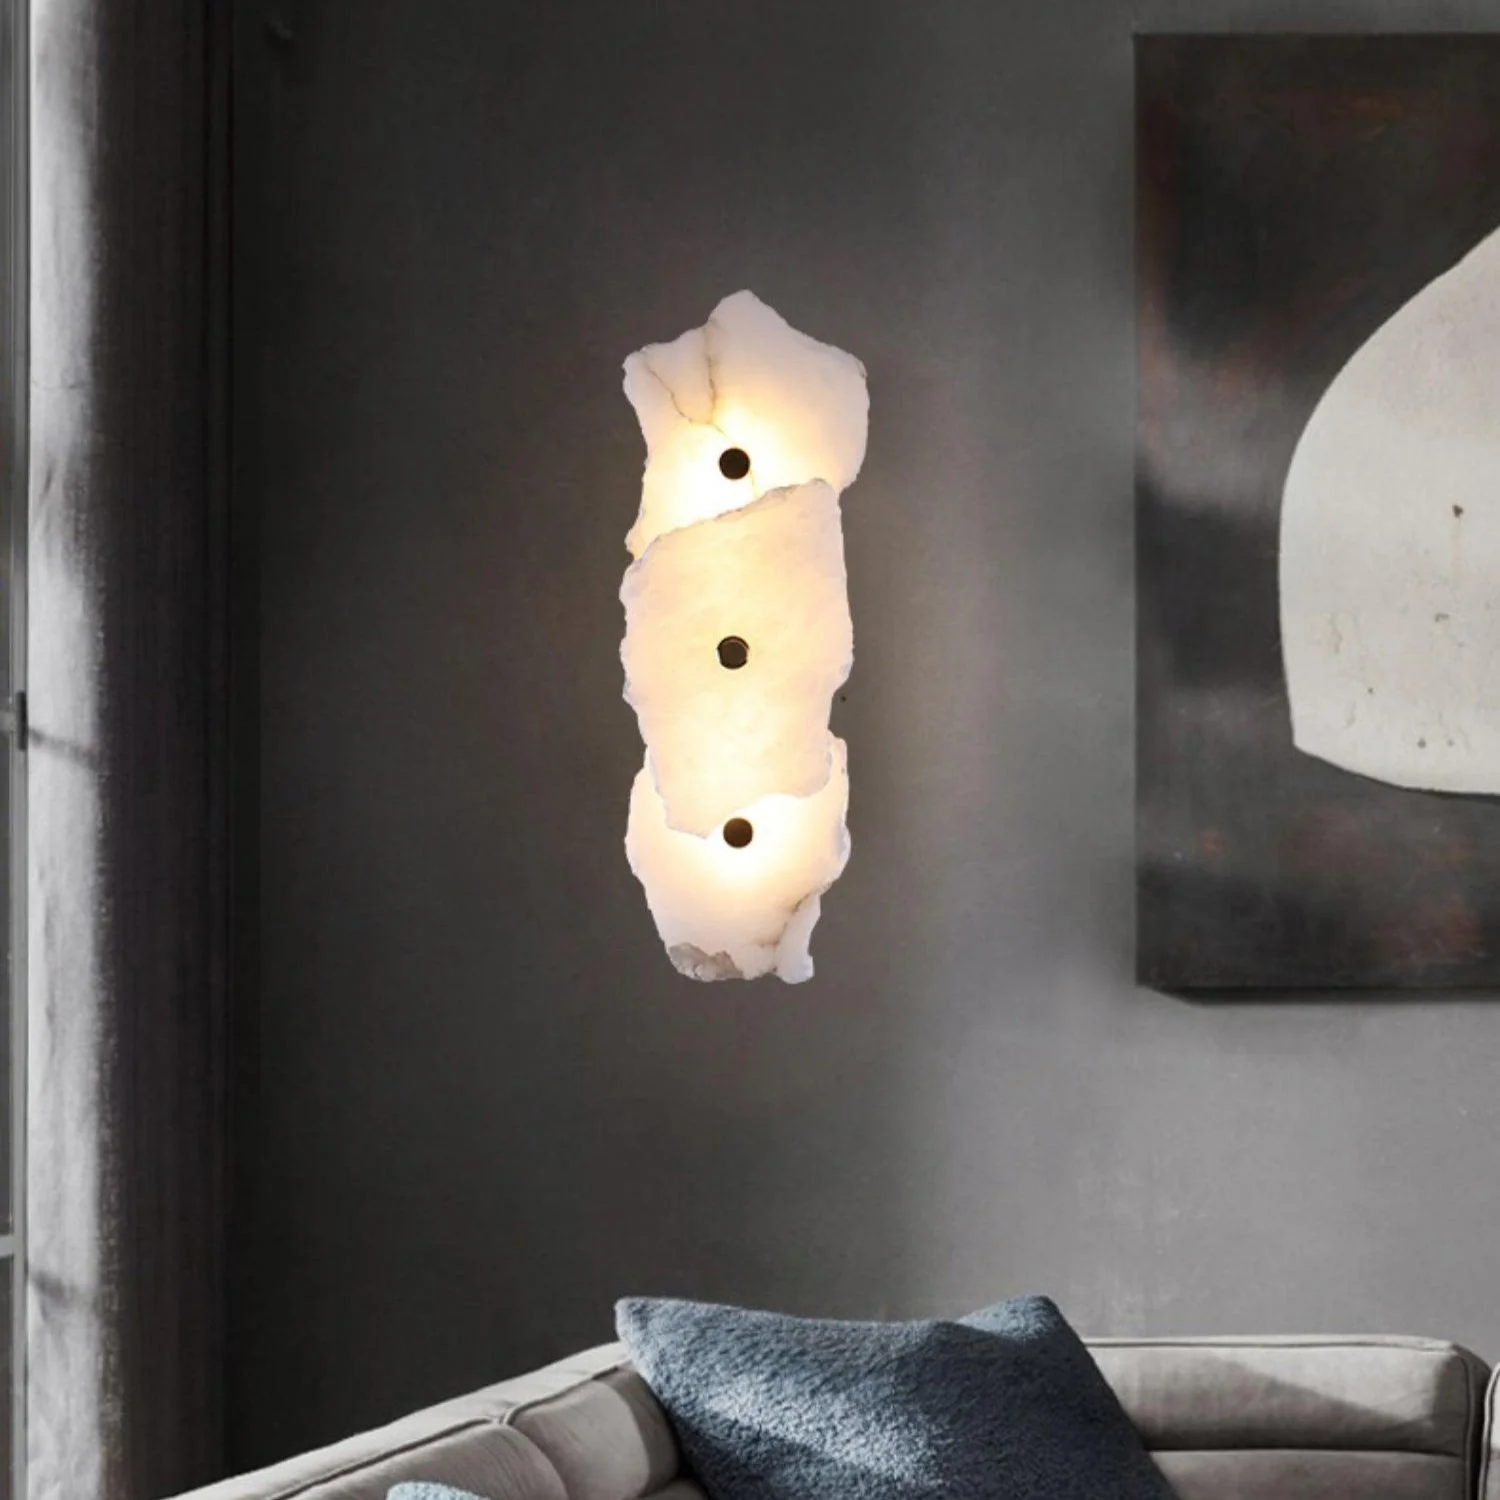
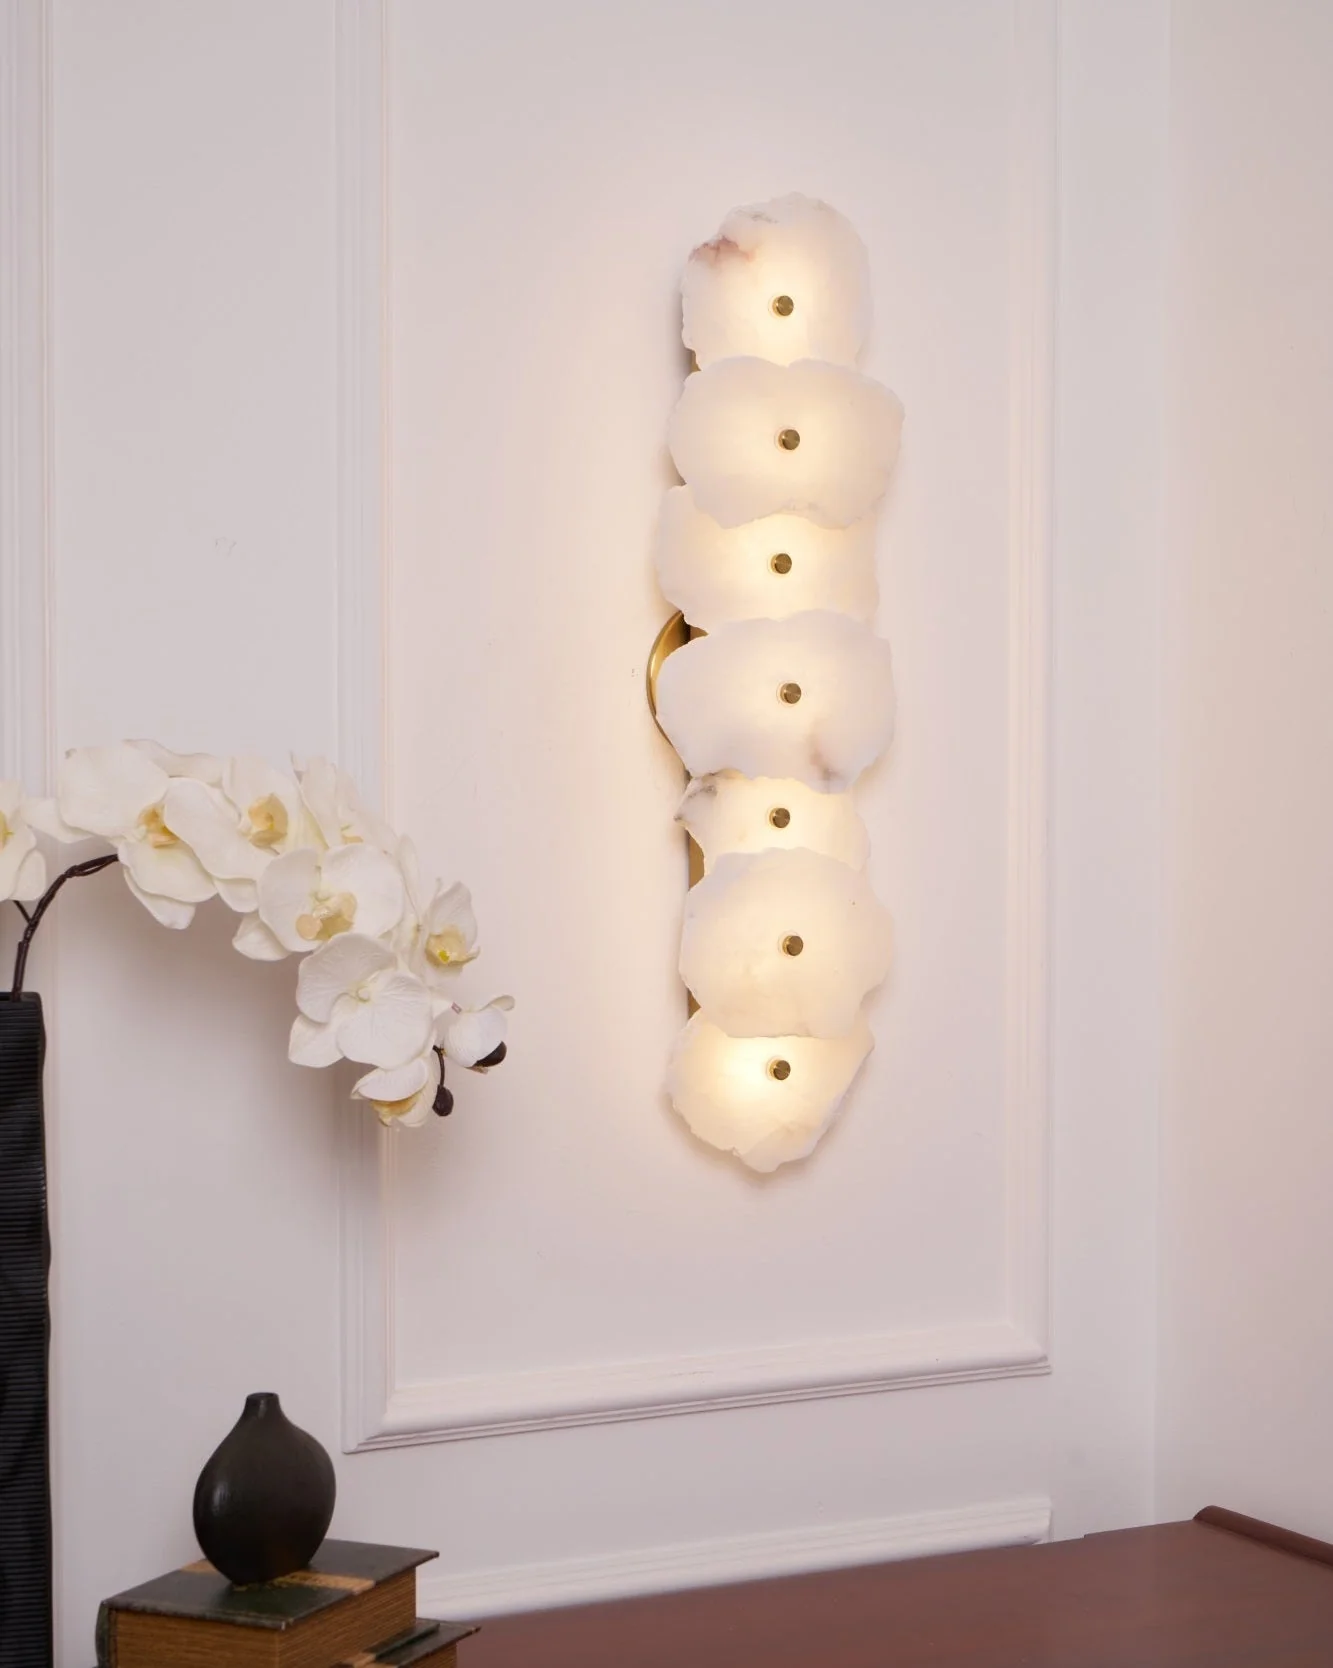
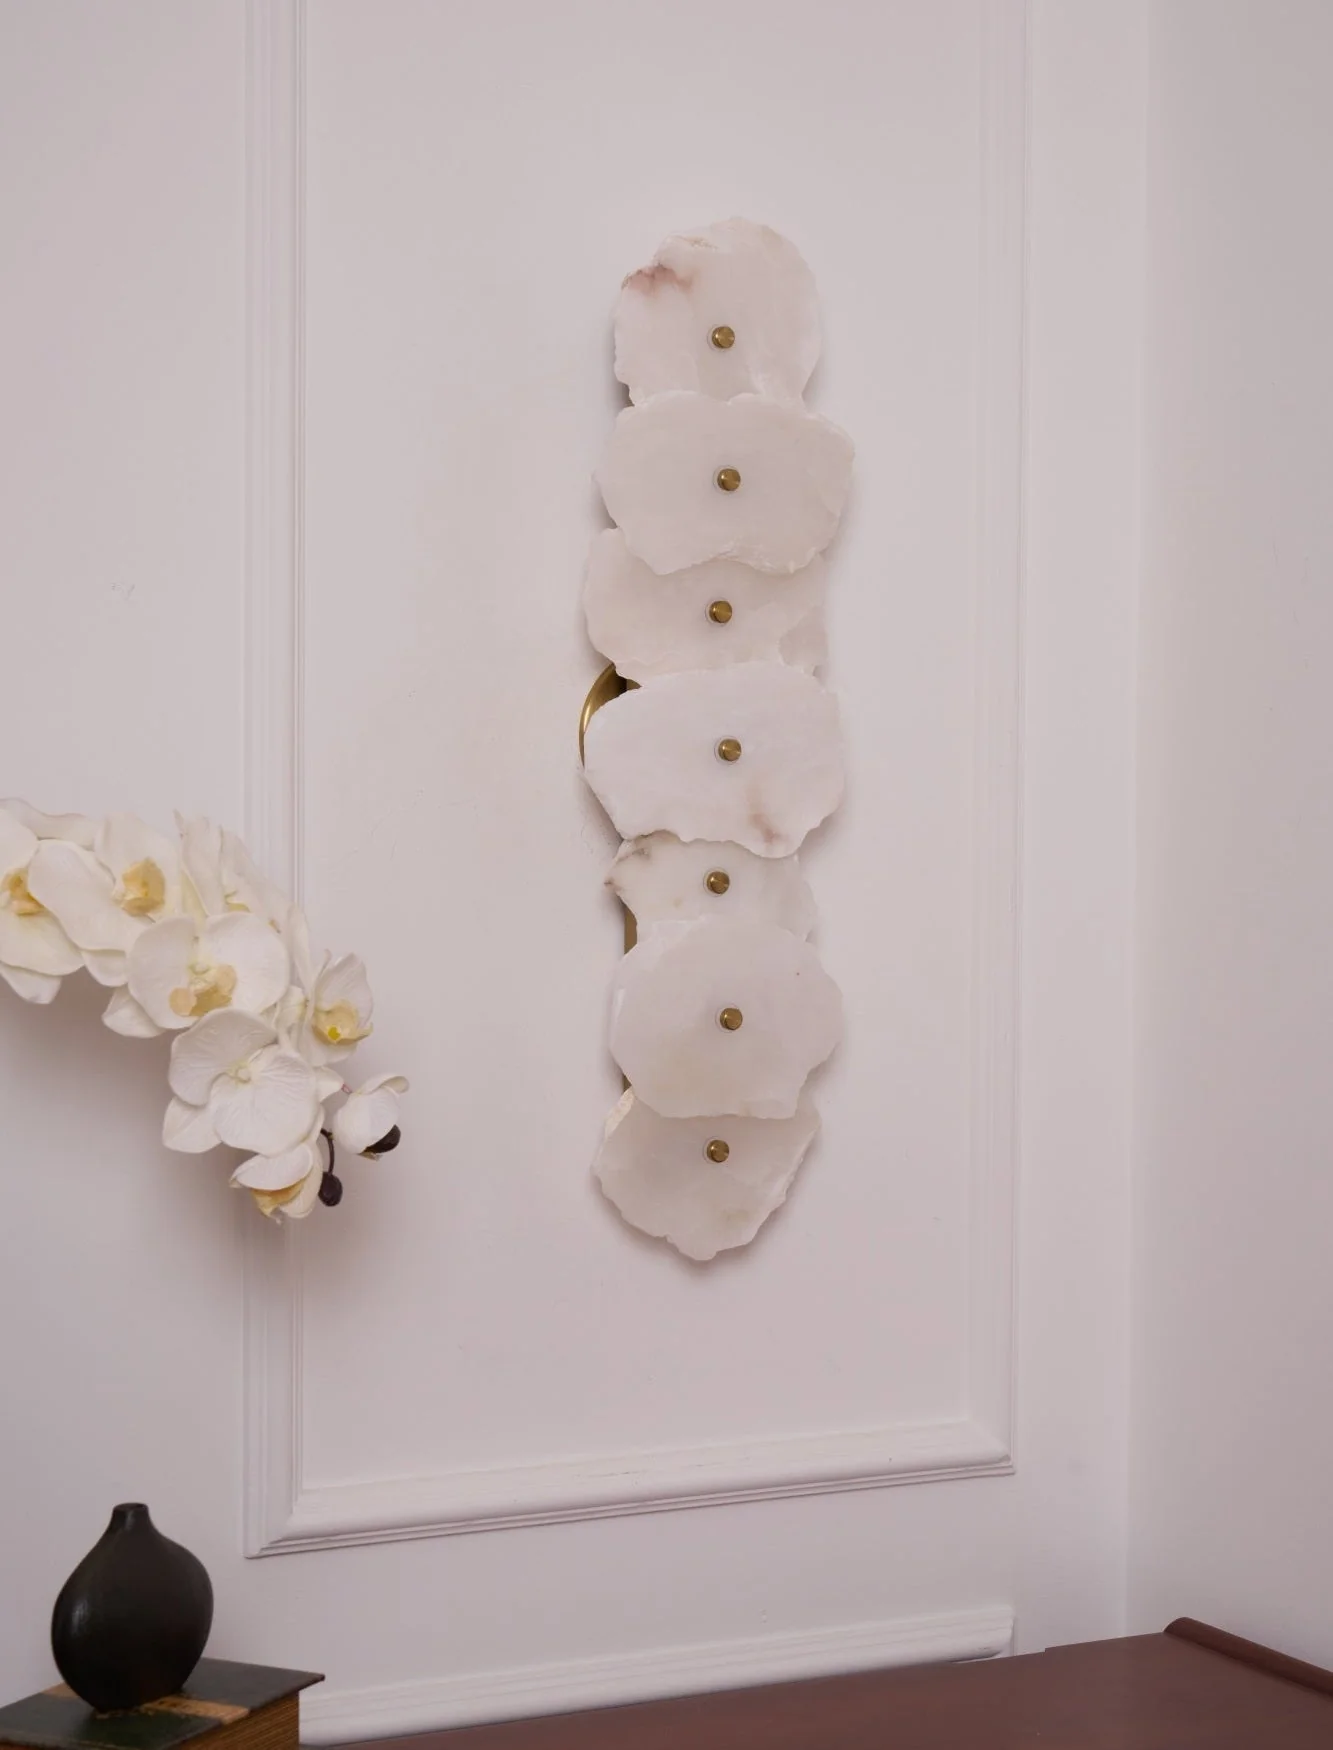
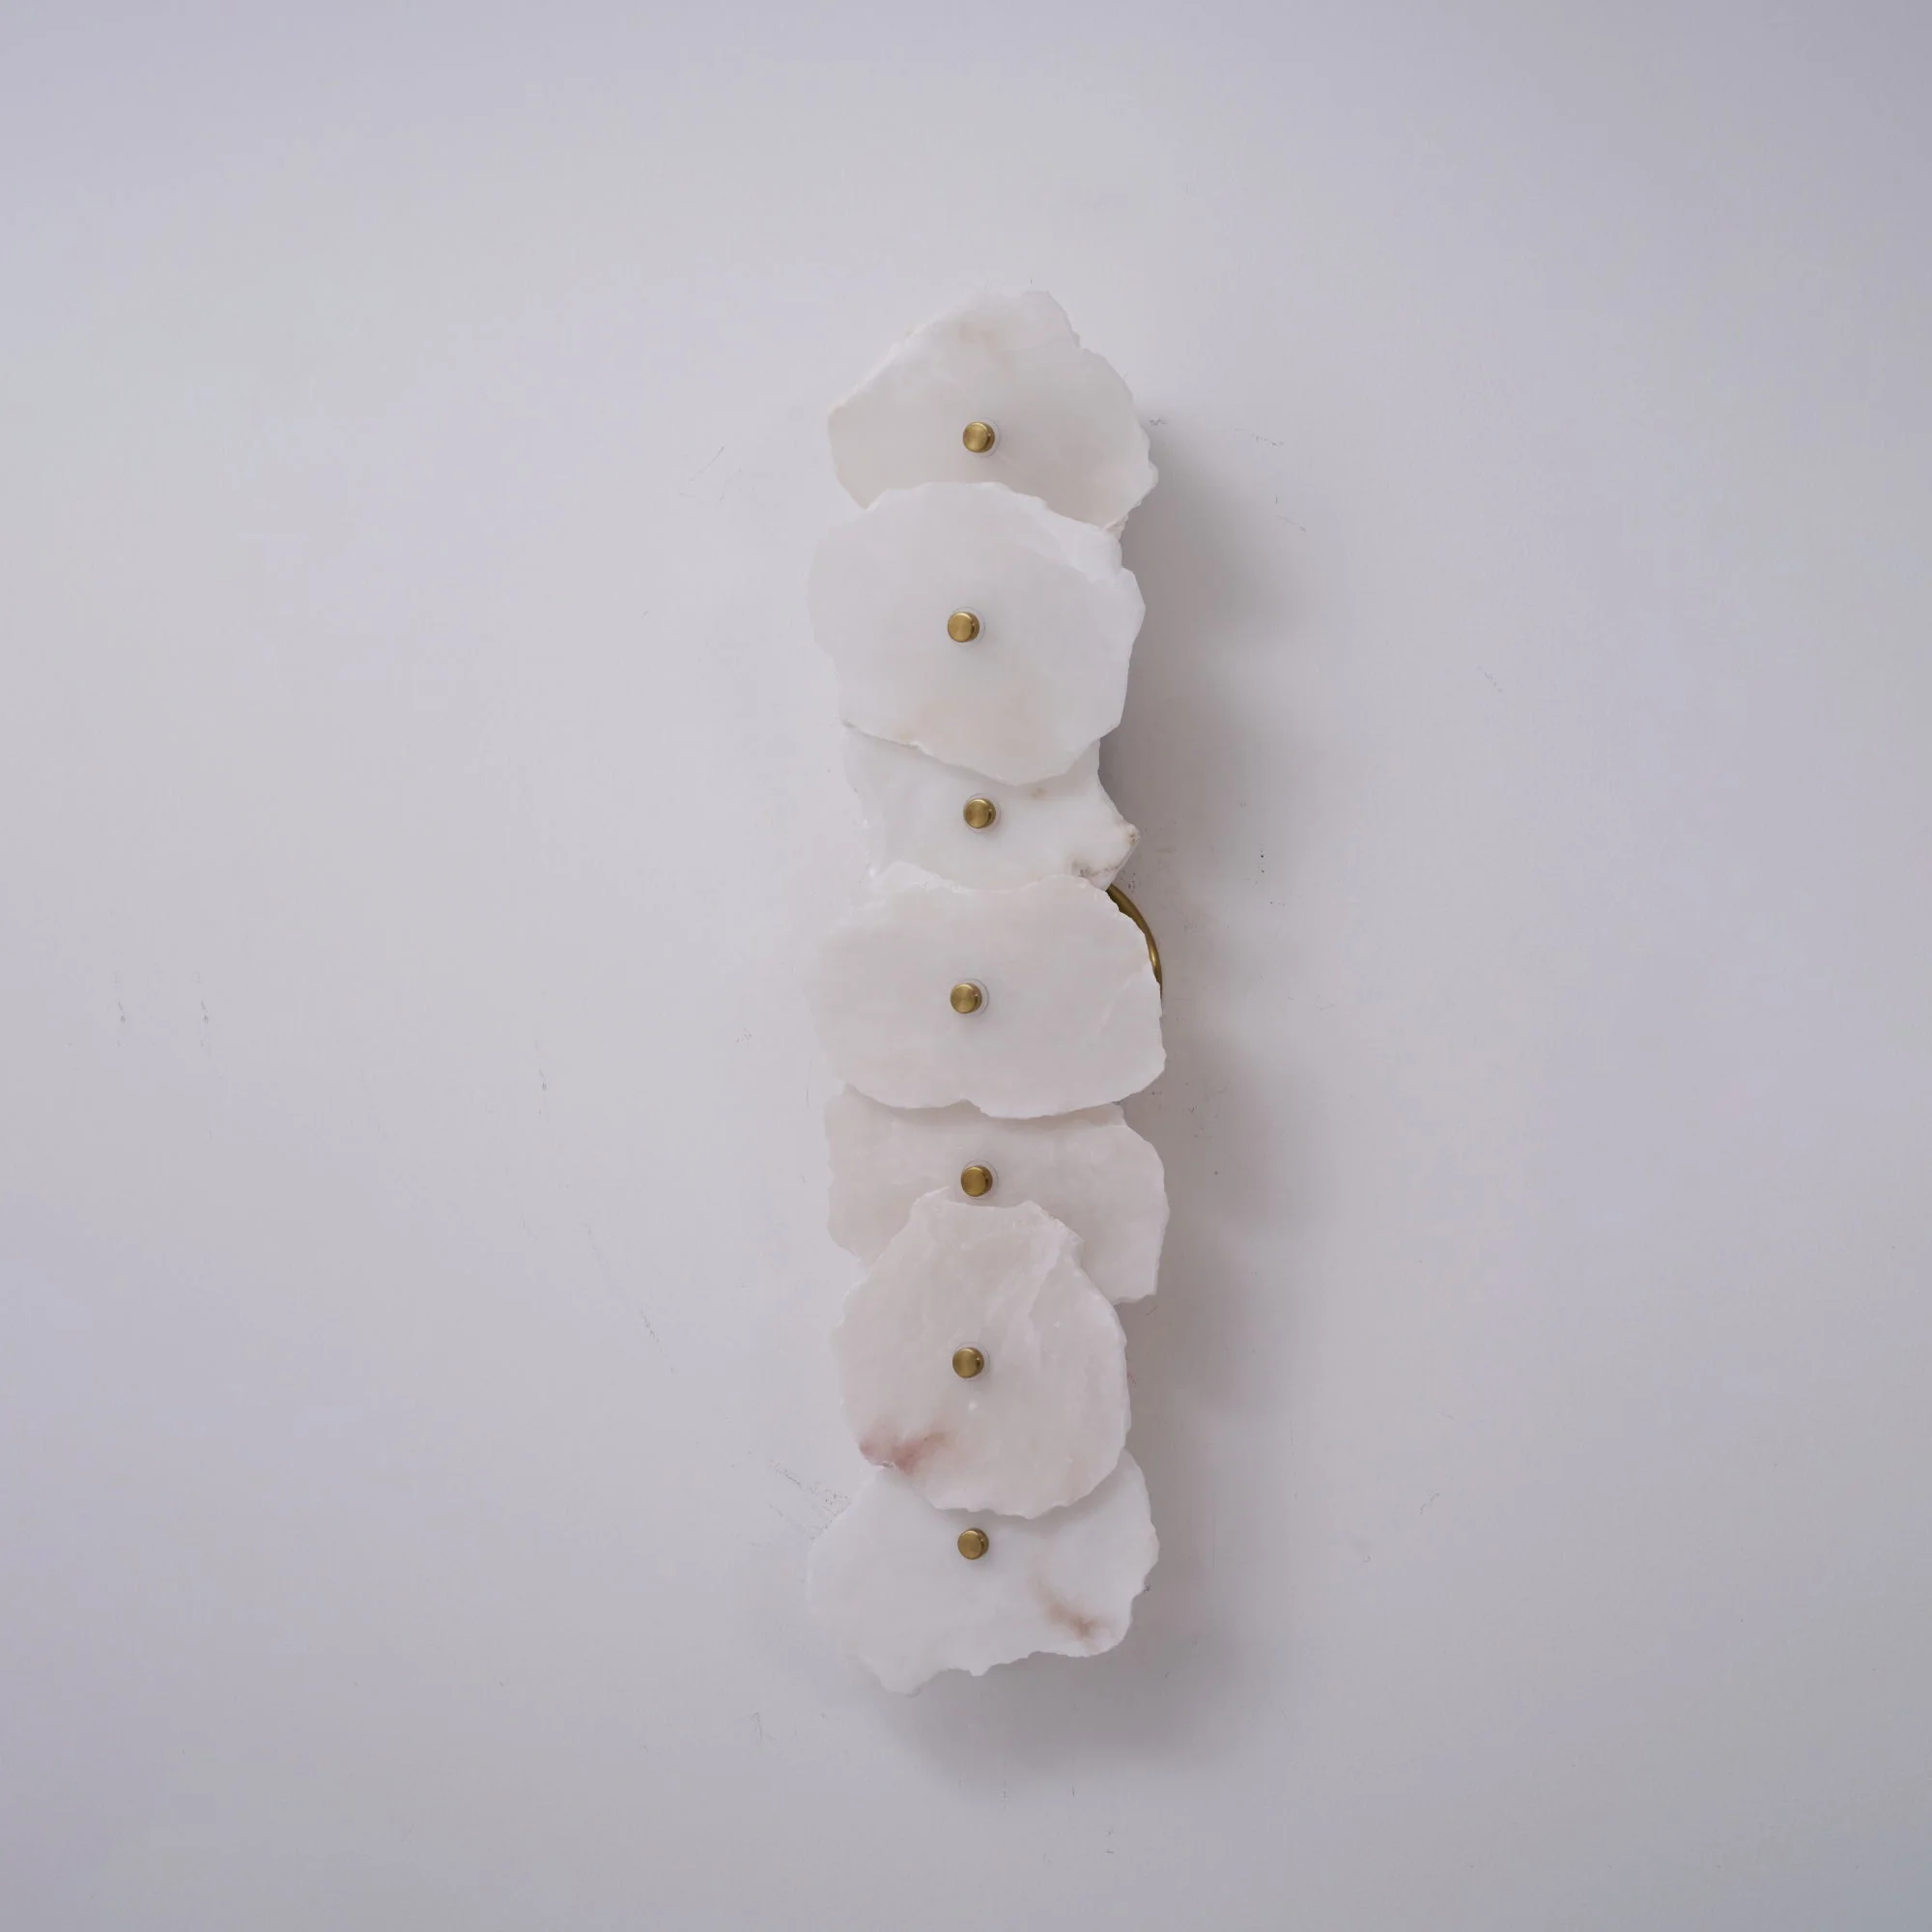
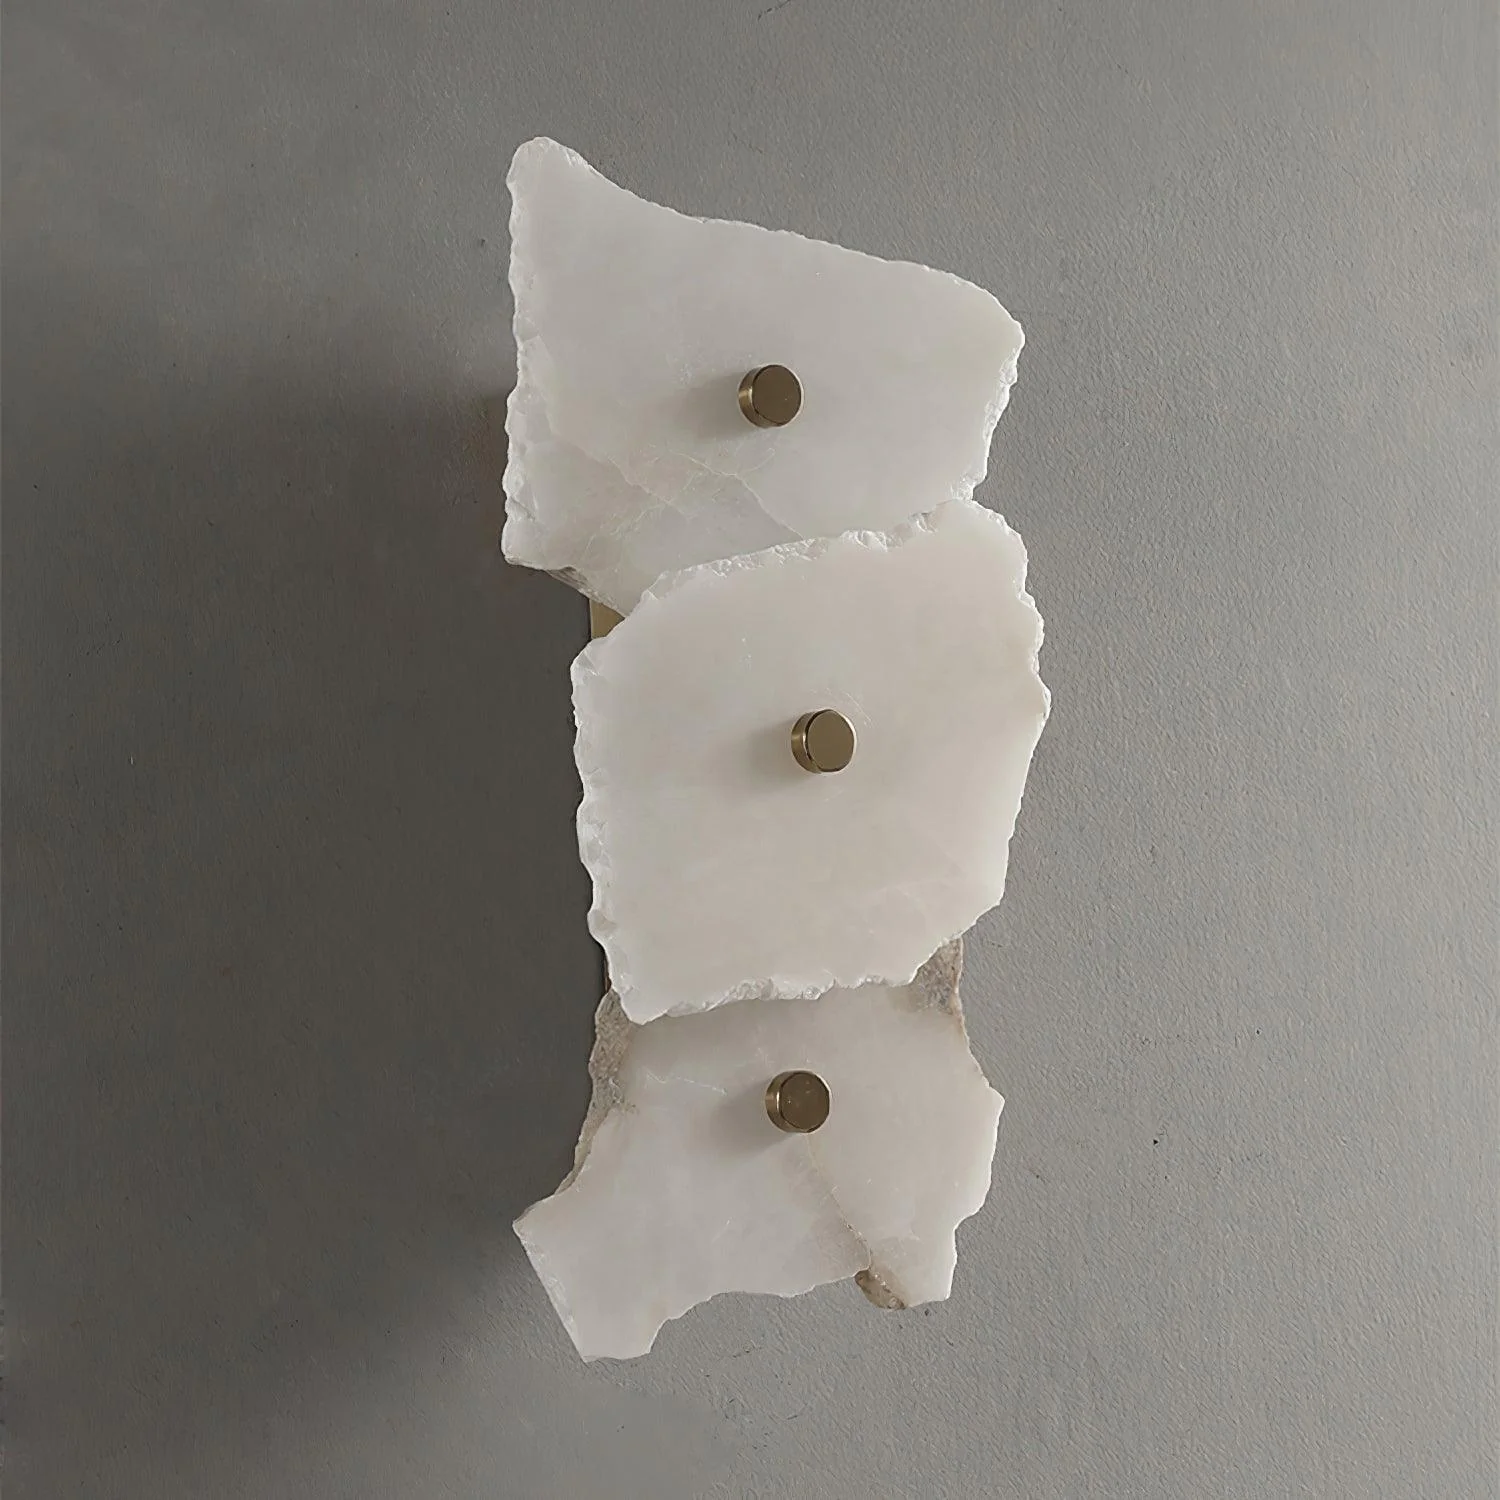
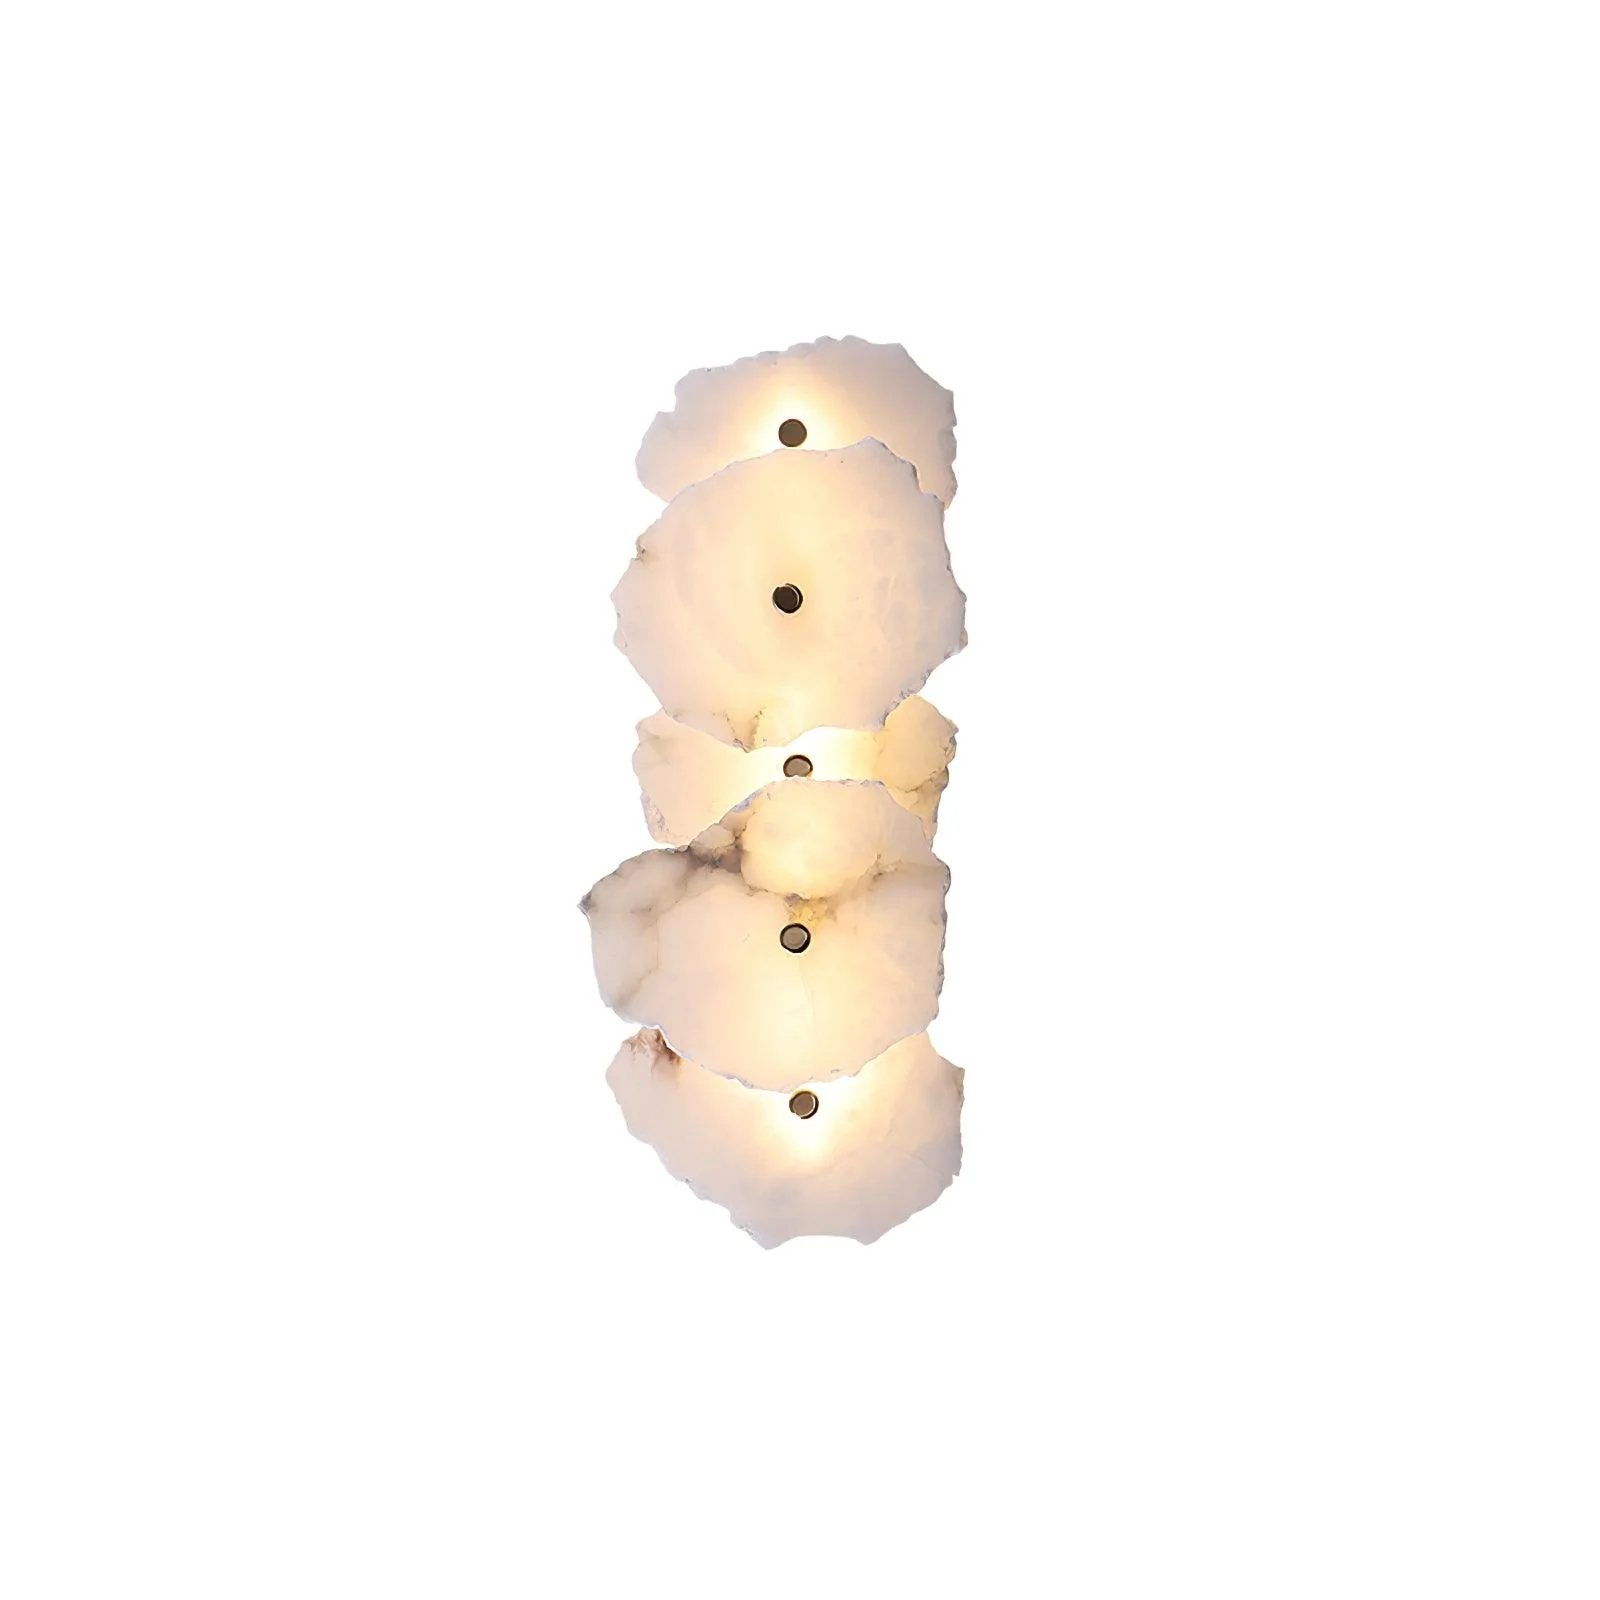
1 Heads Size: Dia 13cm x H 18cm / ∅ 5.1″ x H 7.1″ (Power: ~7W)
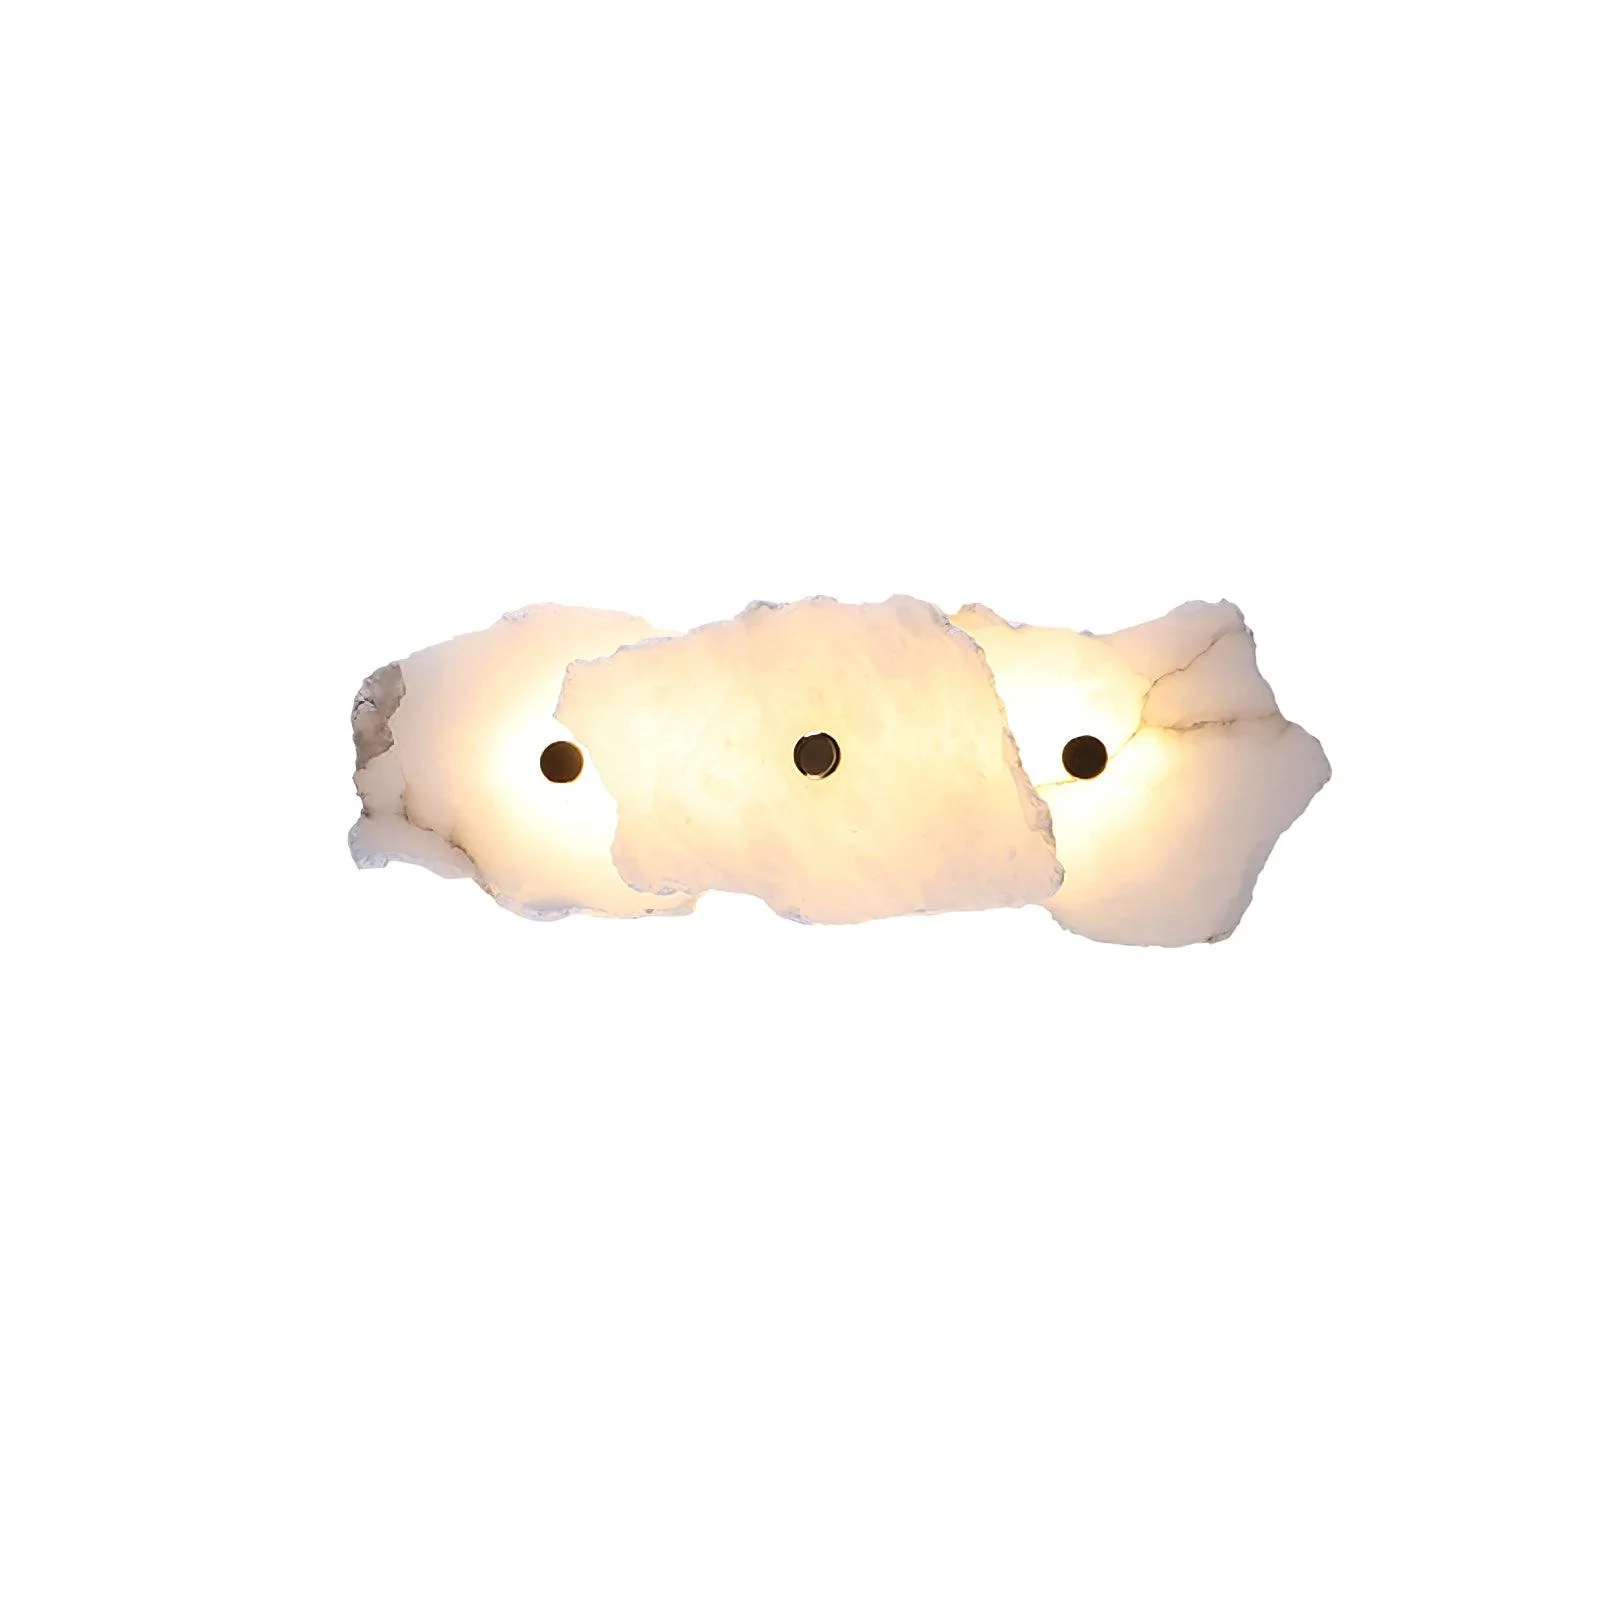
3 Heads Size: L 40cm x H 13cm / L 15.7″ x H 5.1″ (Power:~12W)
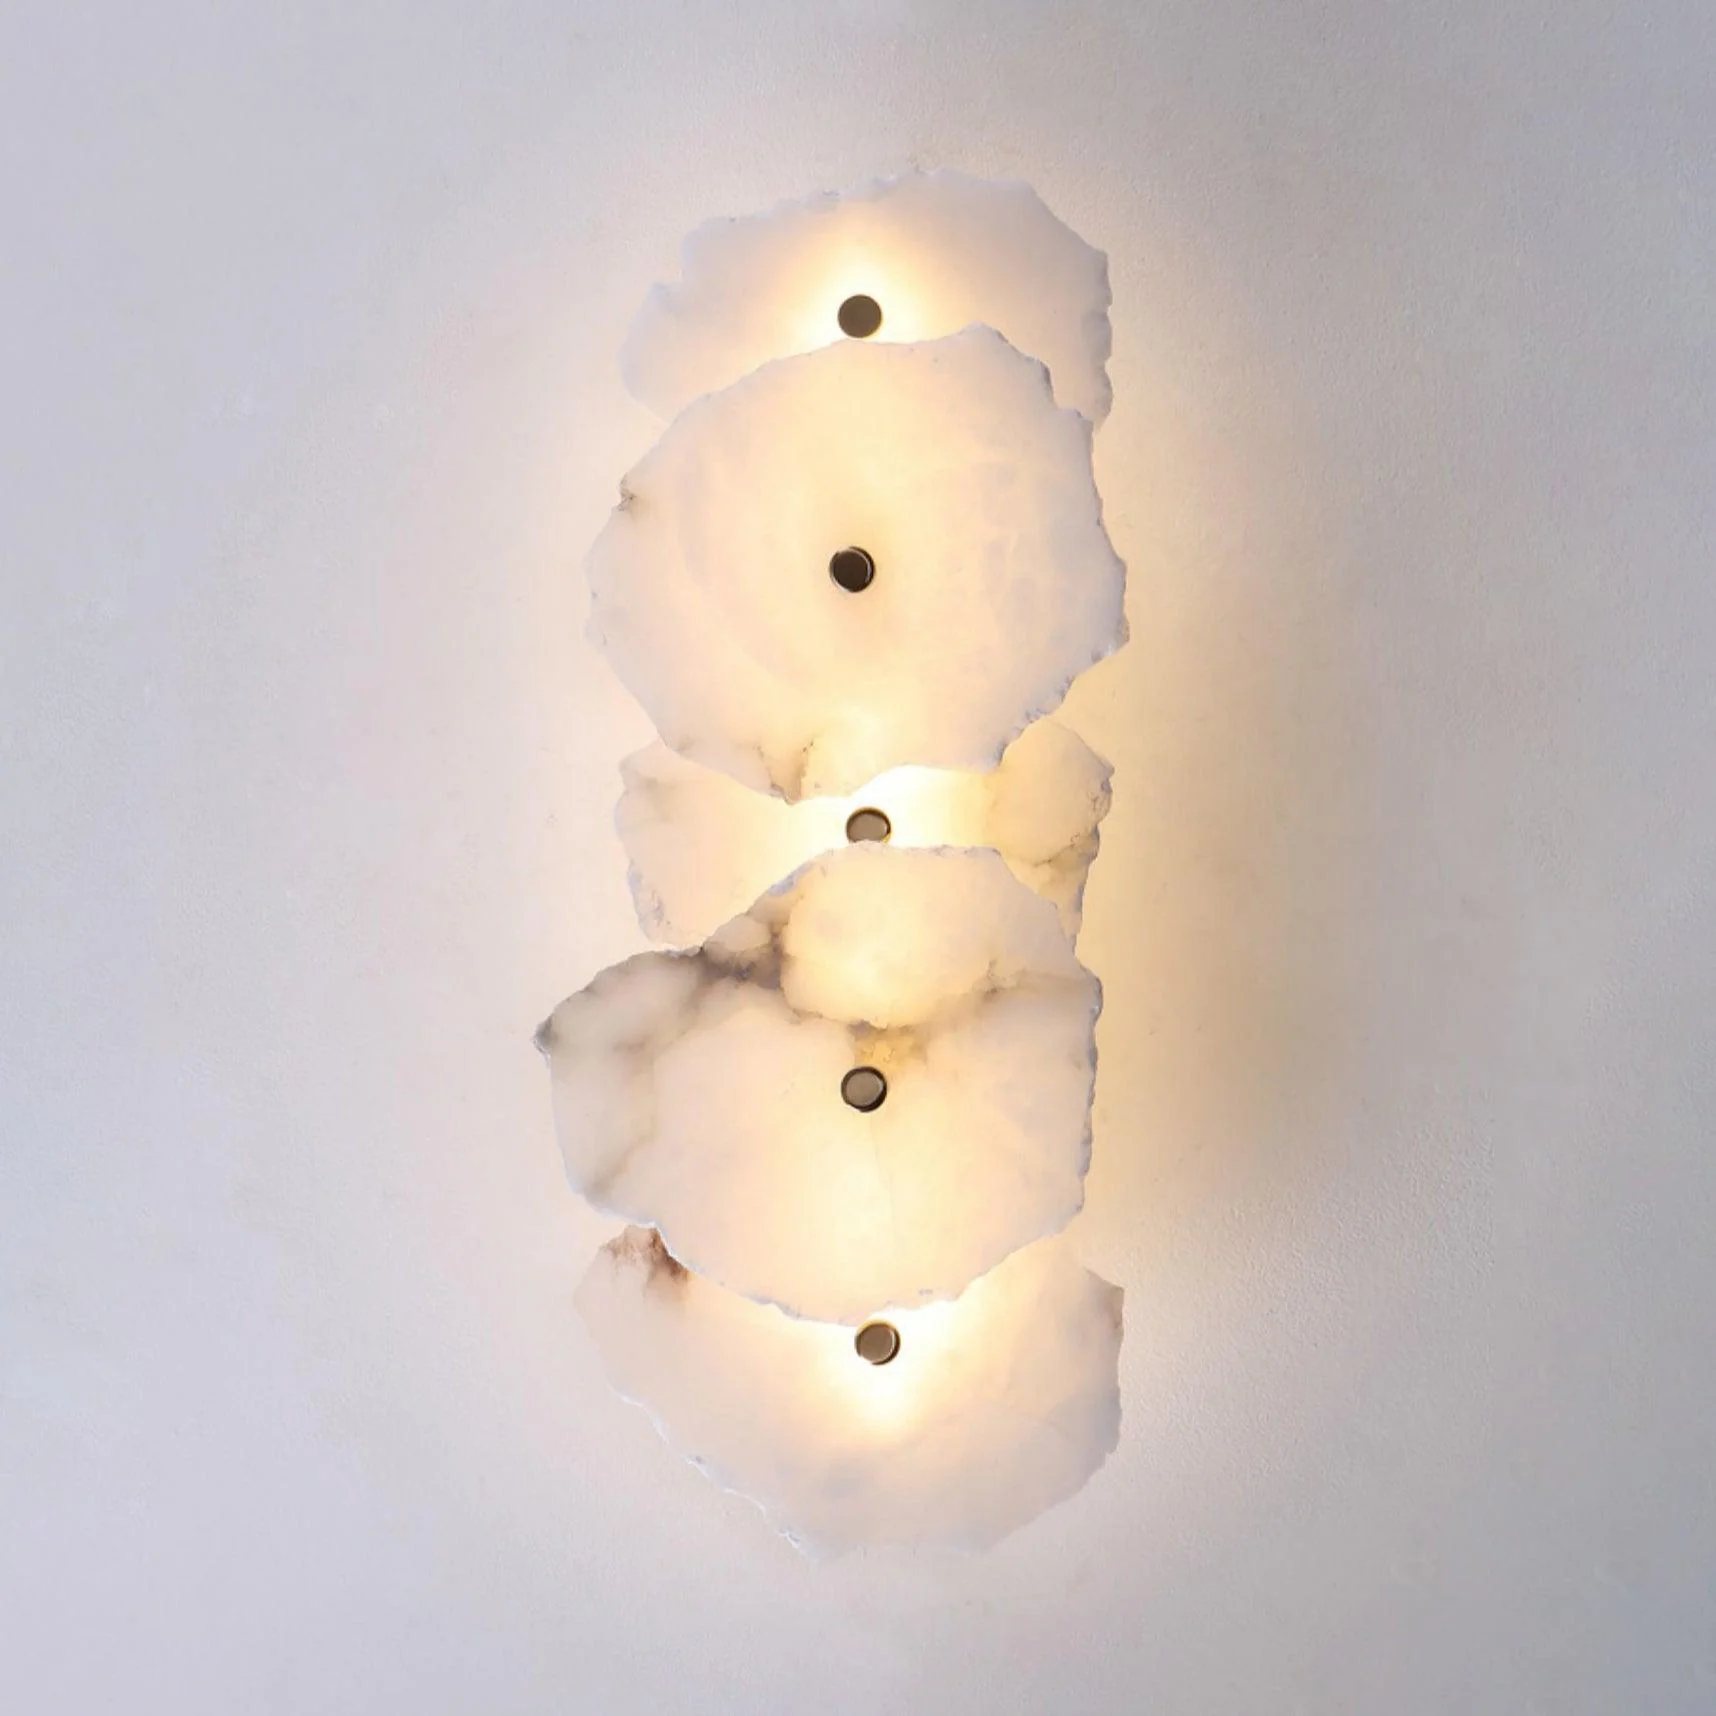
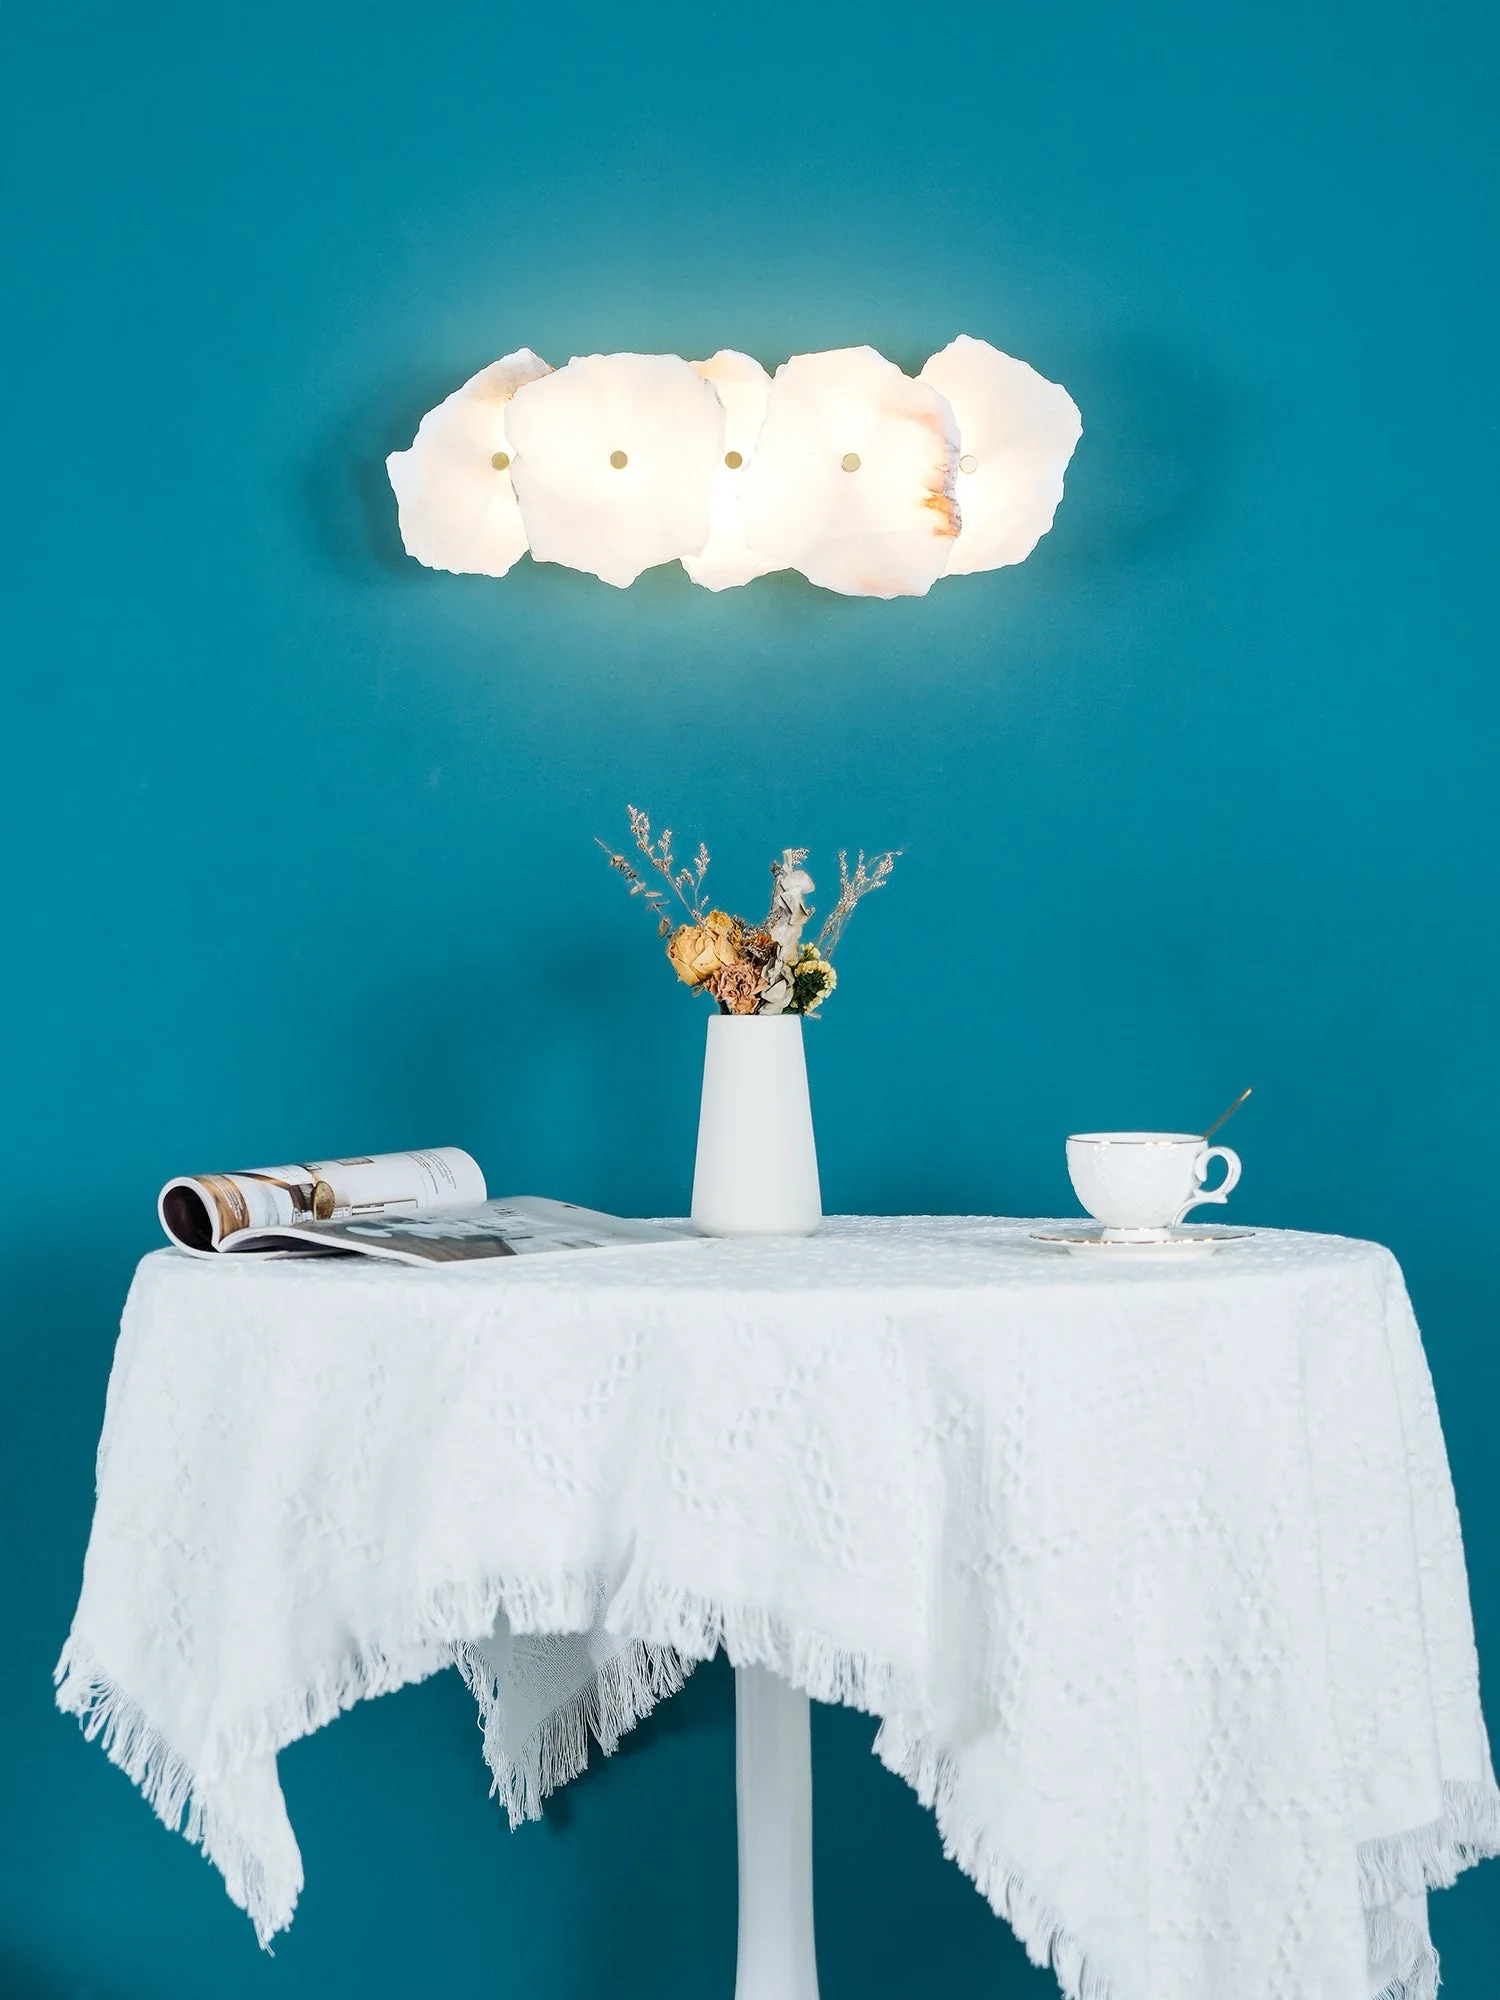
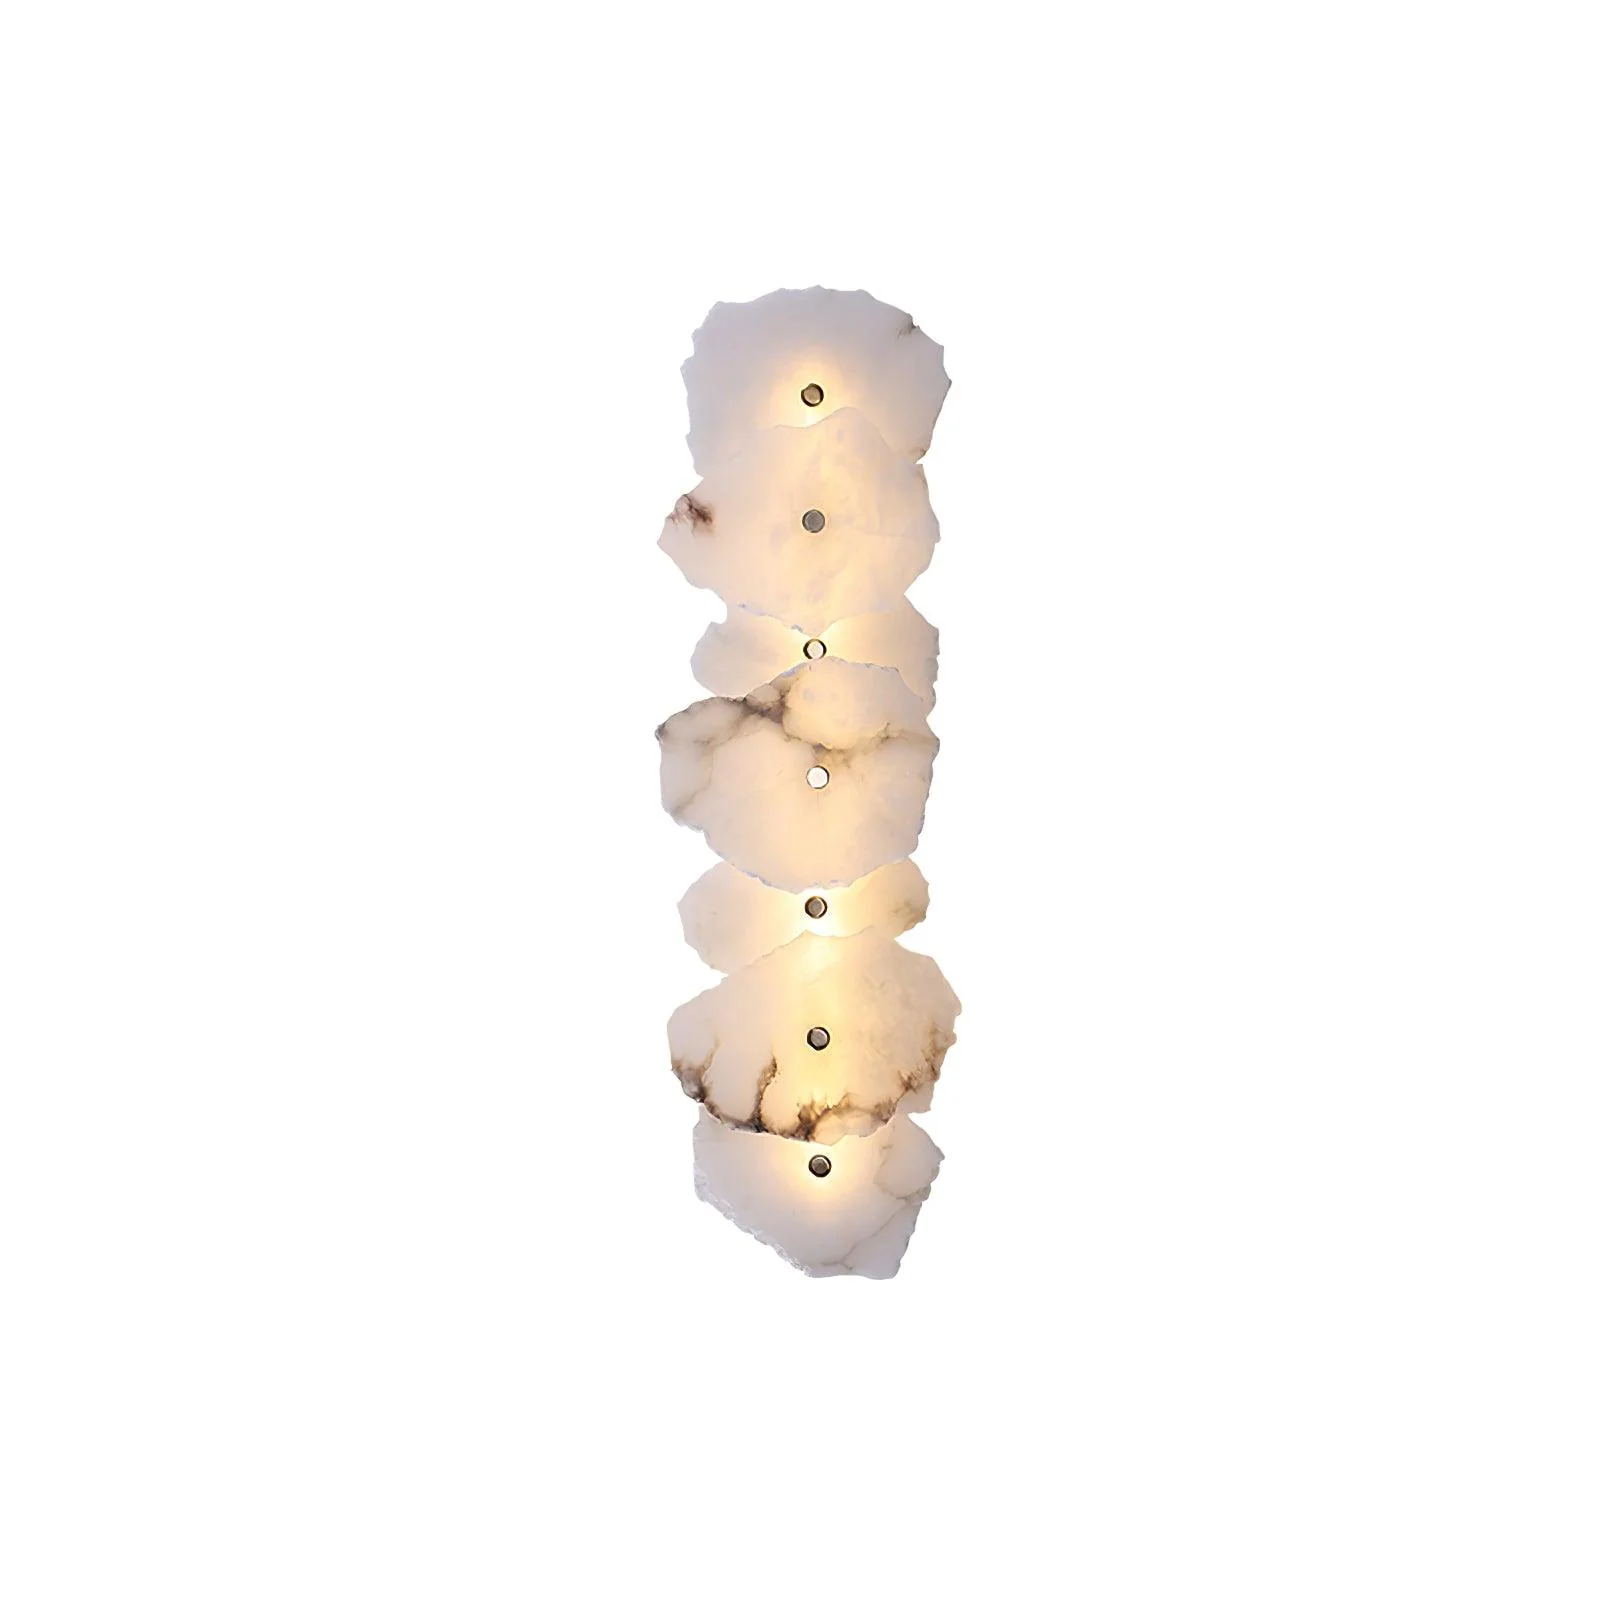
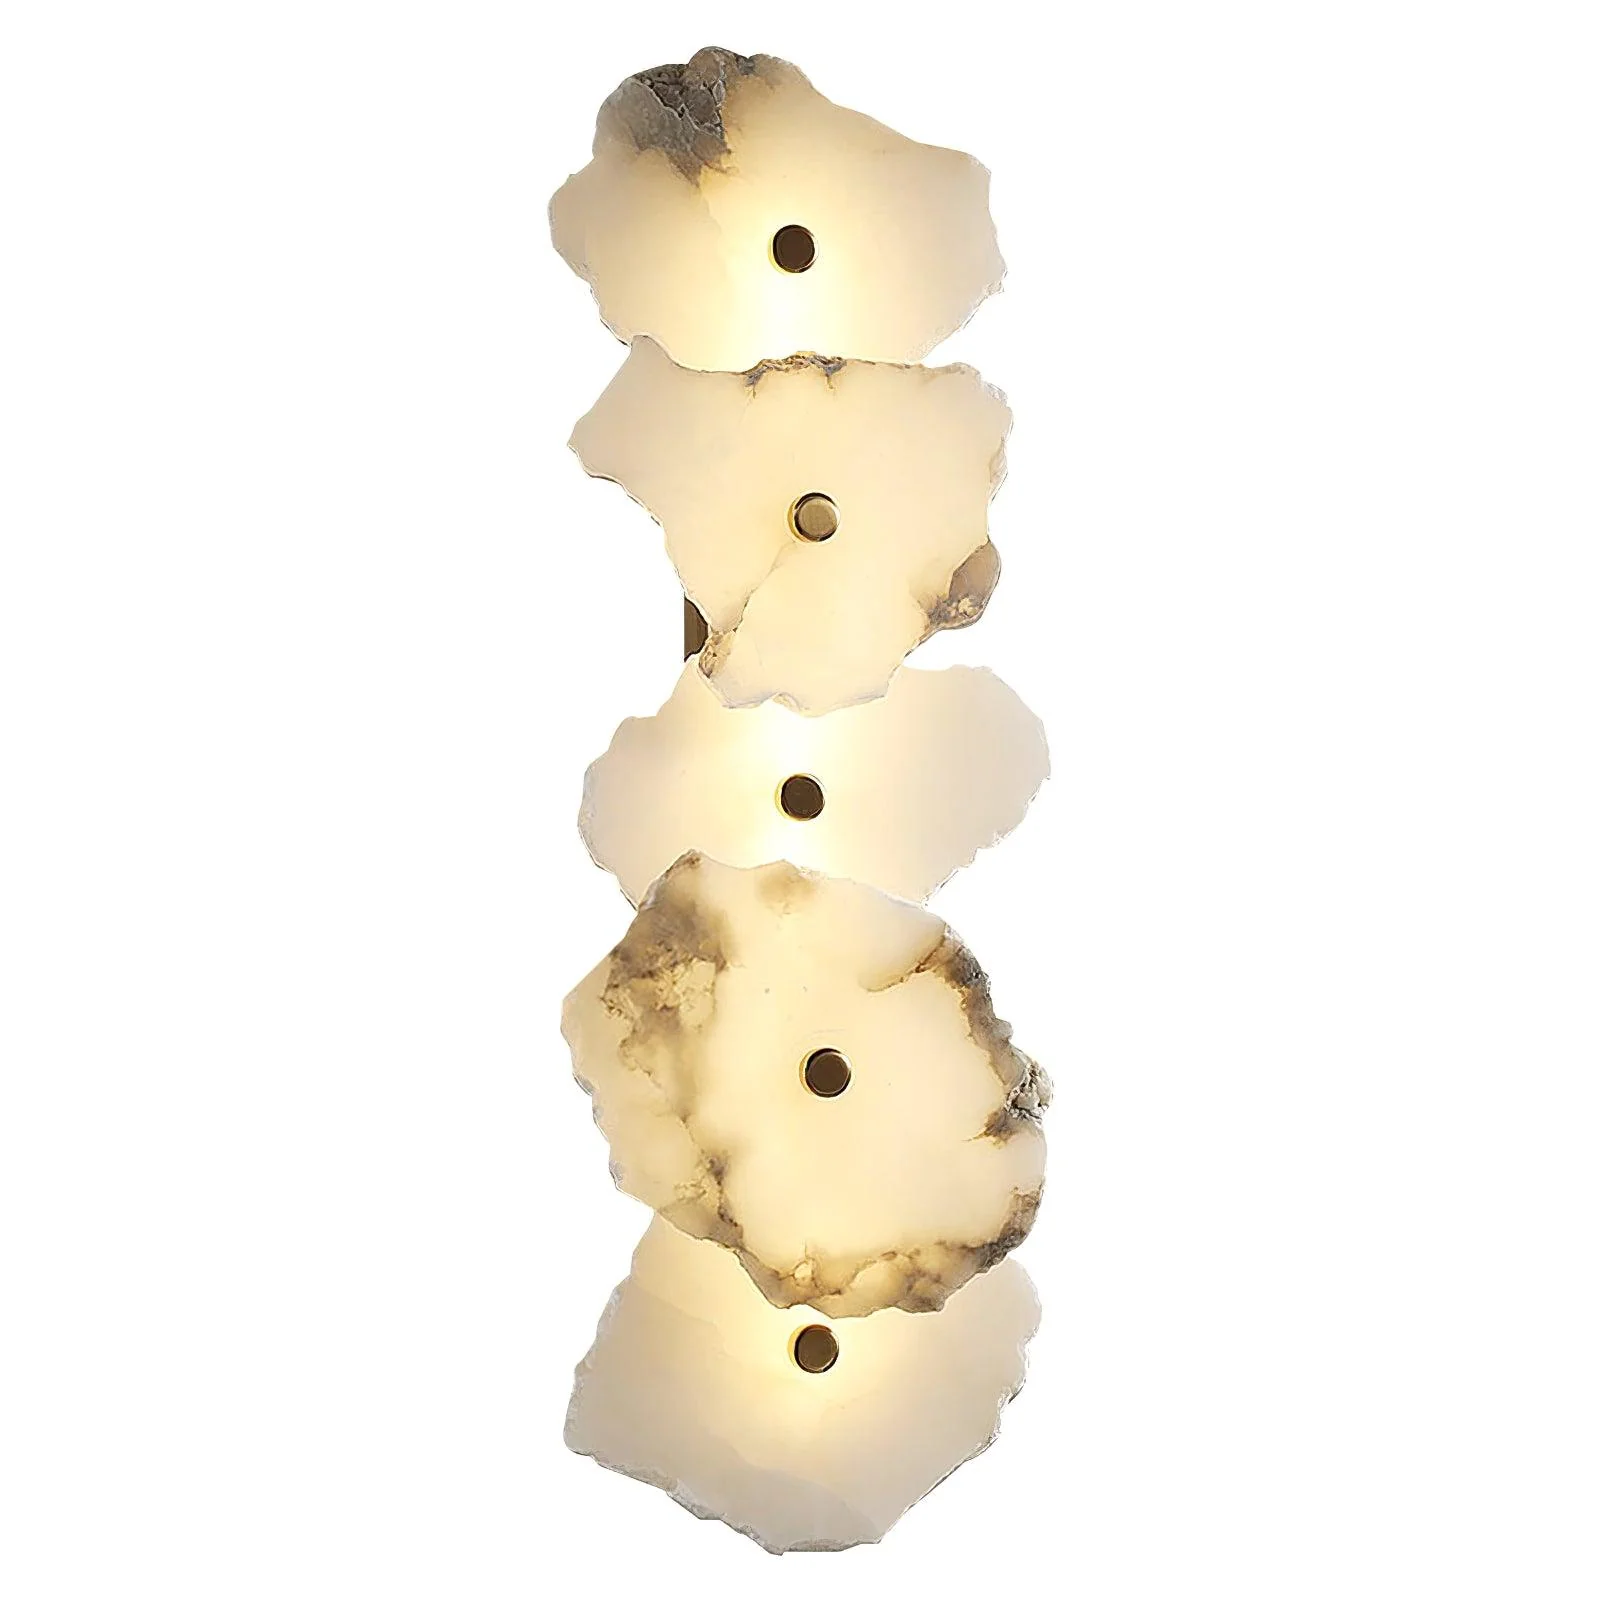
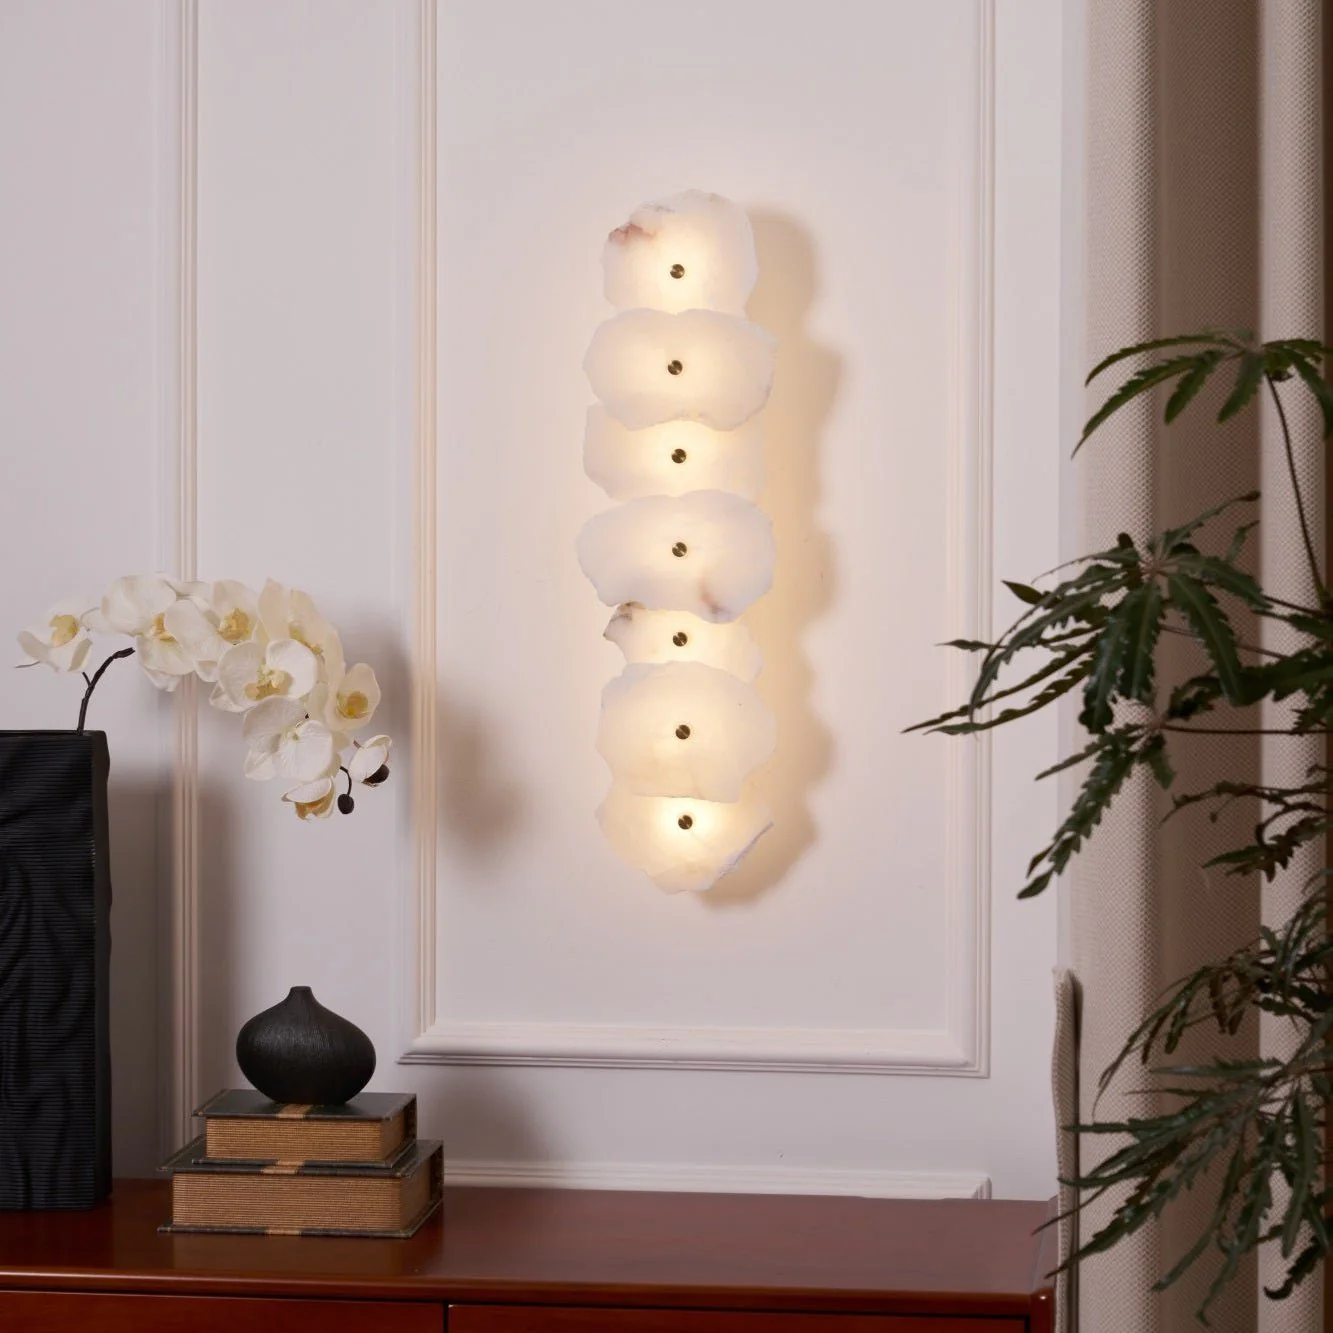
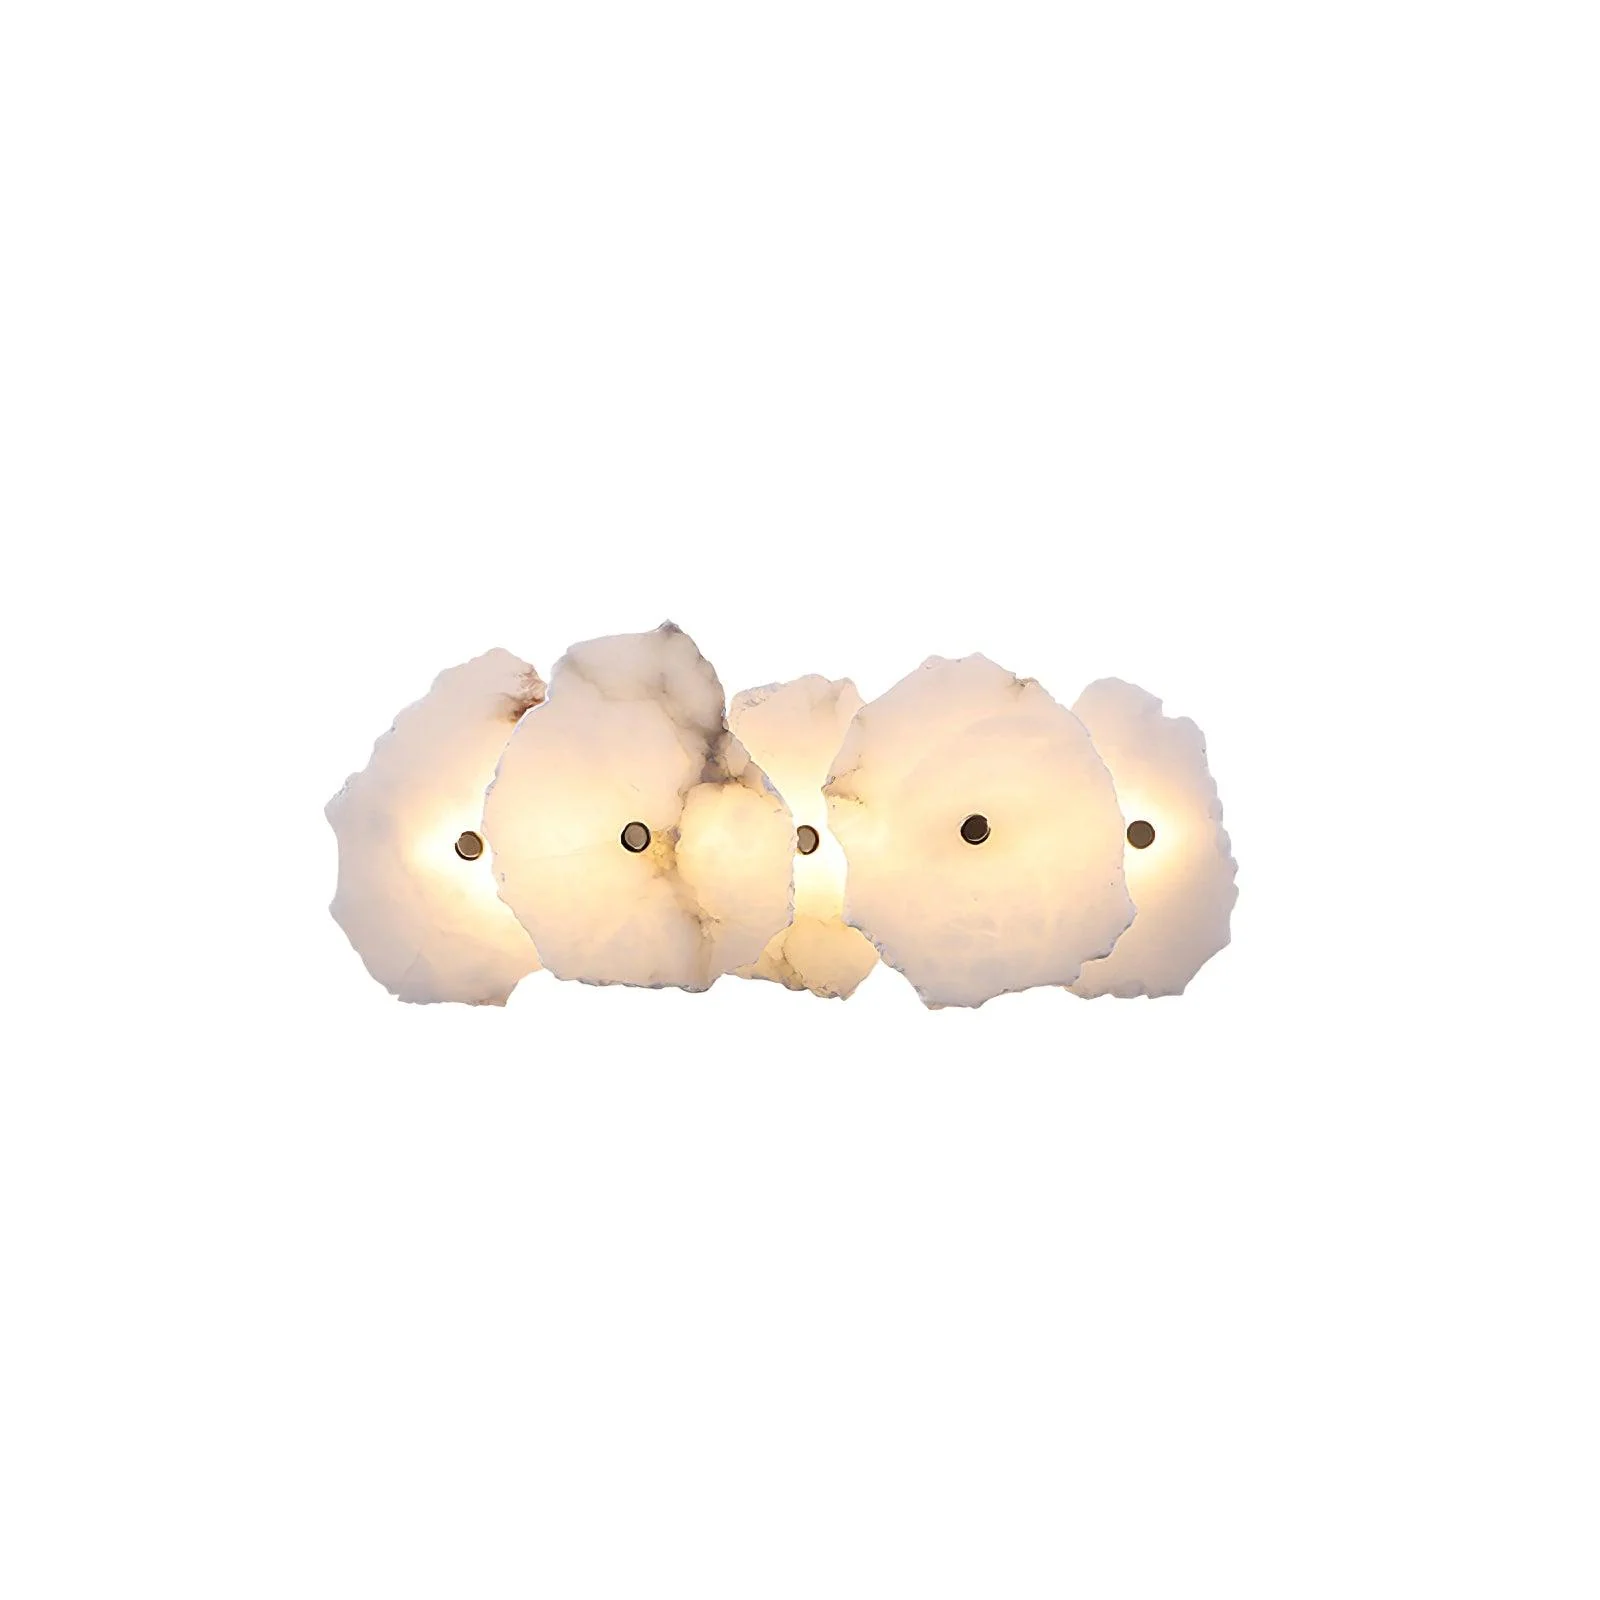
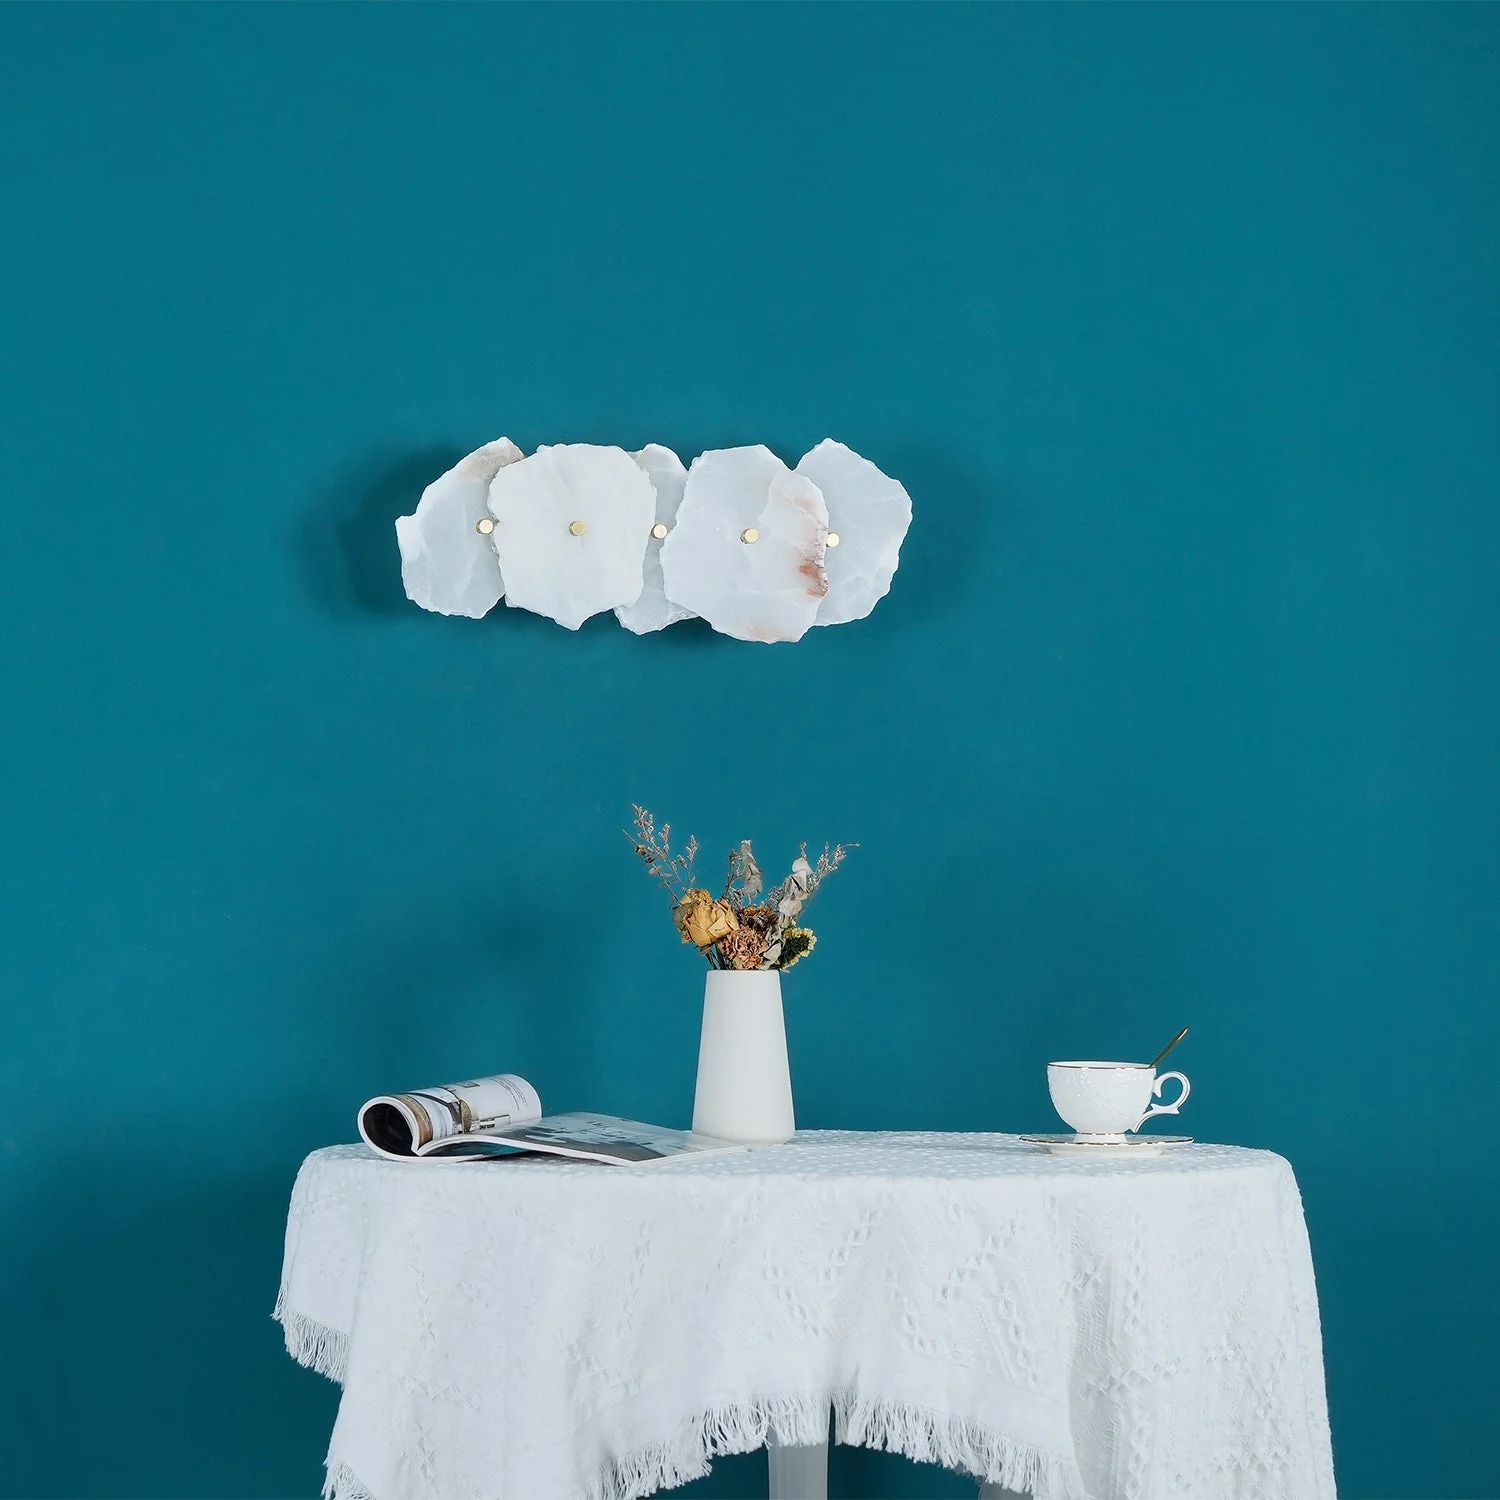
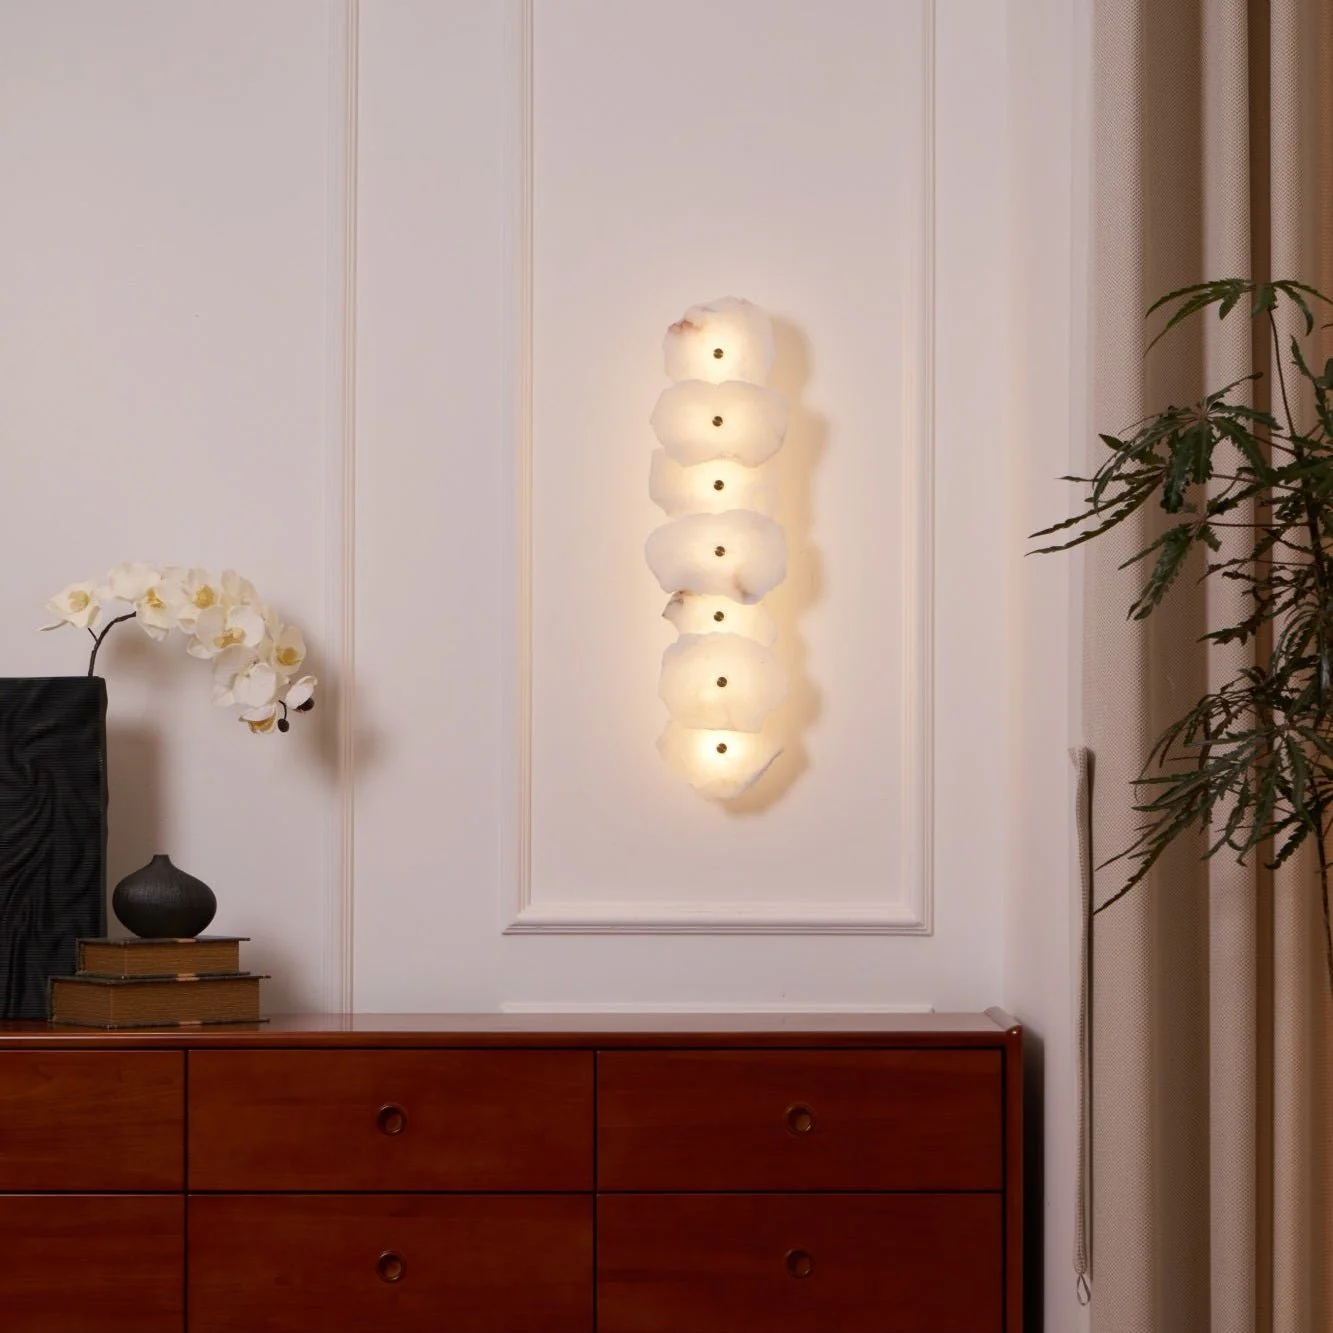
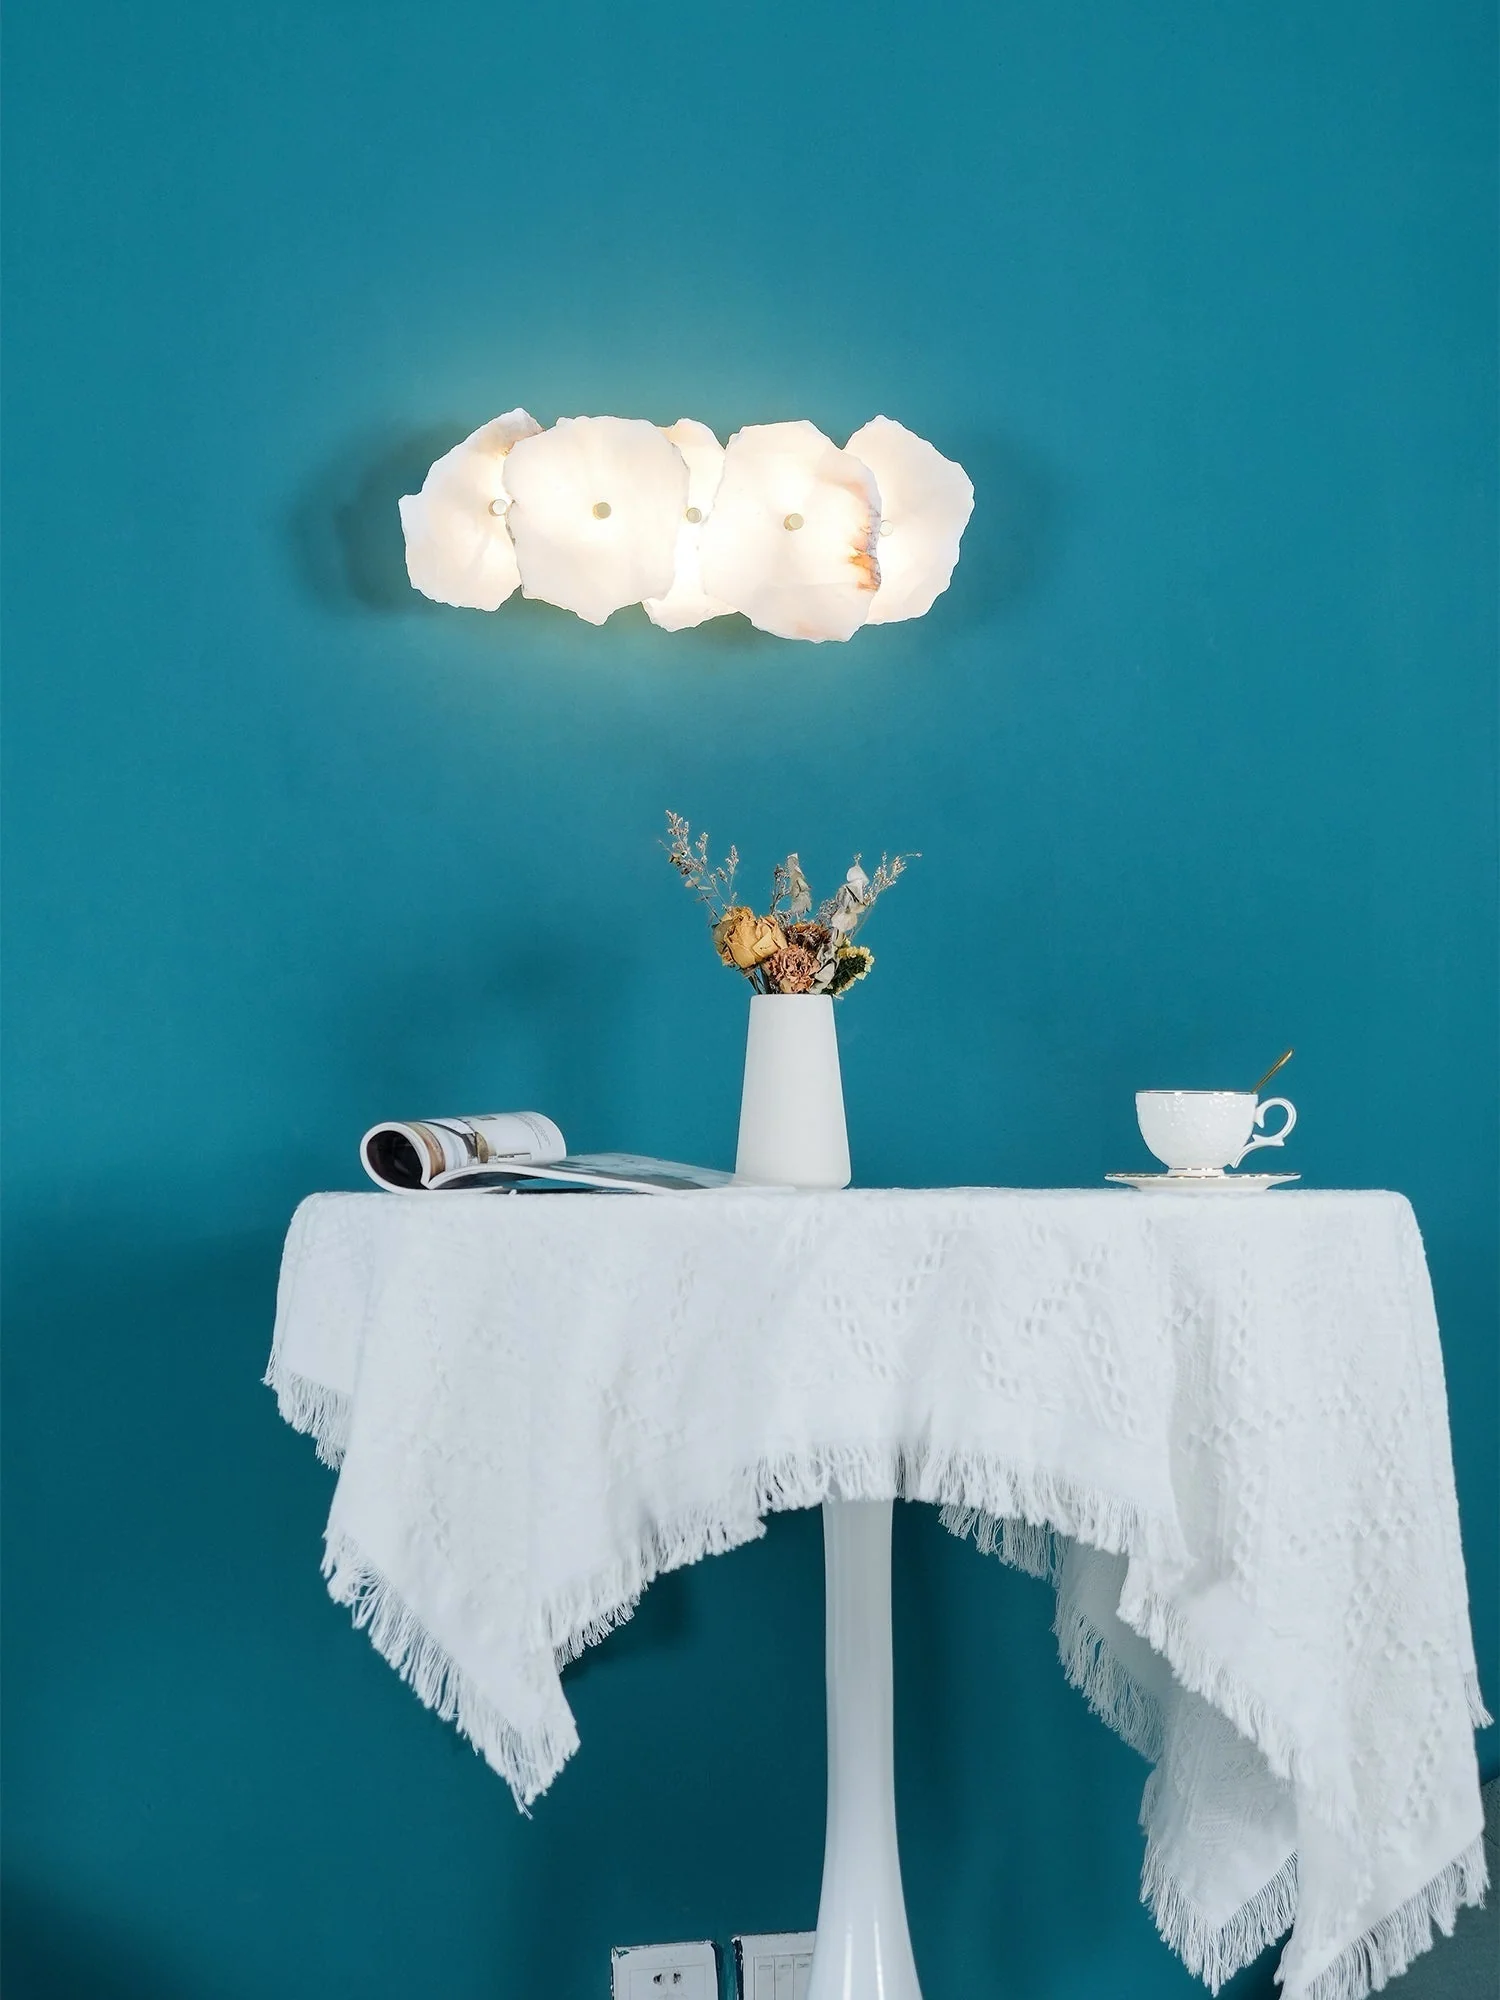
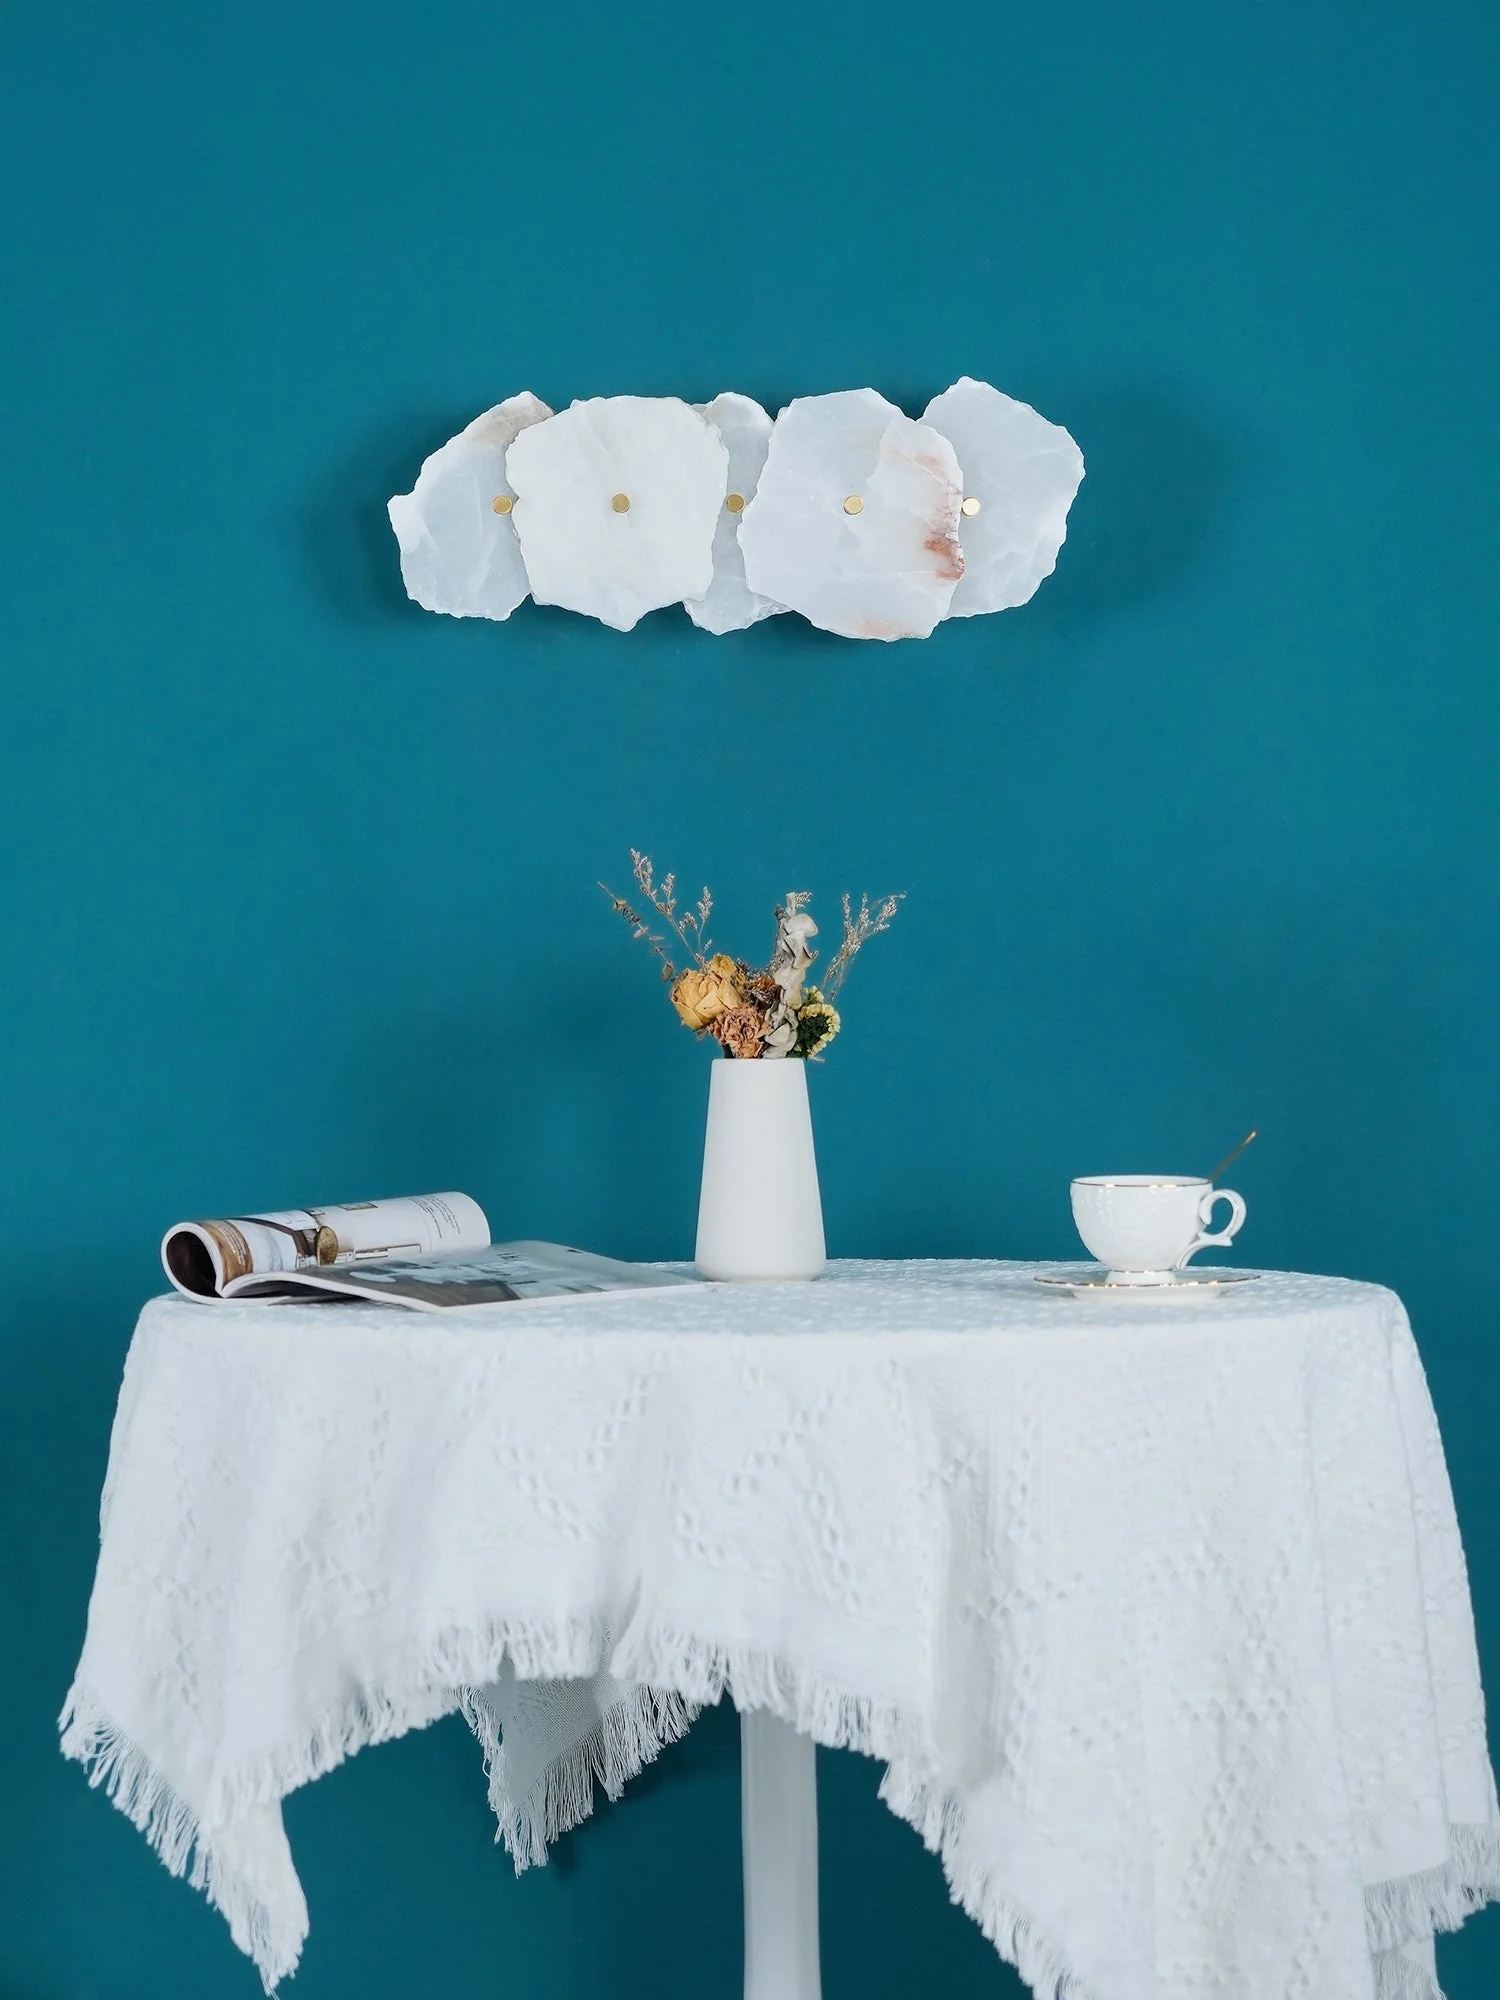
5 Heads Size: L 60cm x H 13cm / L 18.1″ x H 5.1″ (Power:~20W)
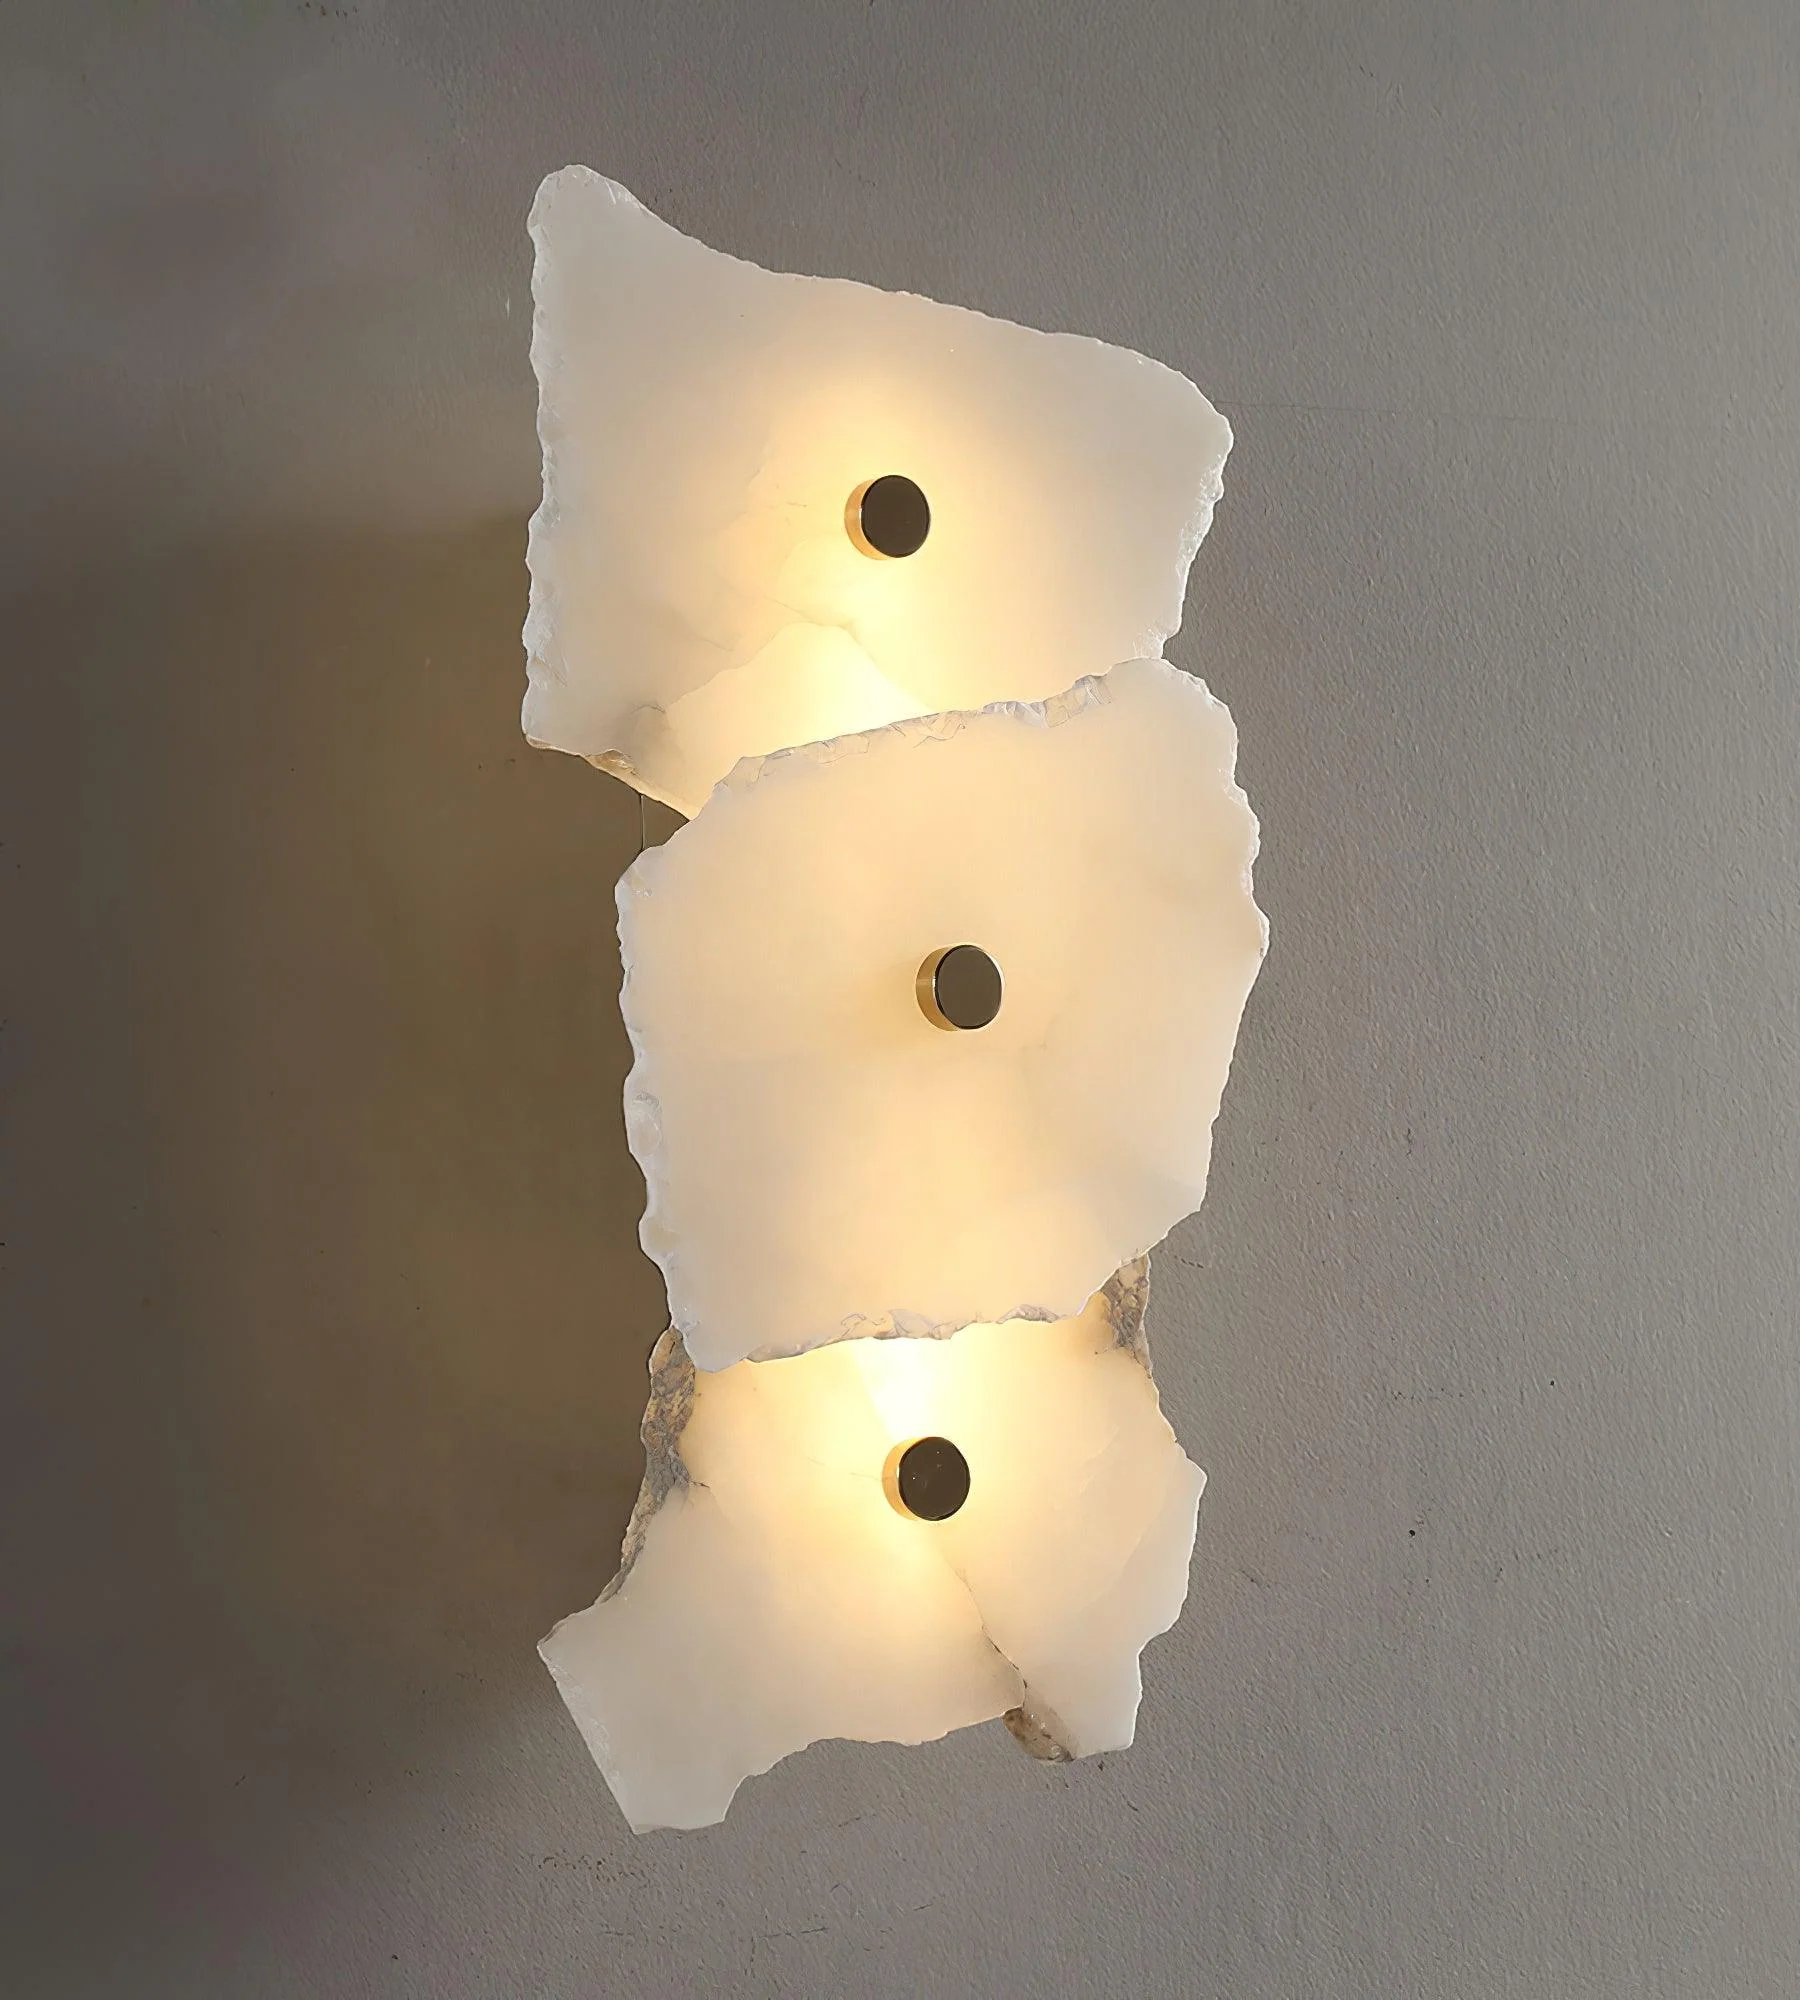
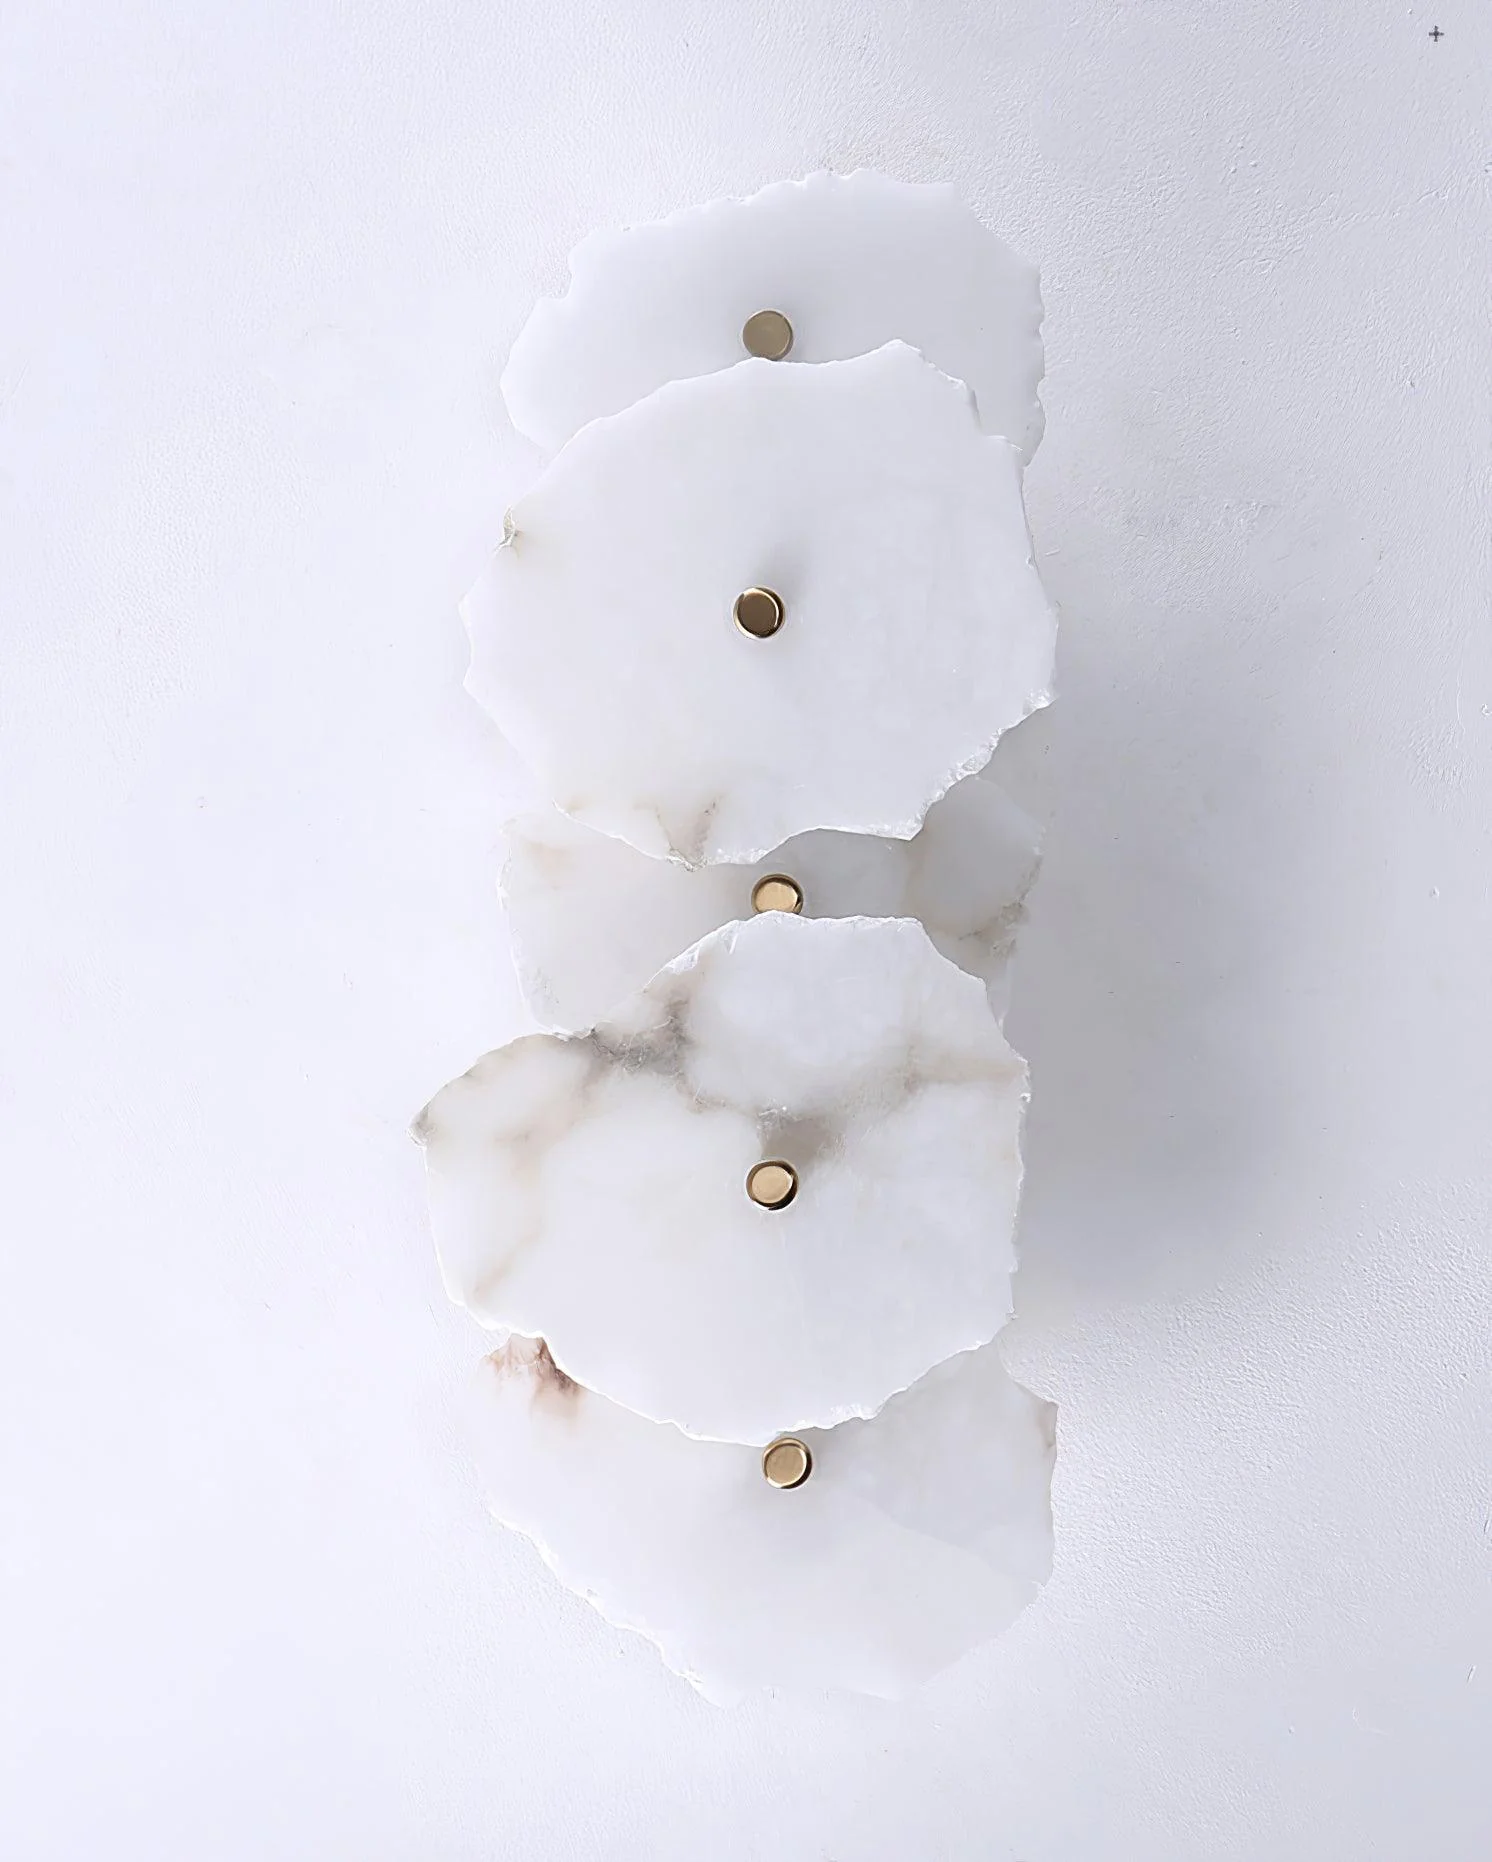
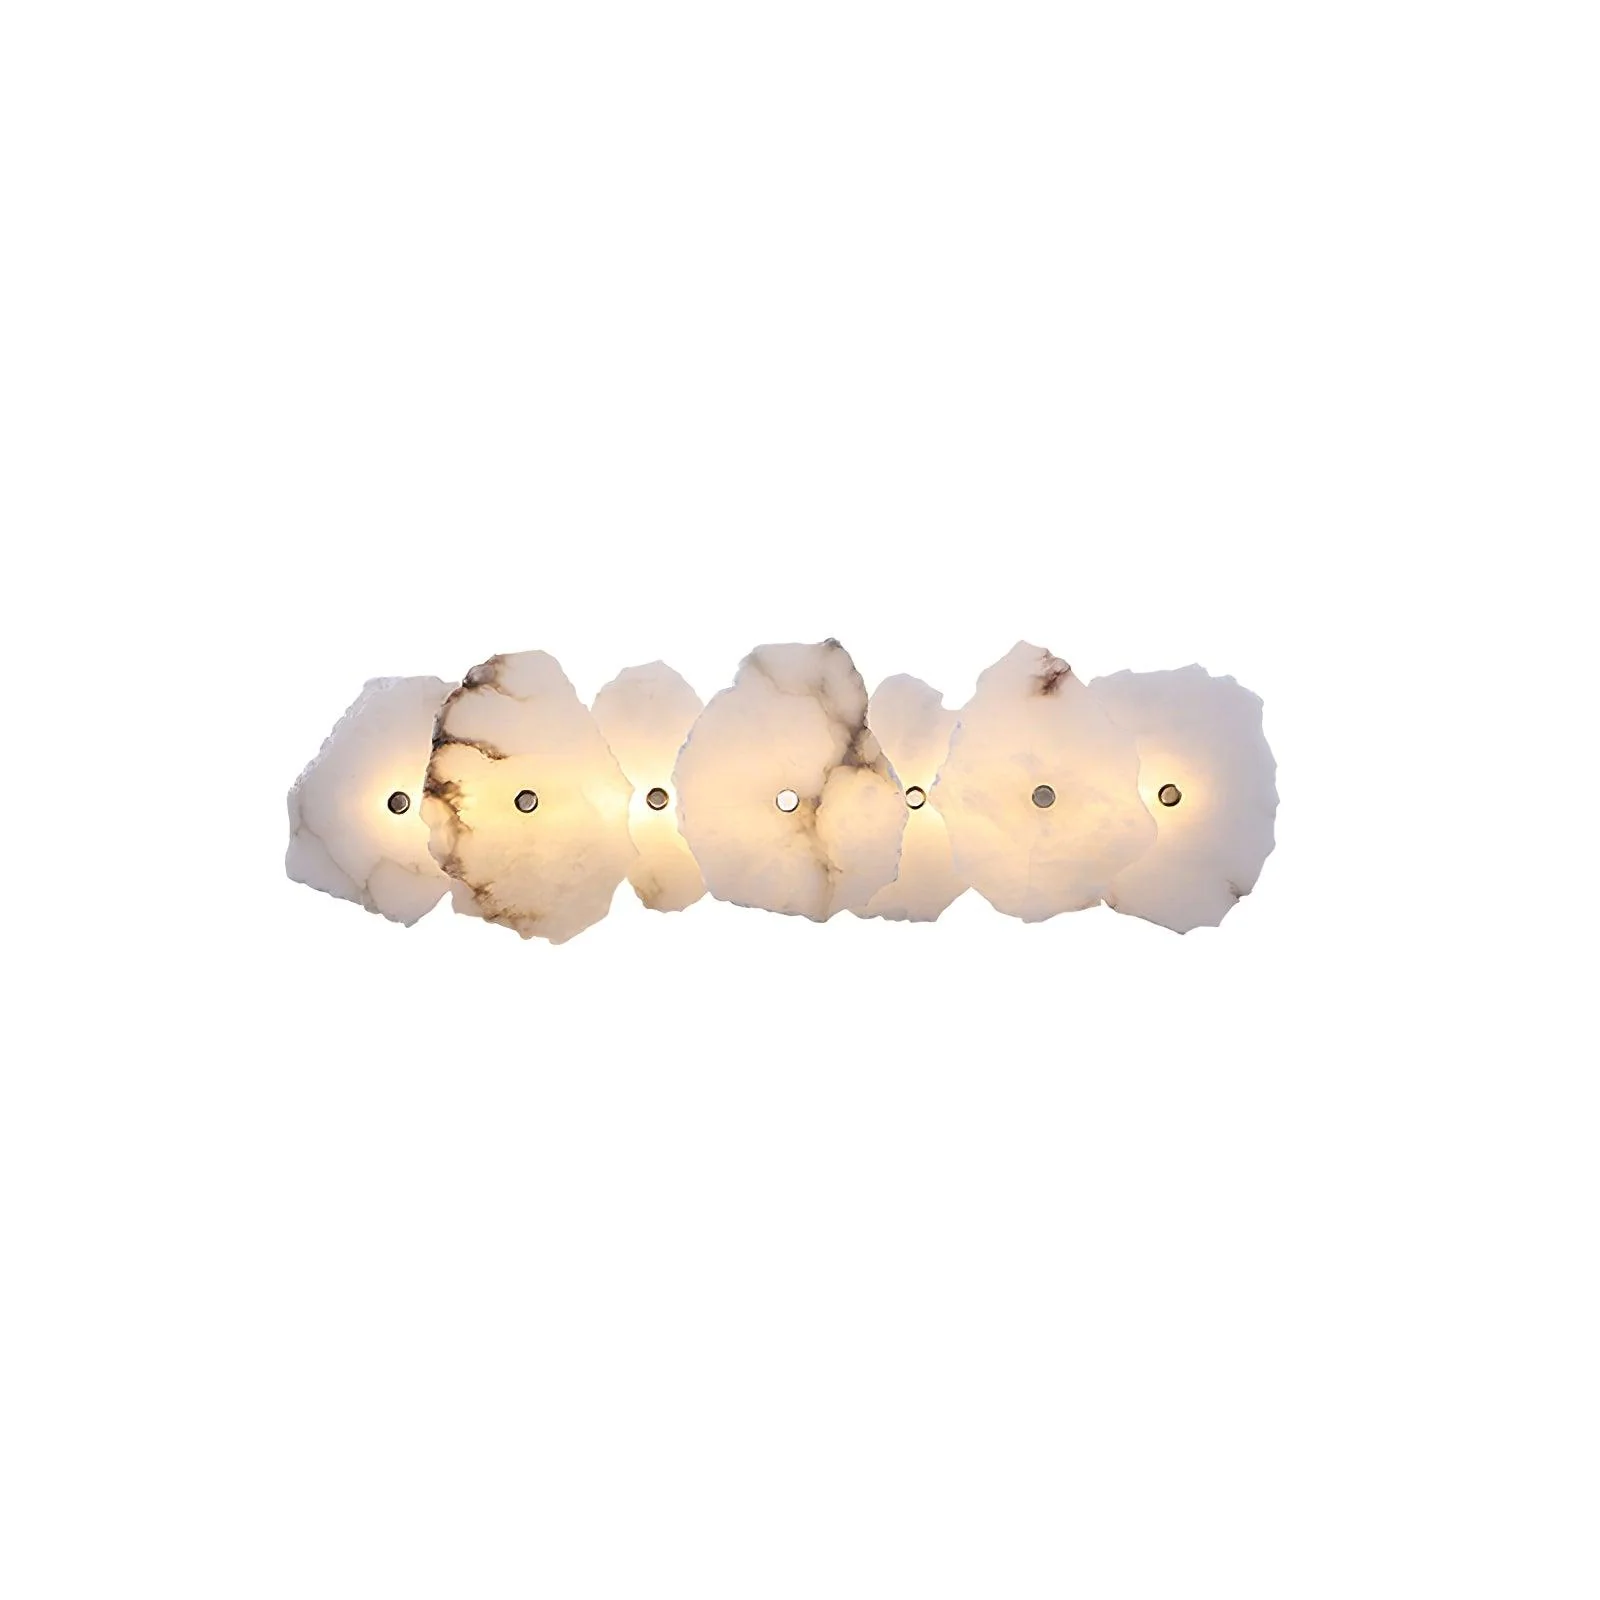
7 Heads Size: L 64cm x H 13cm / L 25.2″ x H 5.1″ (Power:~28W)
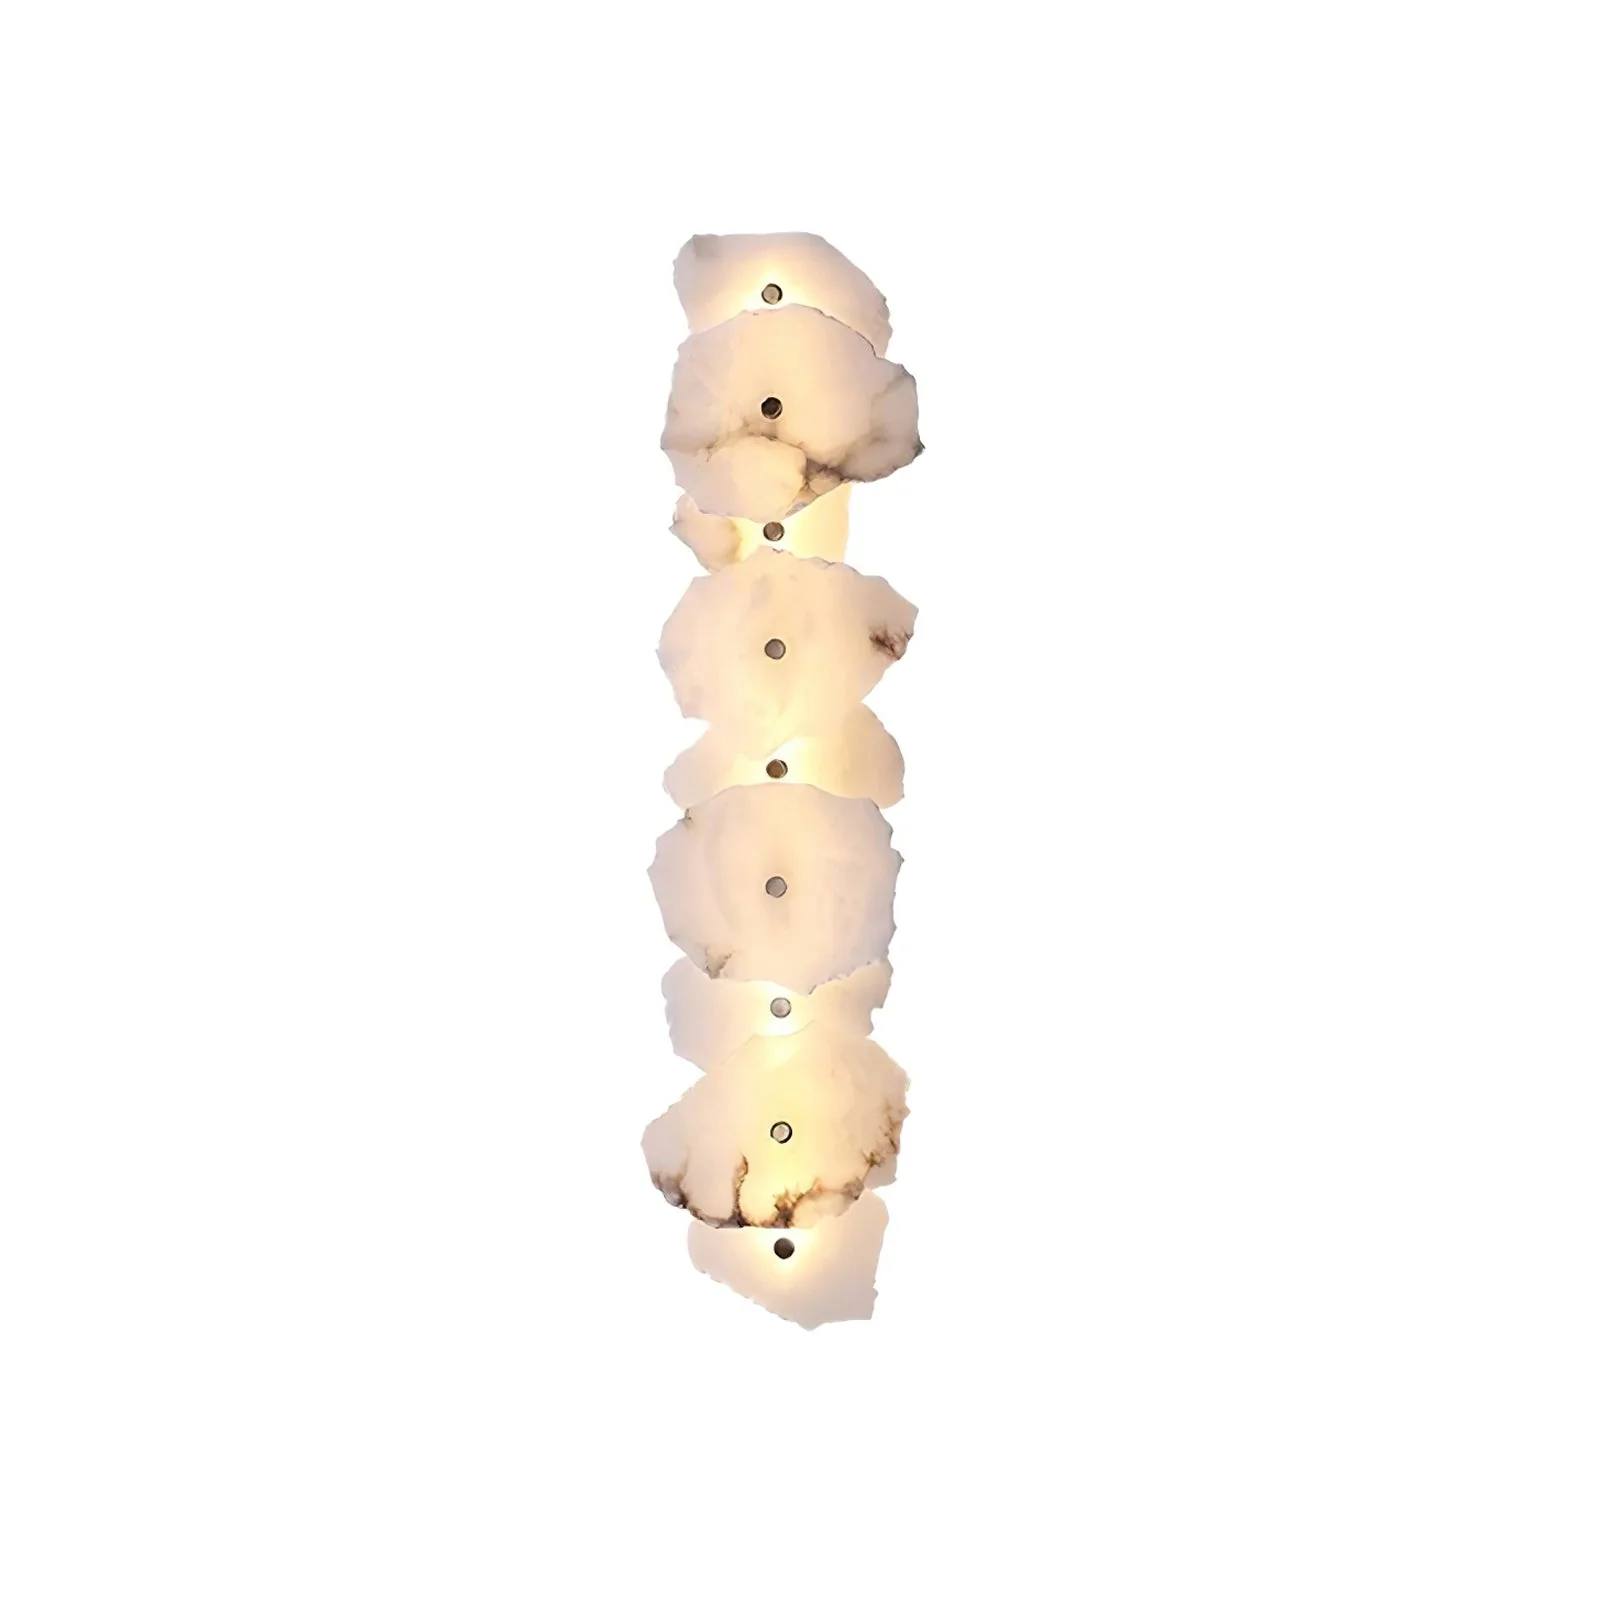
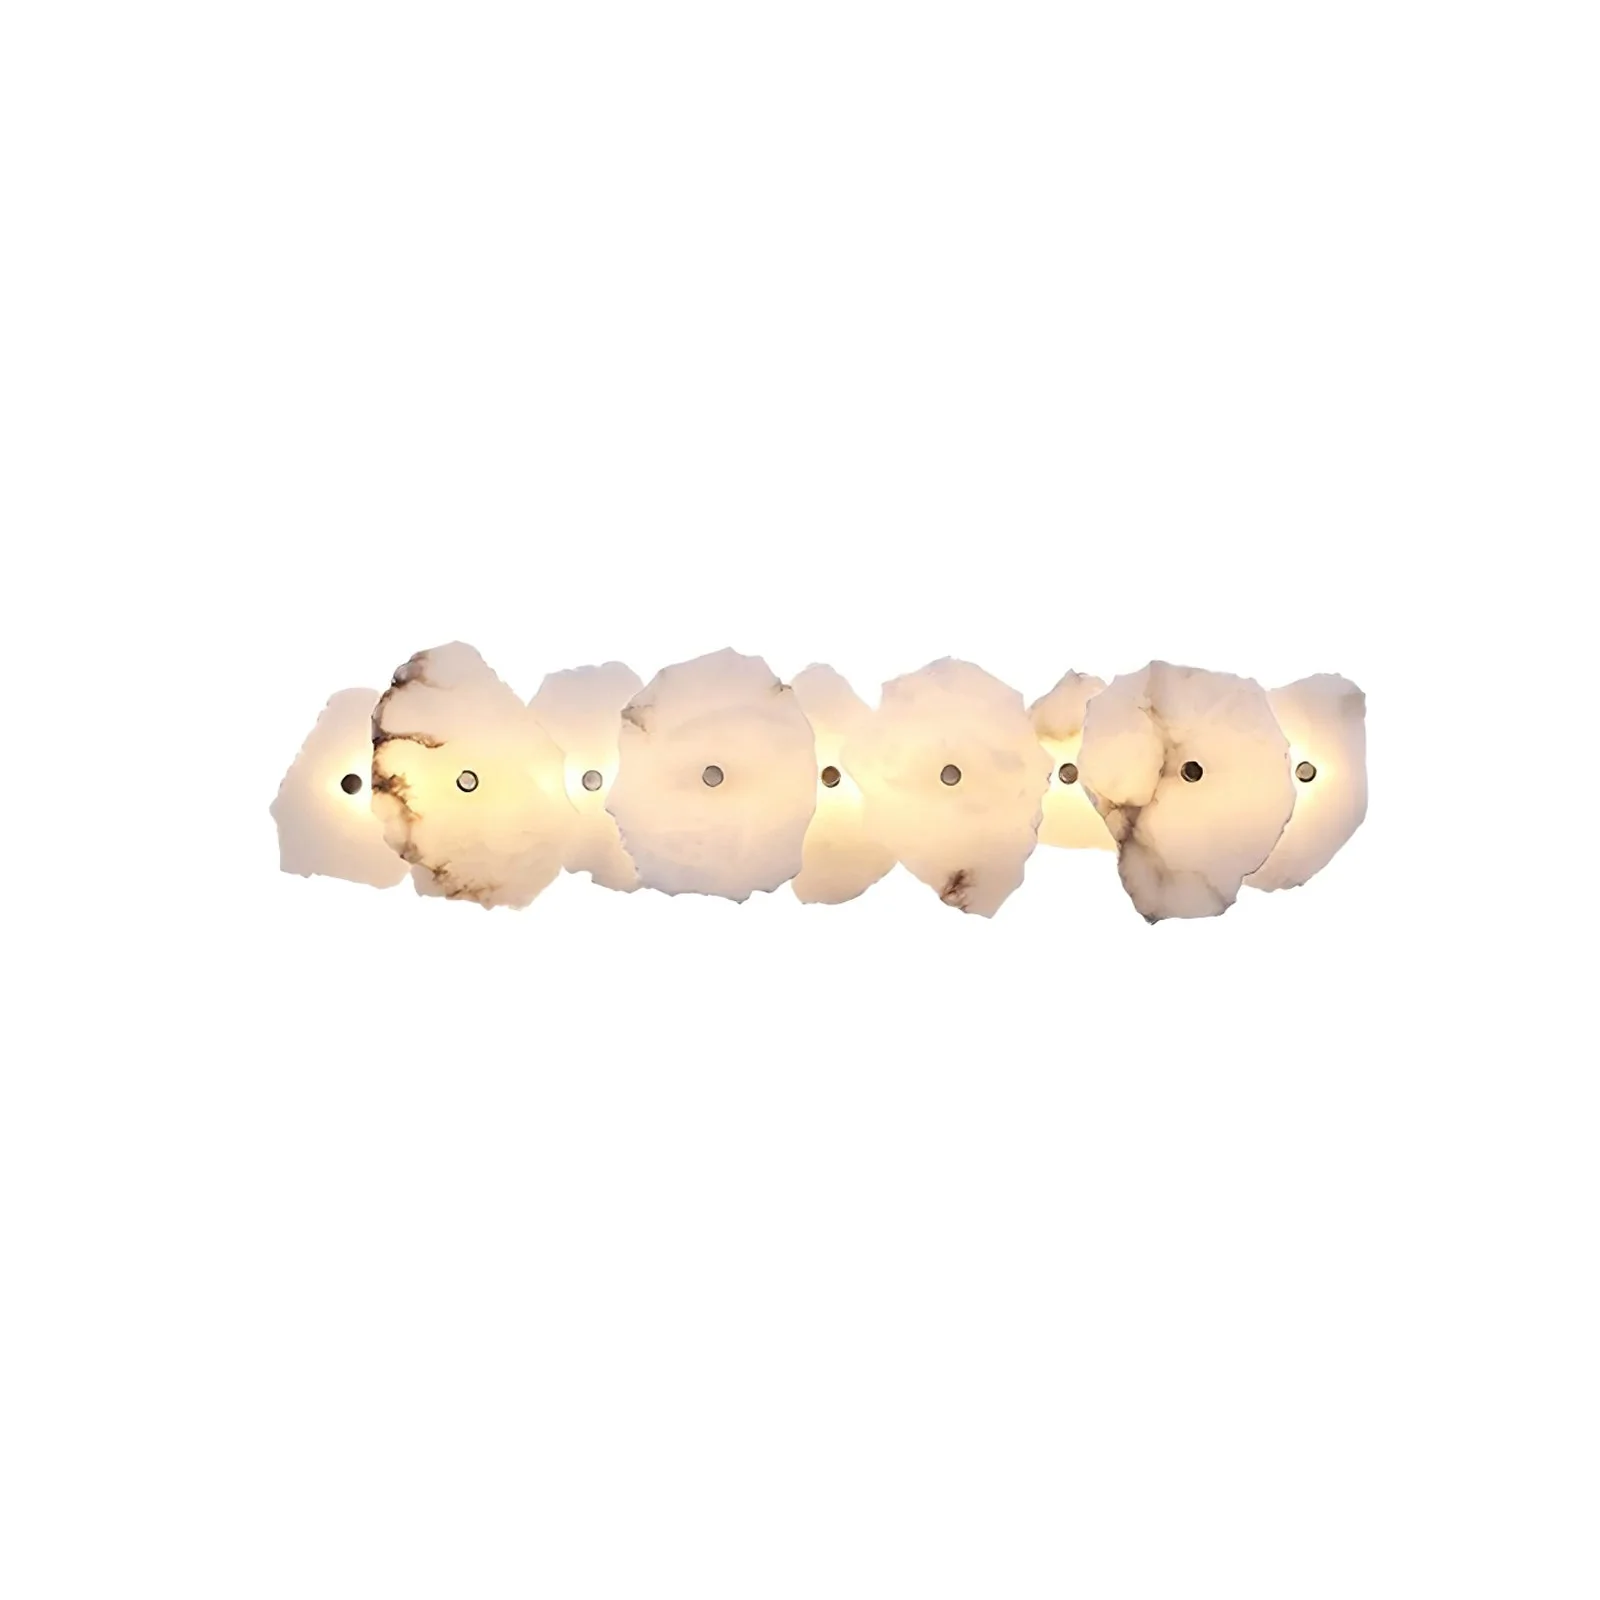
9 heads Size: L 78cm x H 13cm / L 30.7″ x H 5.1″ (Power:~36W)

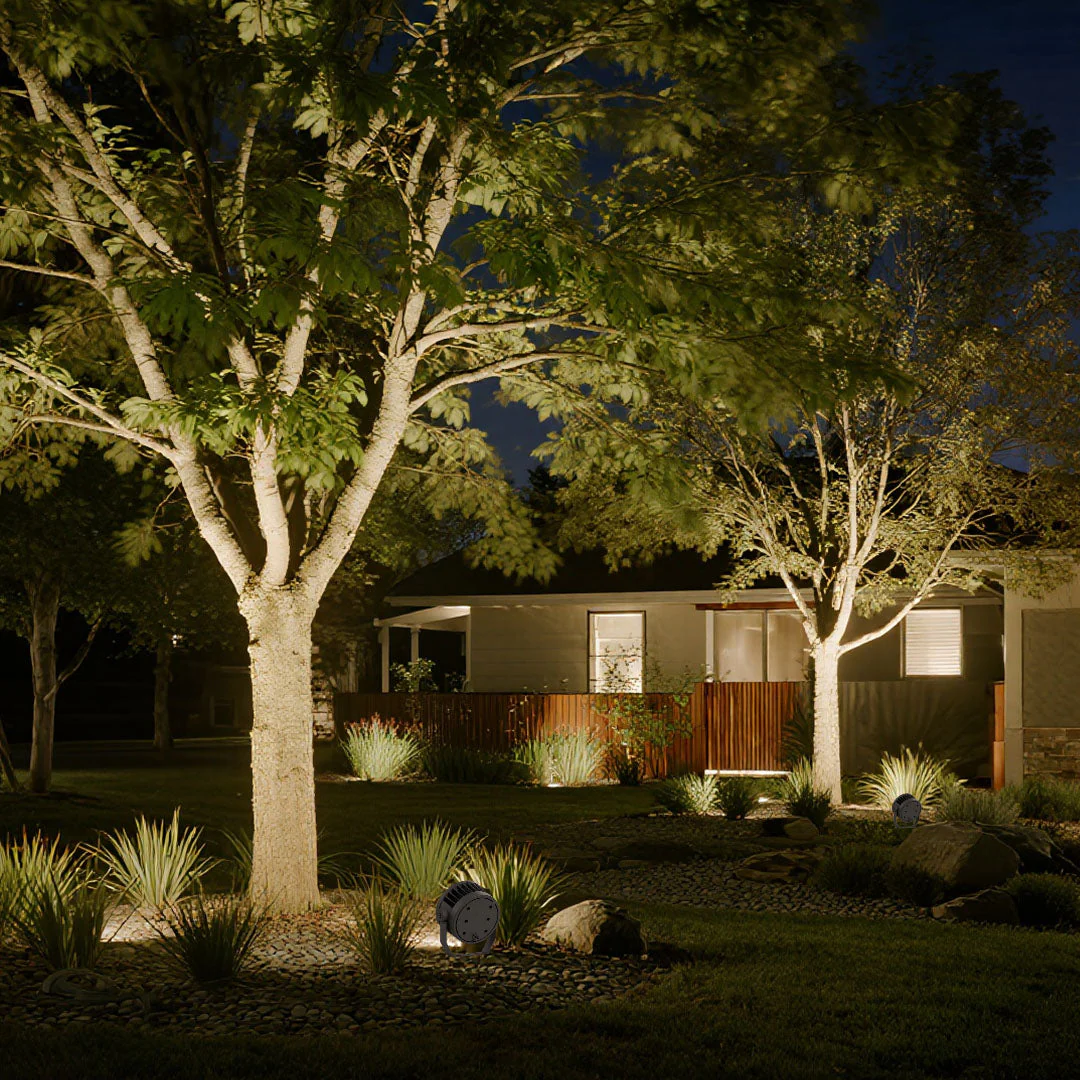
Details
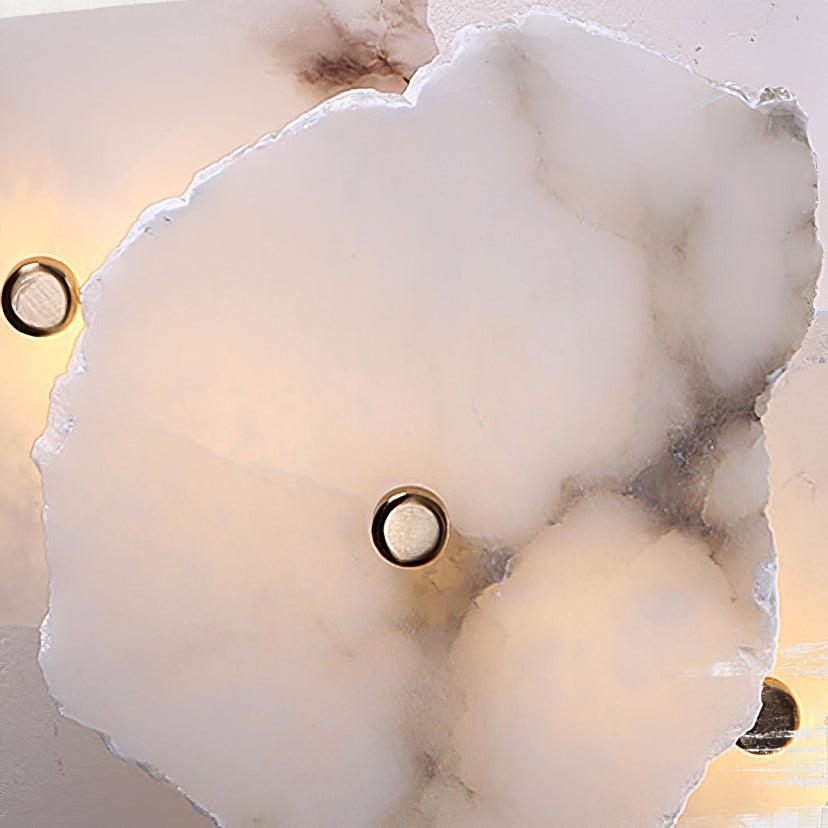
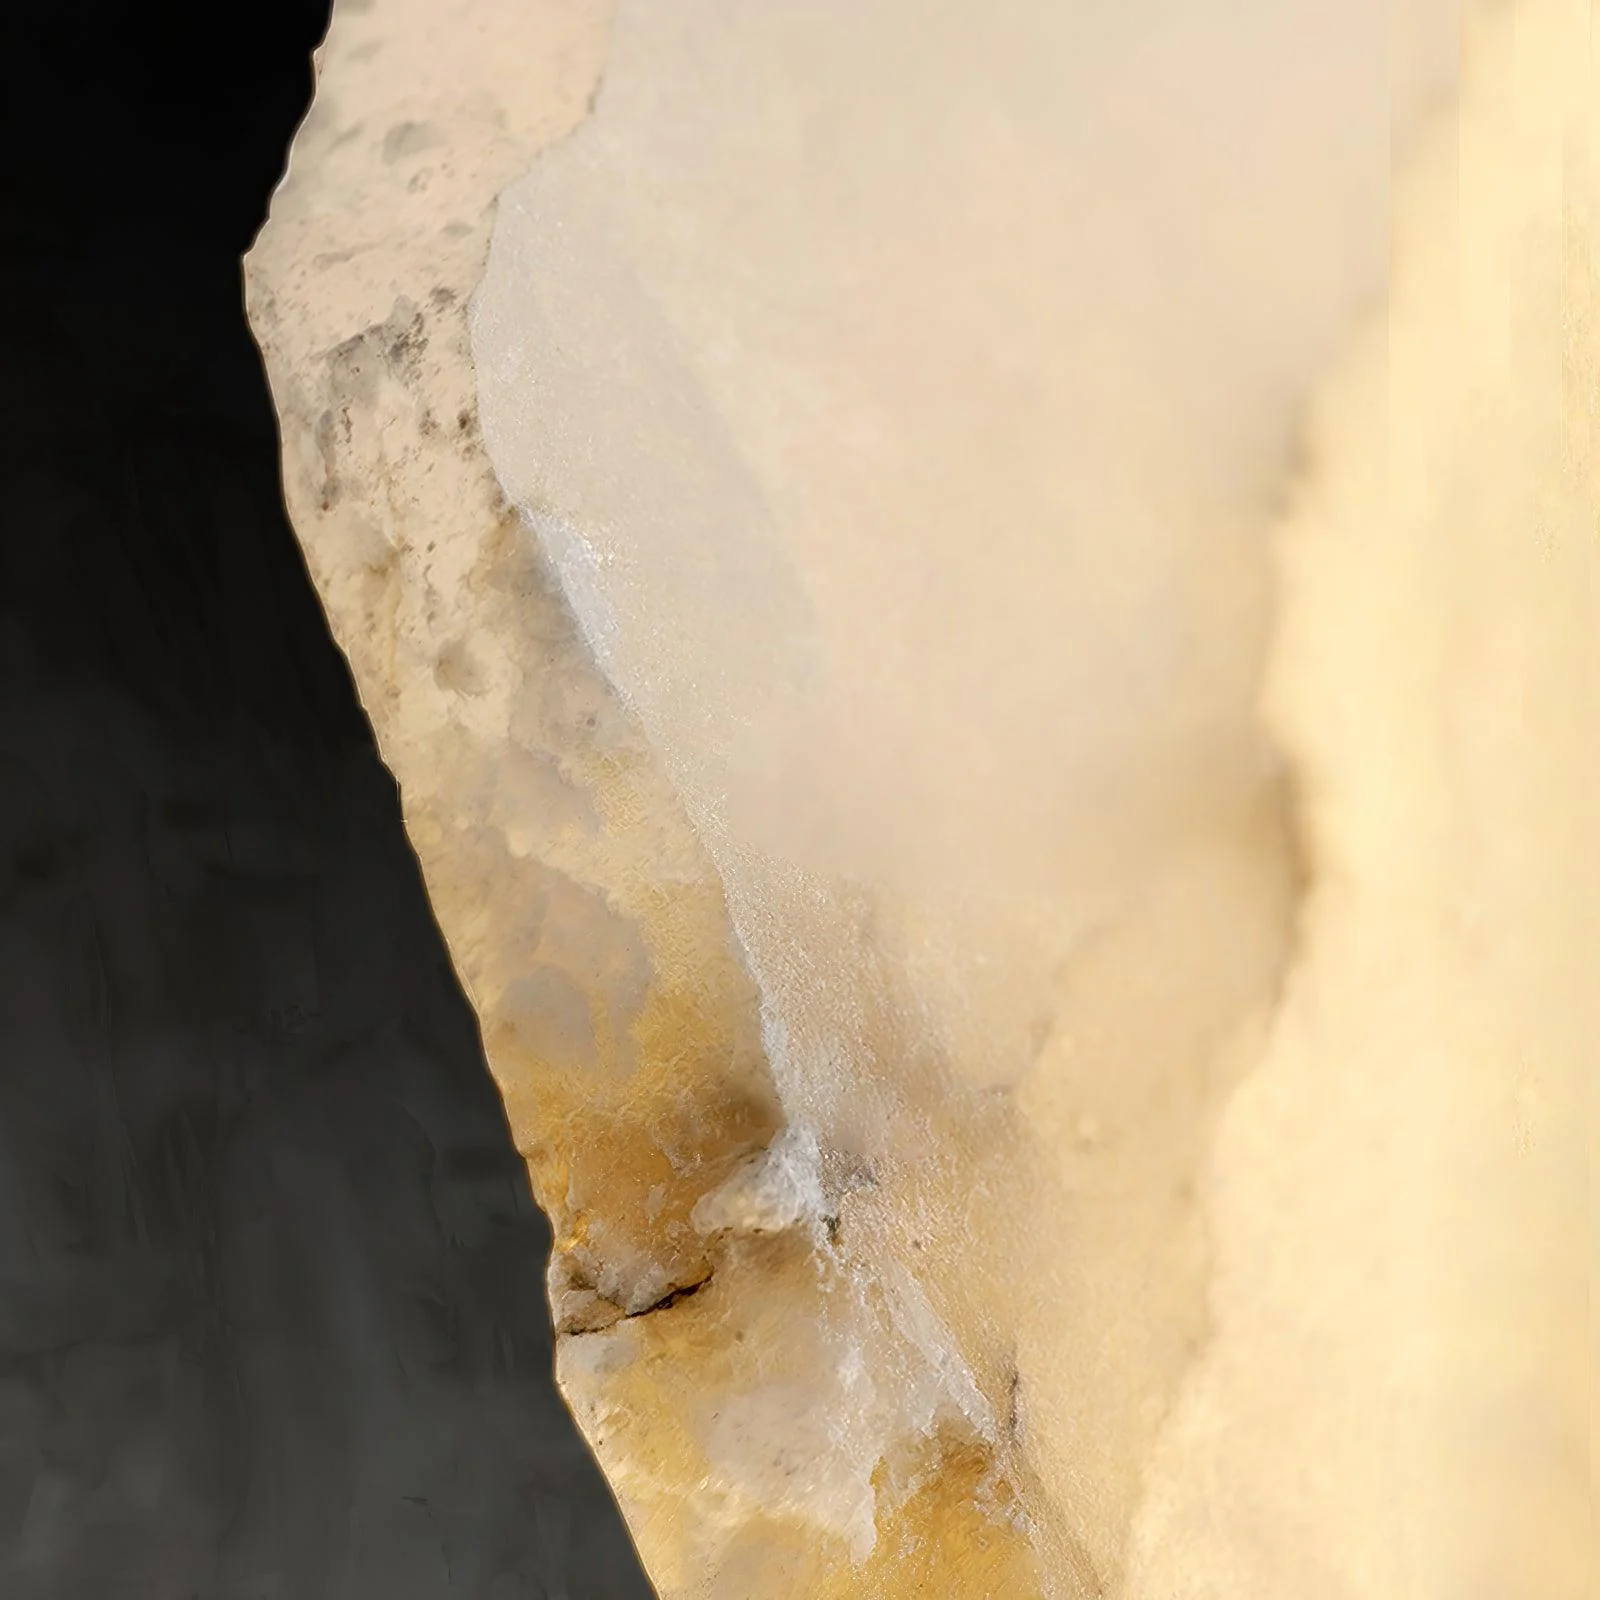
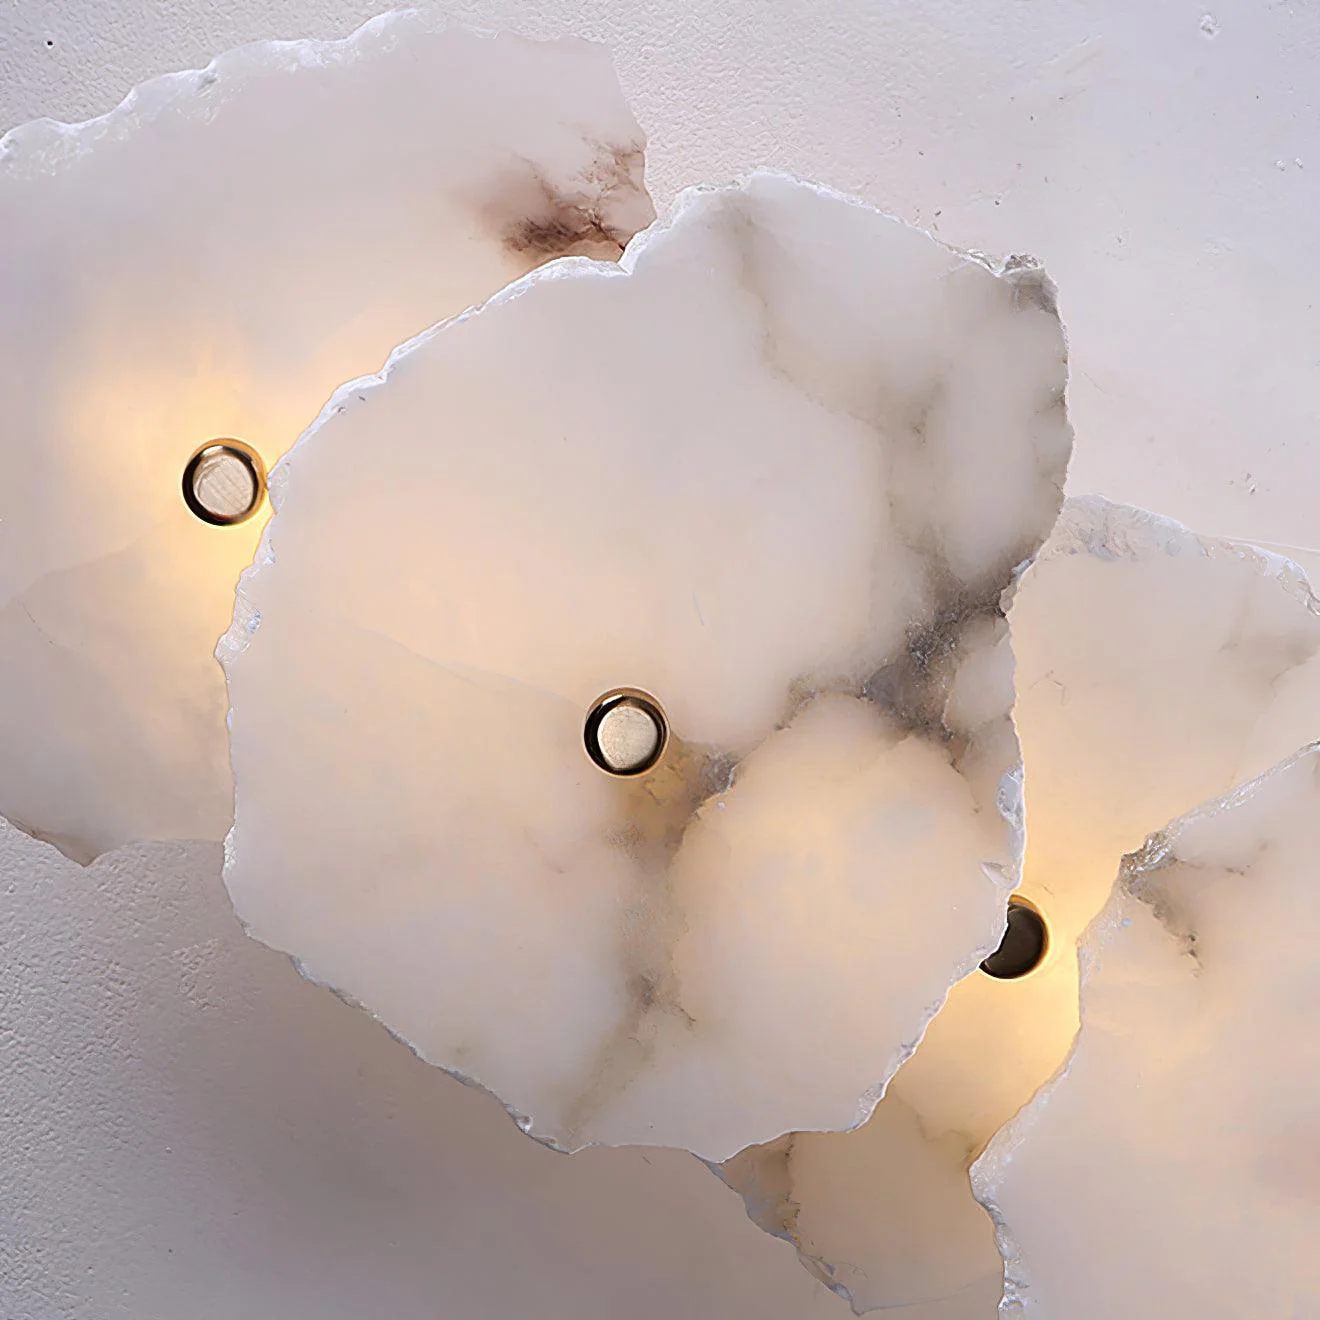
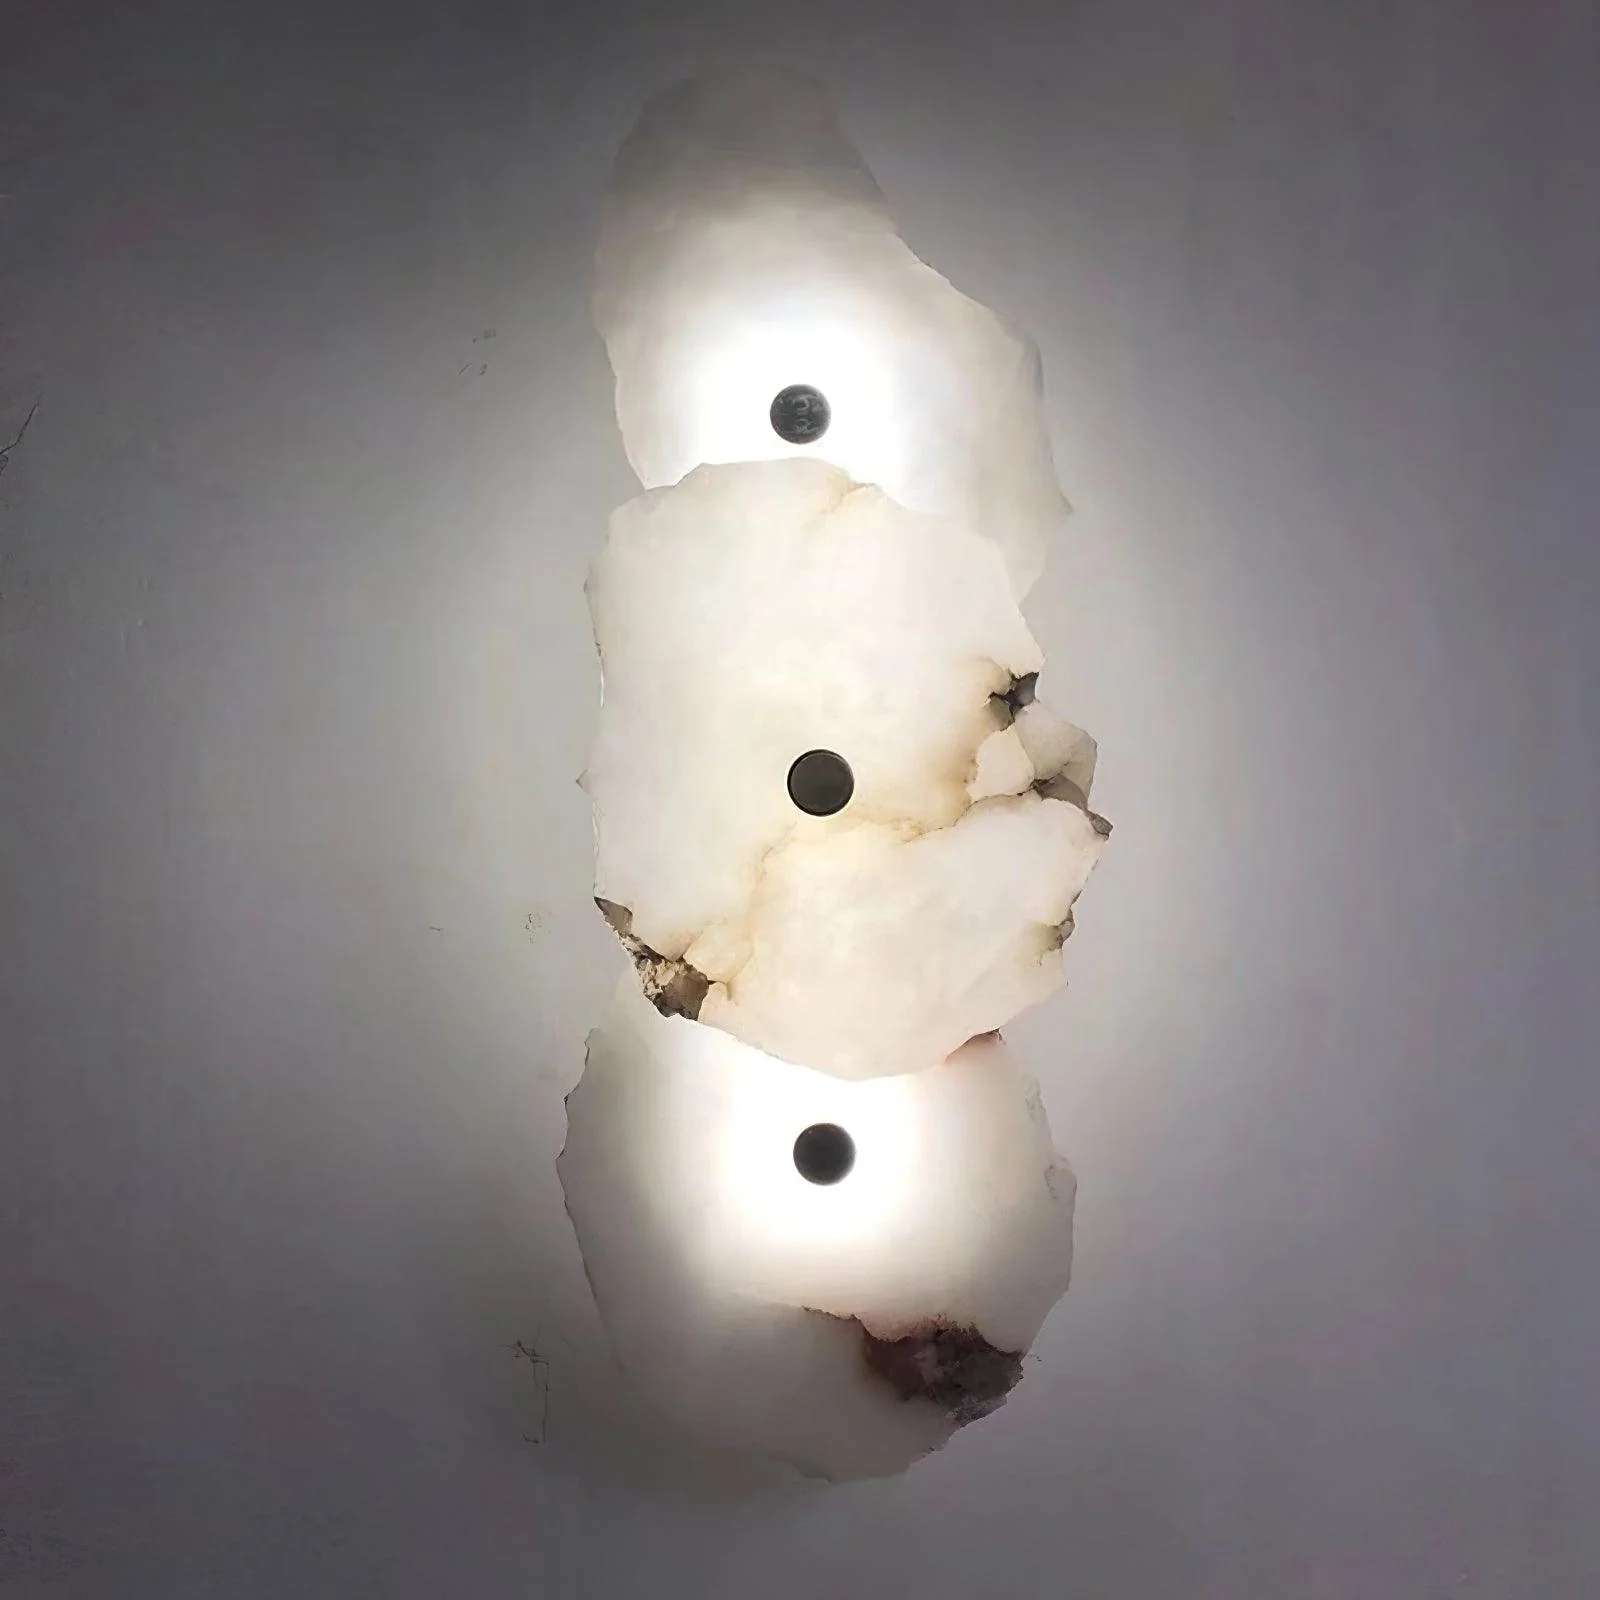
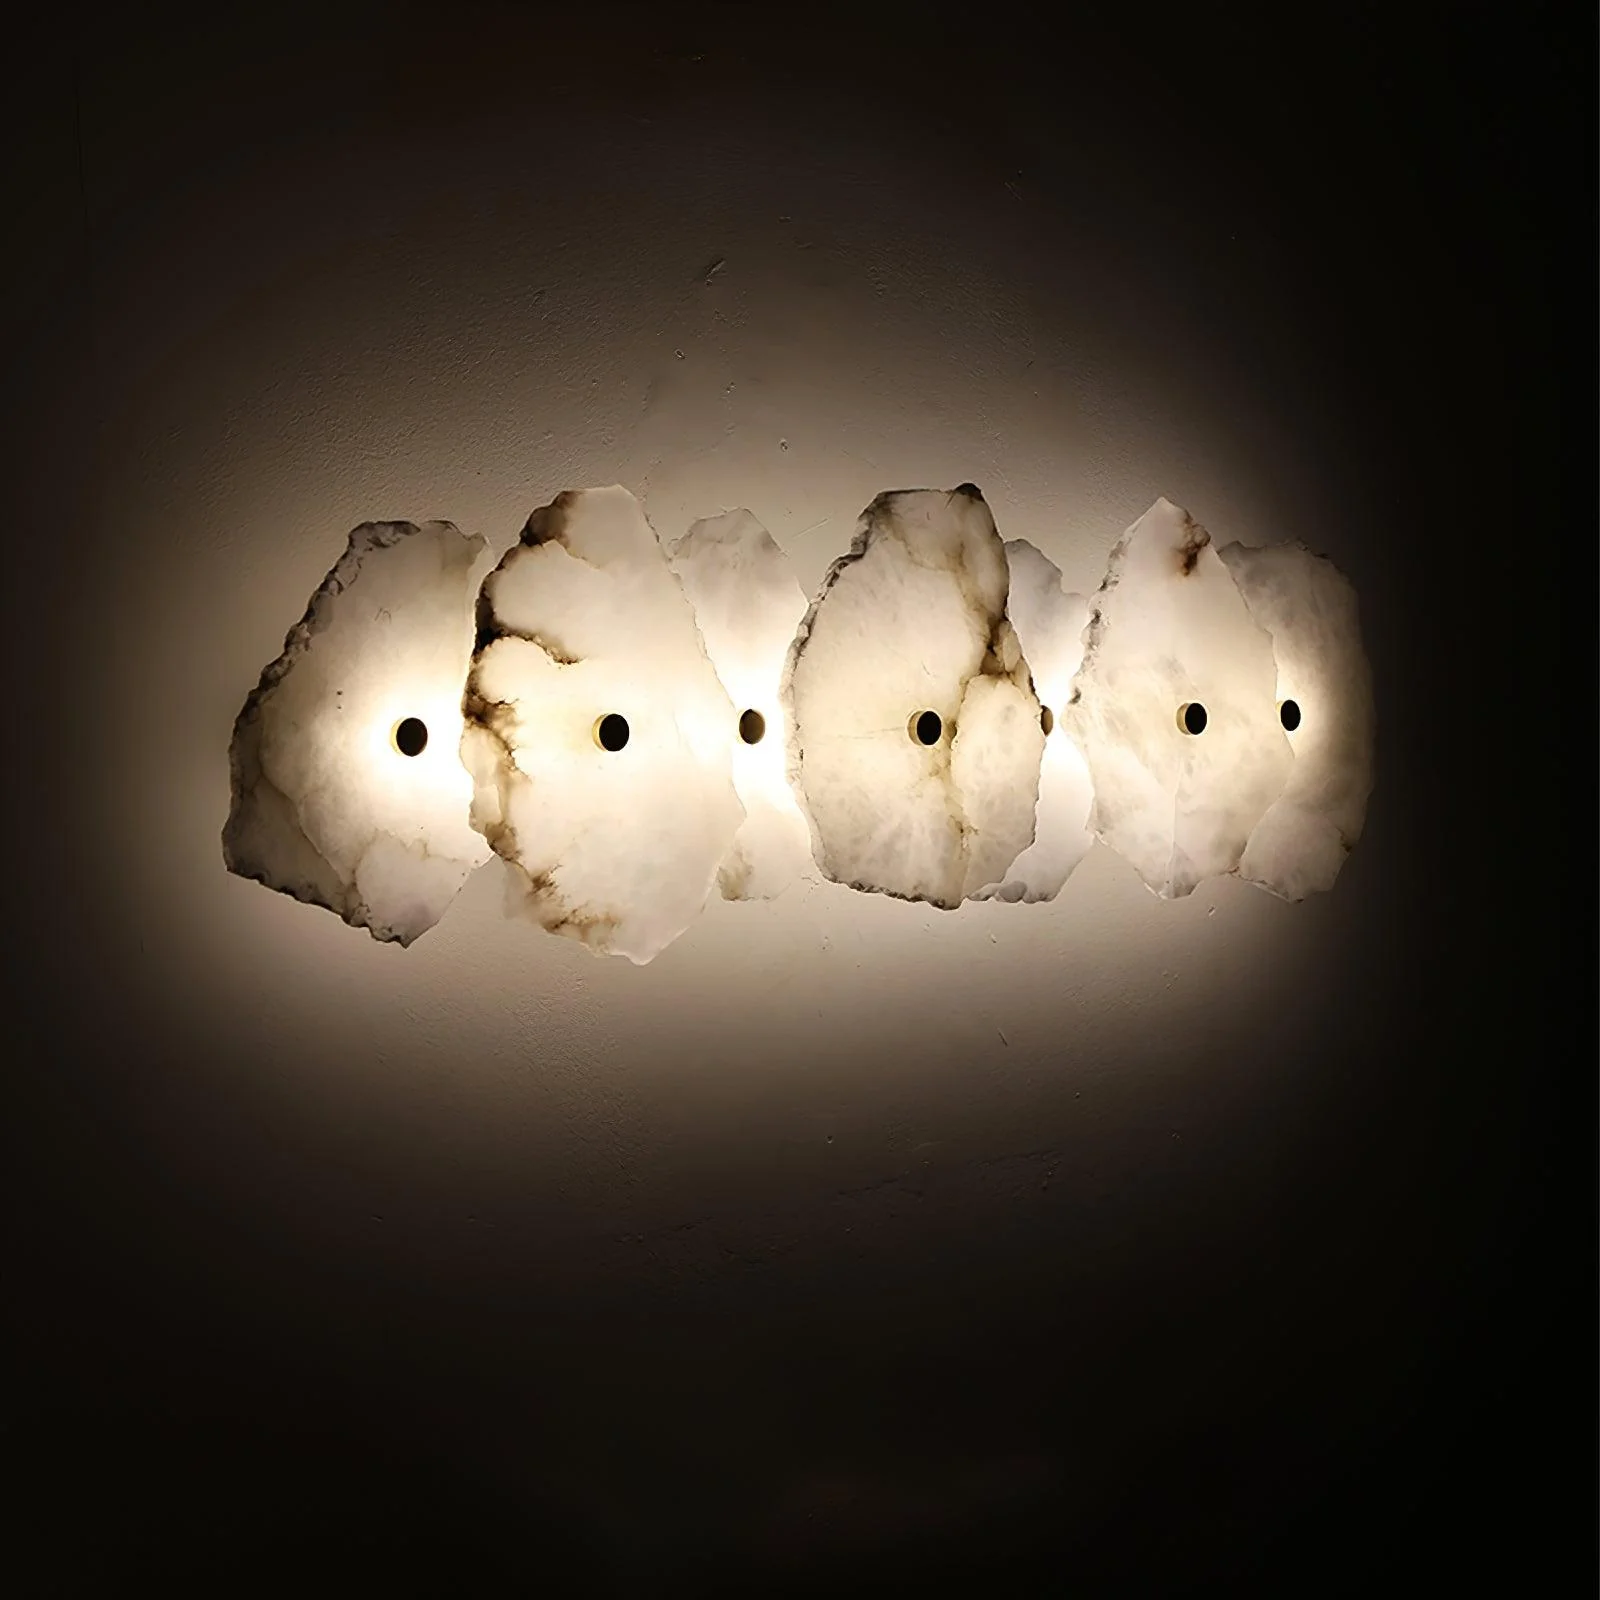
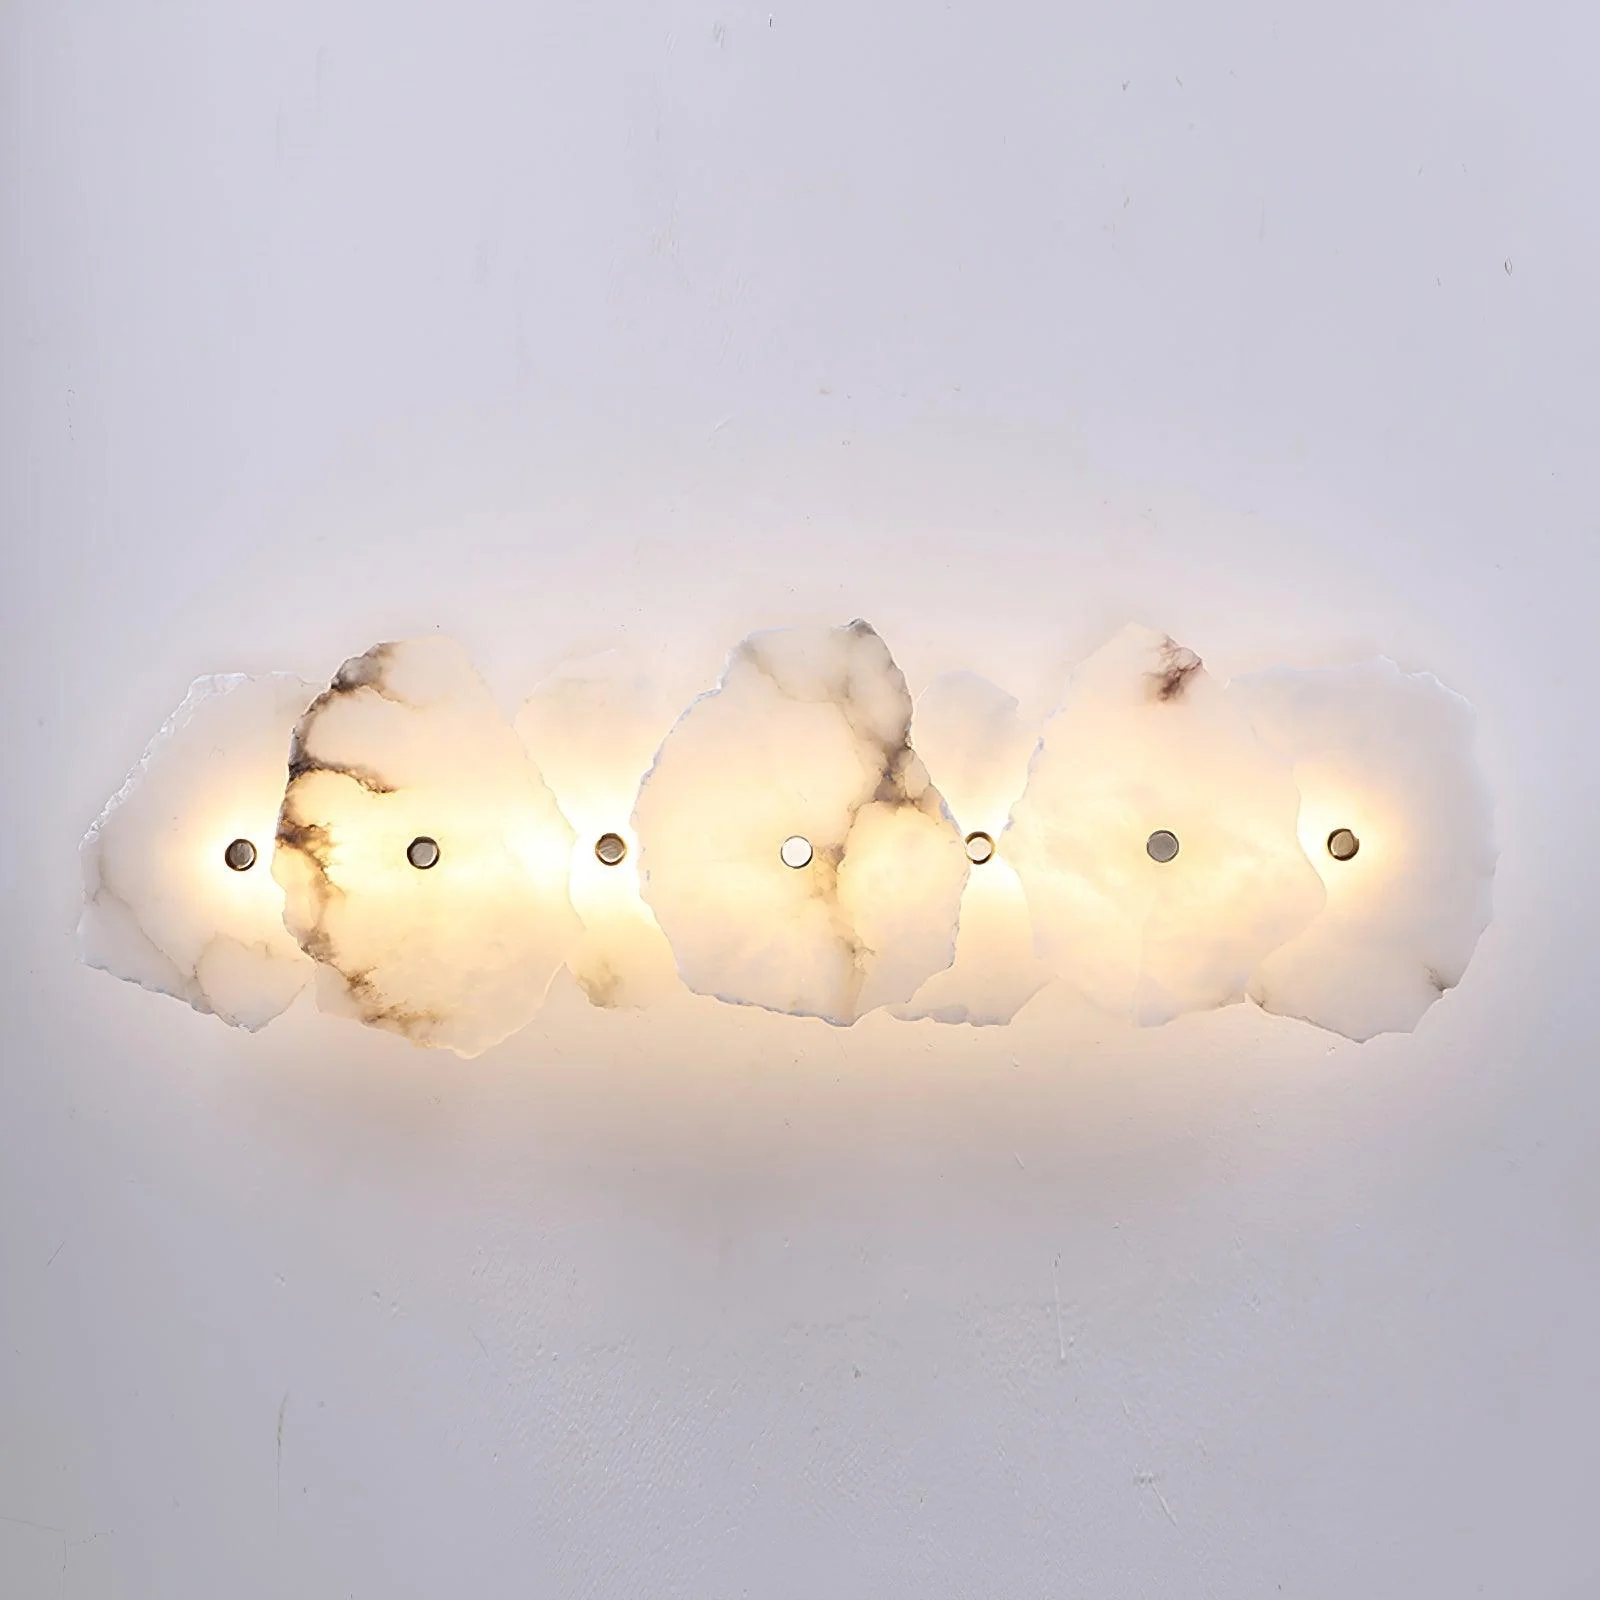
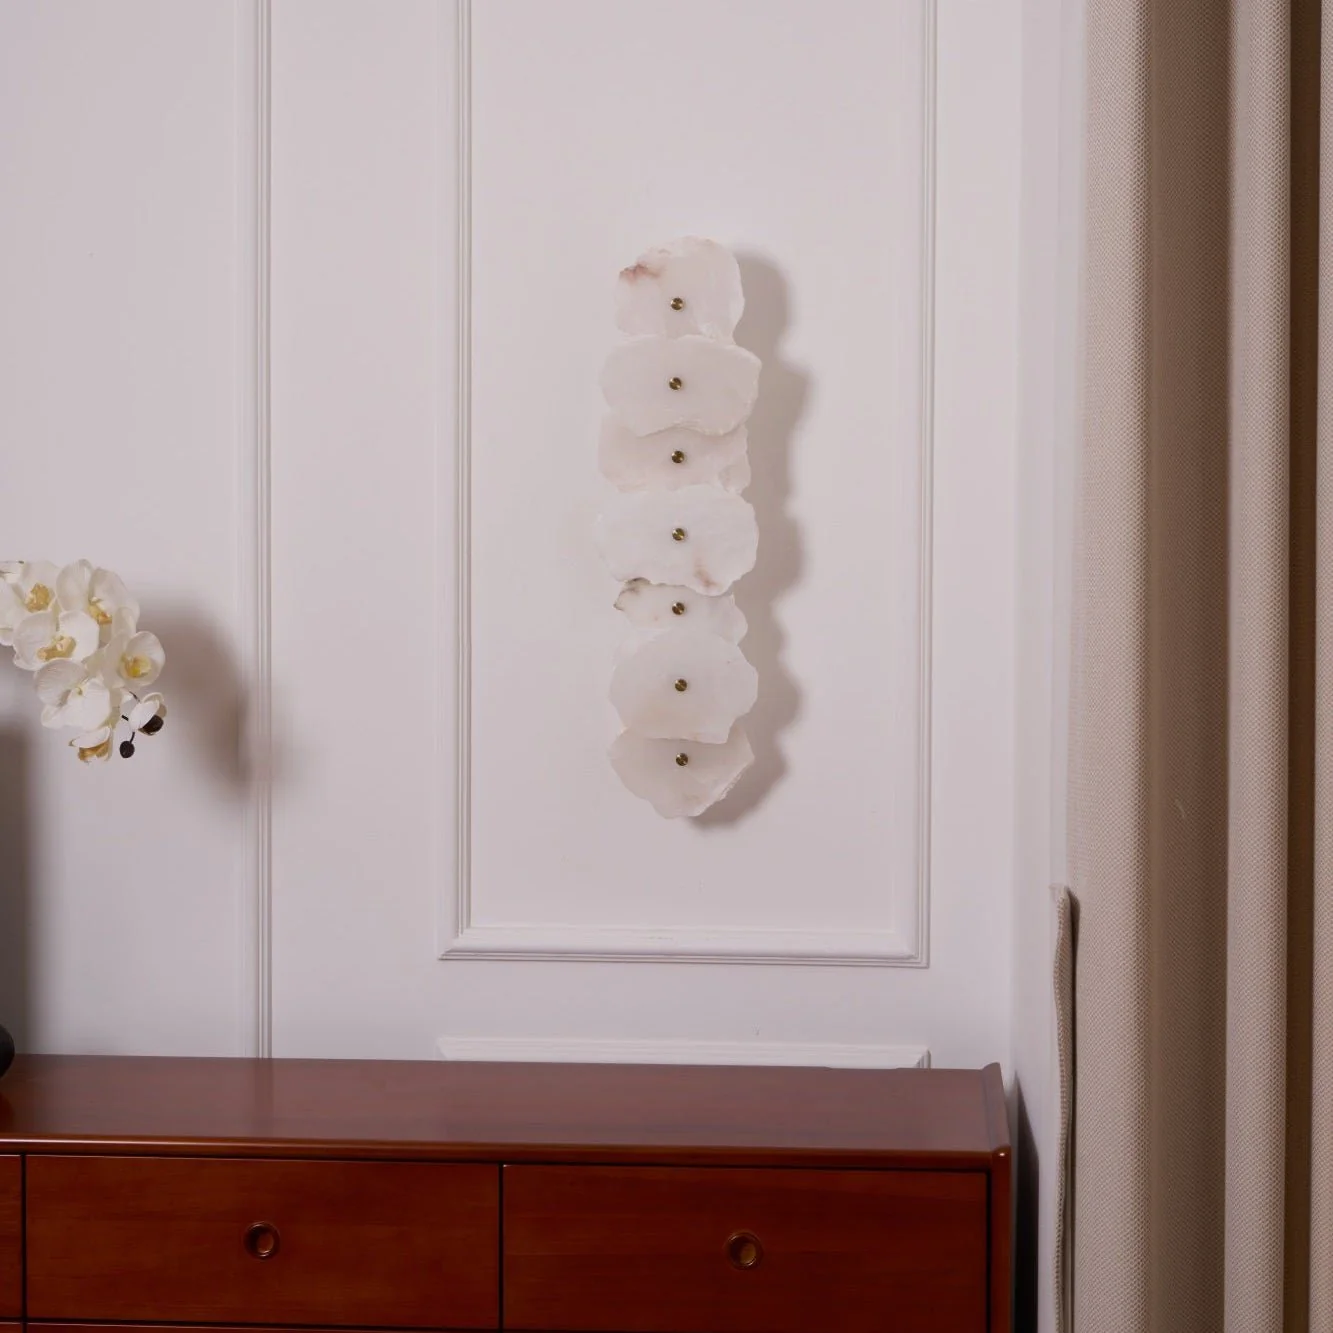
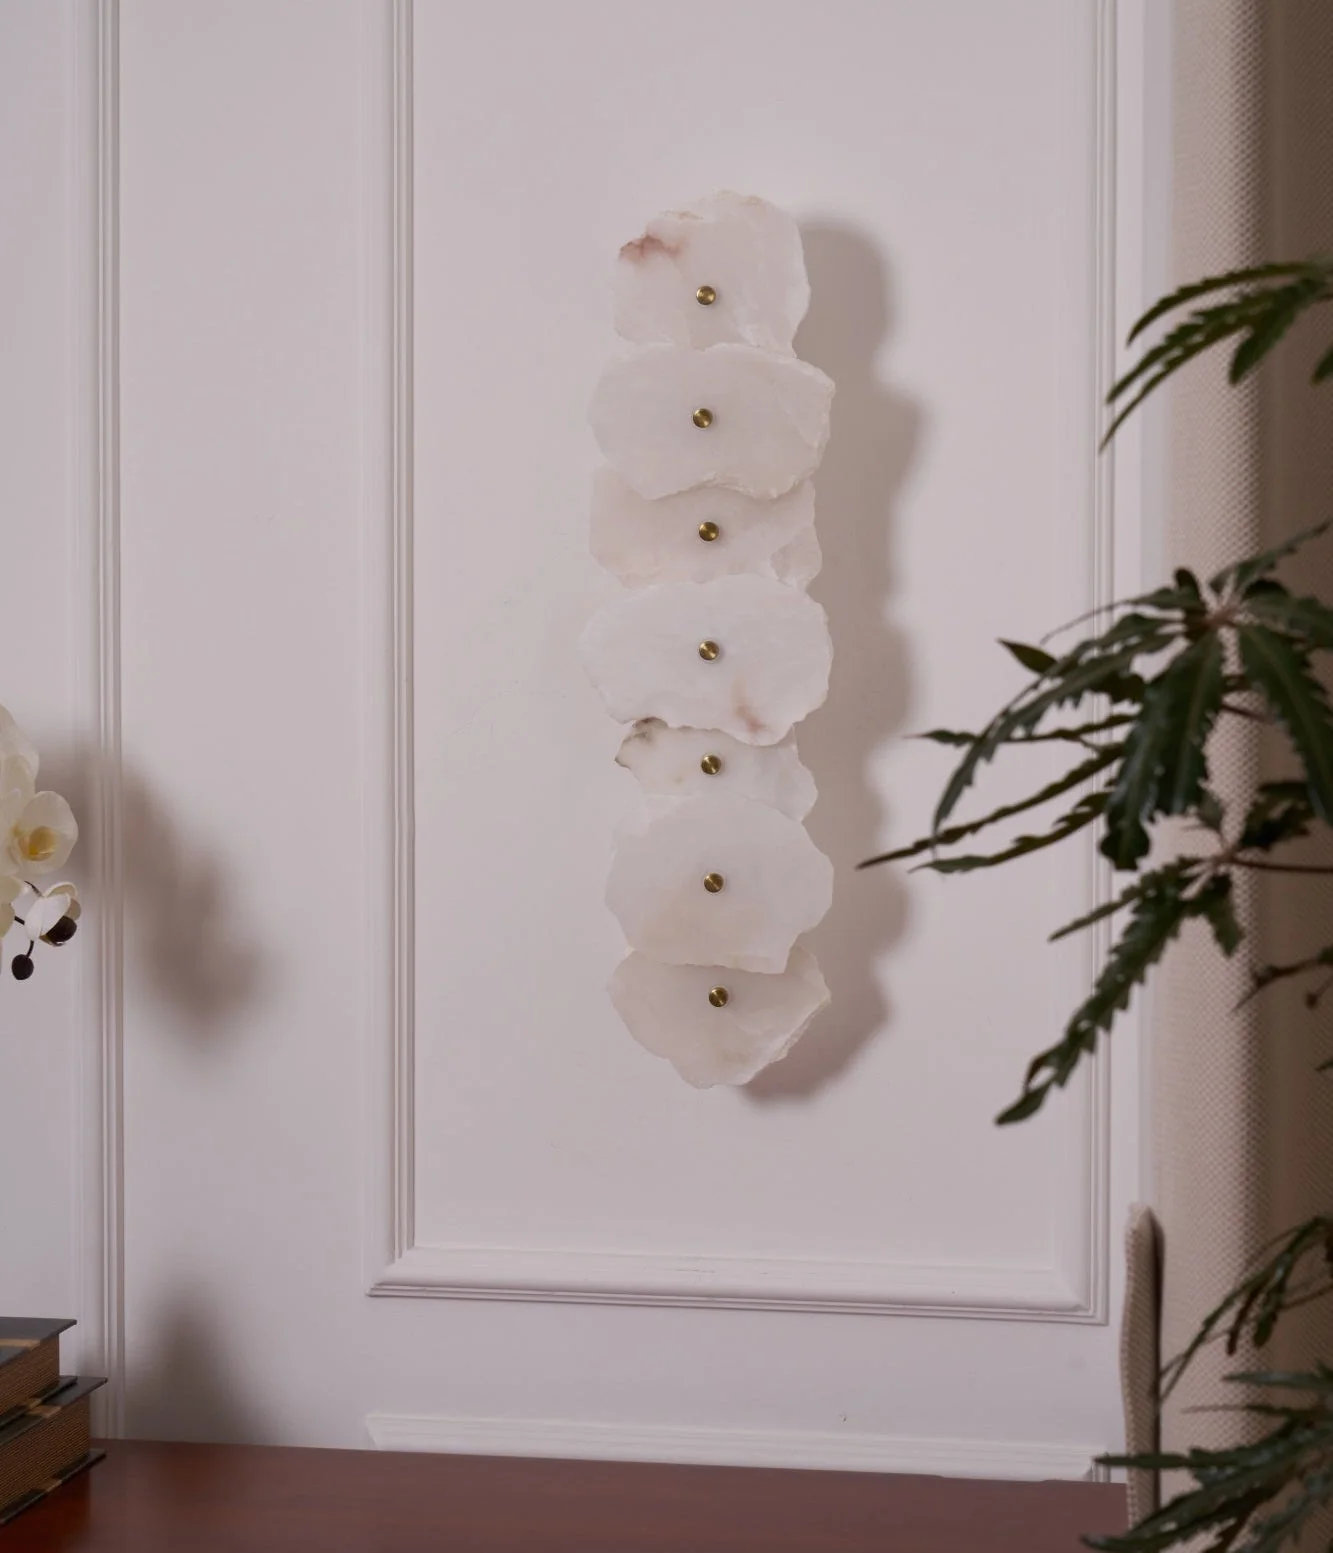
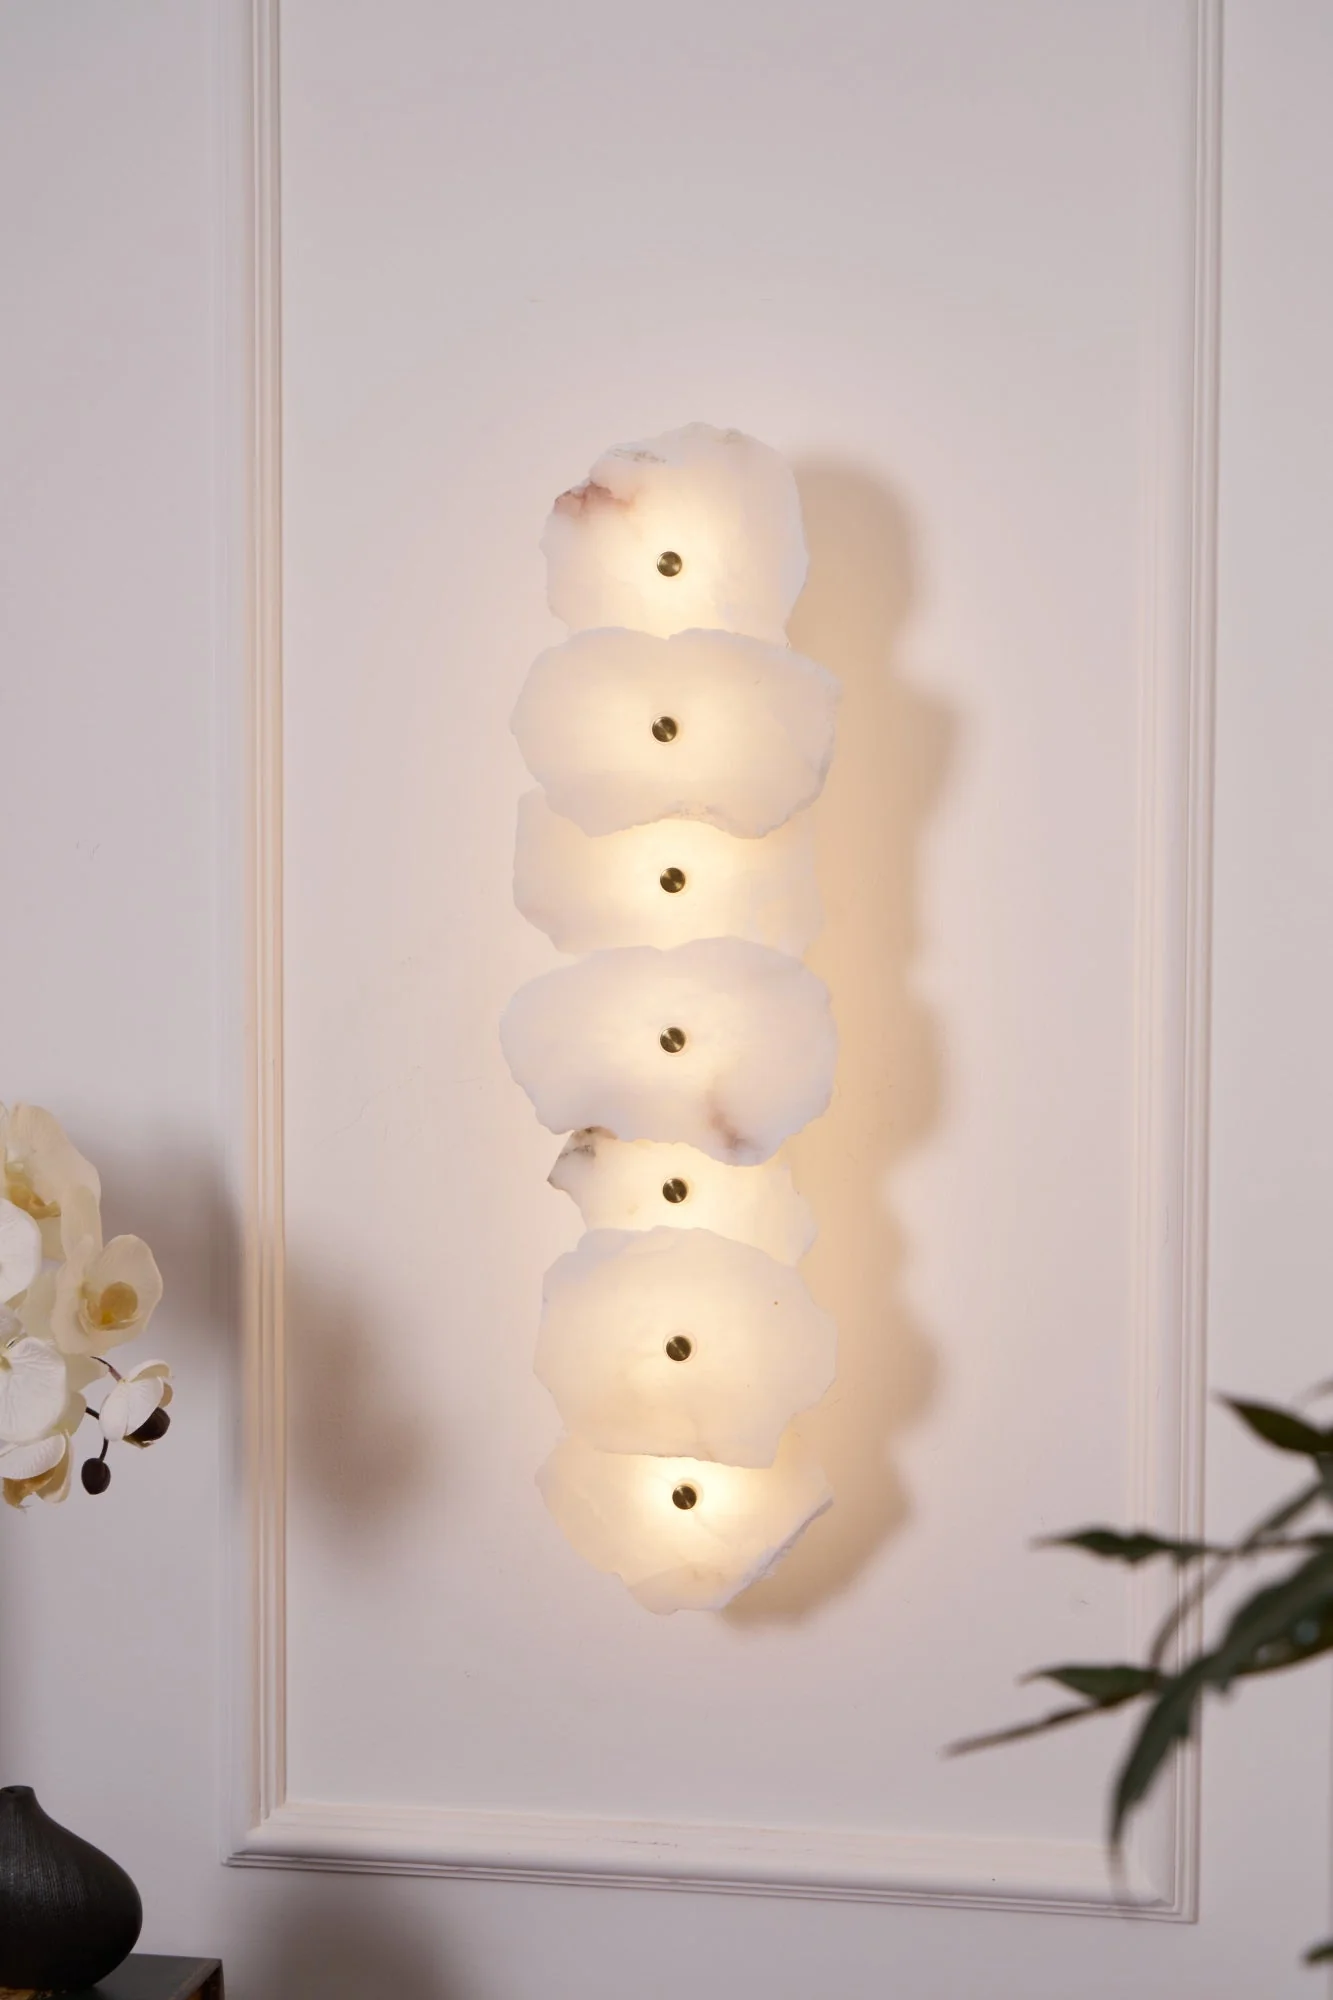
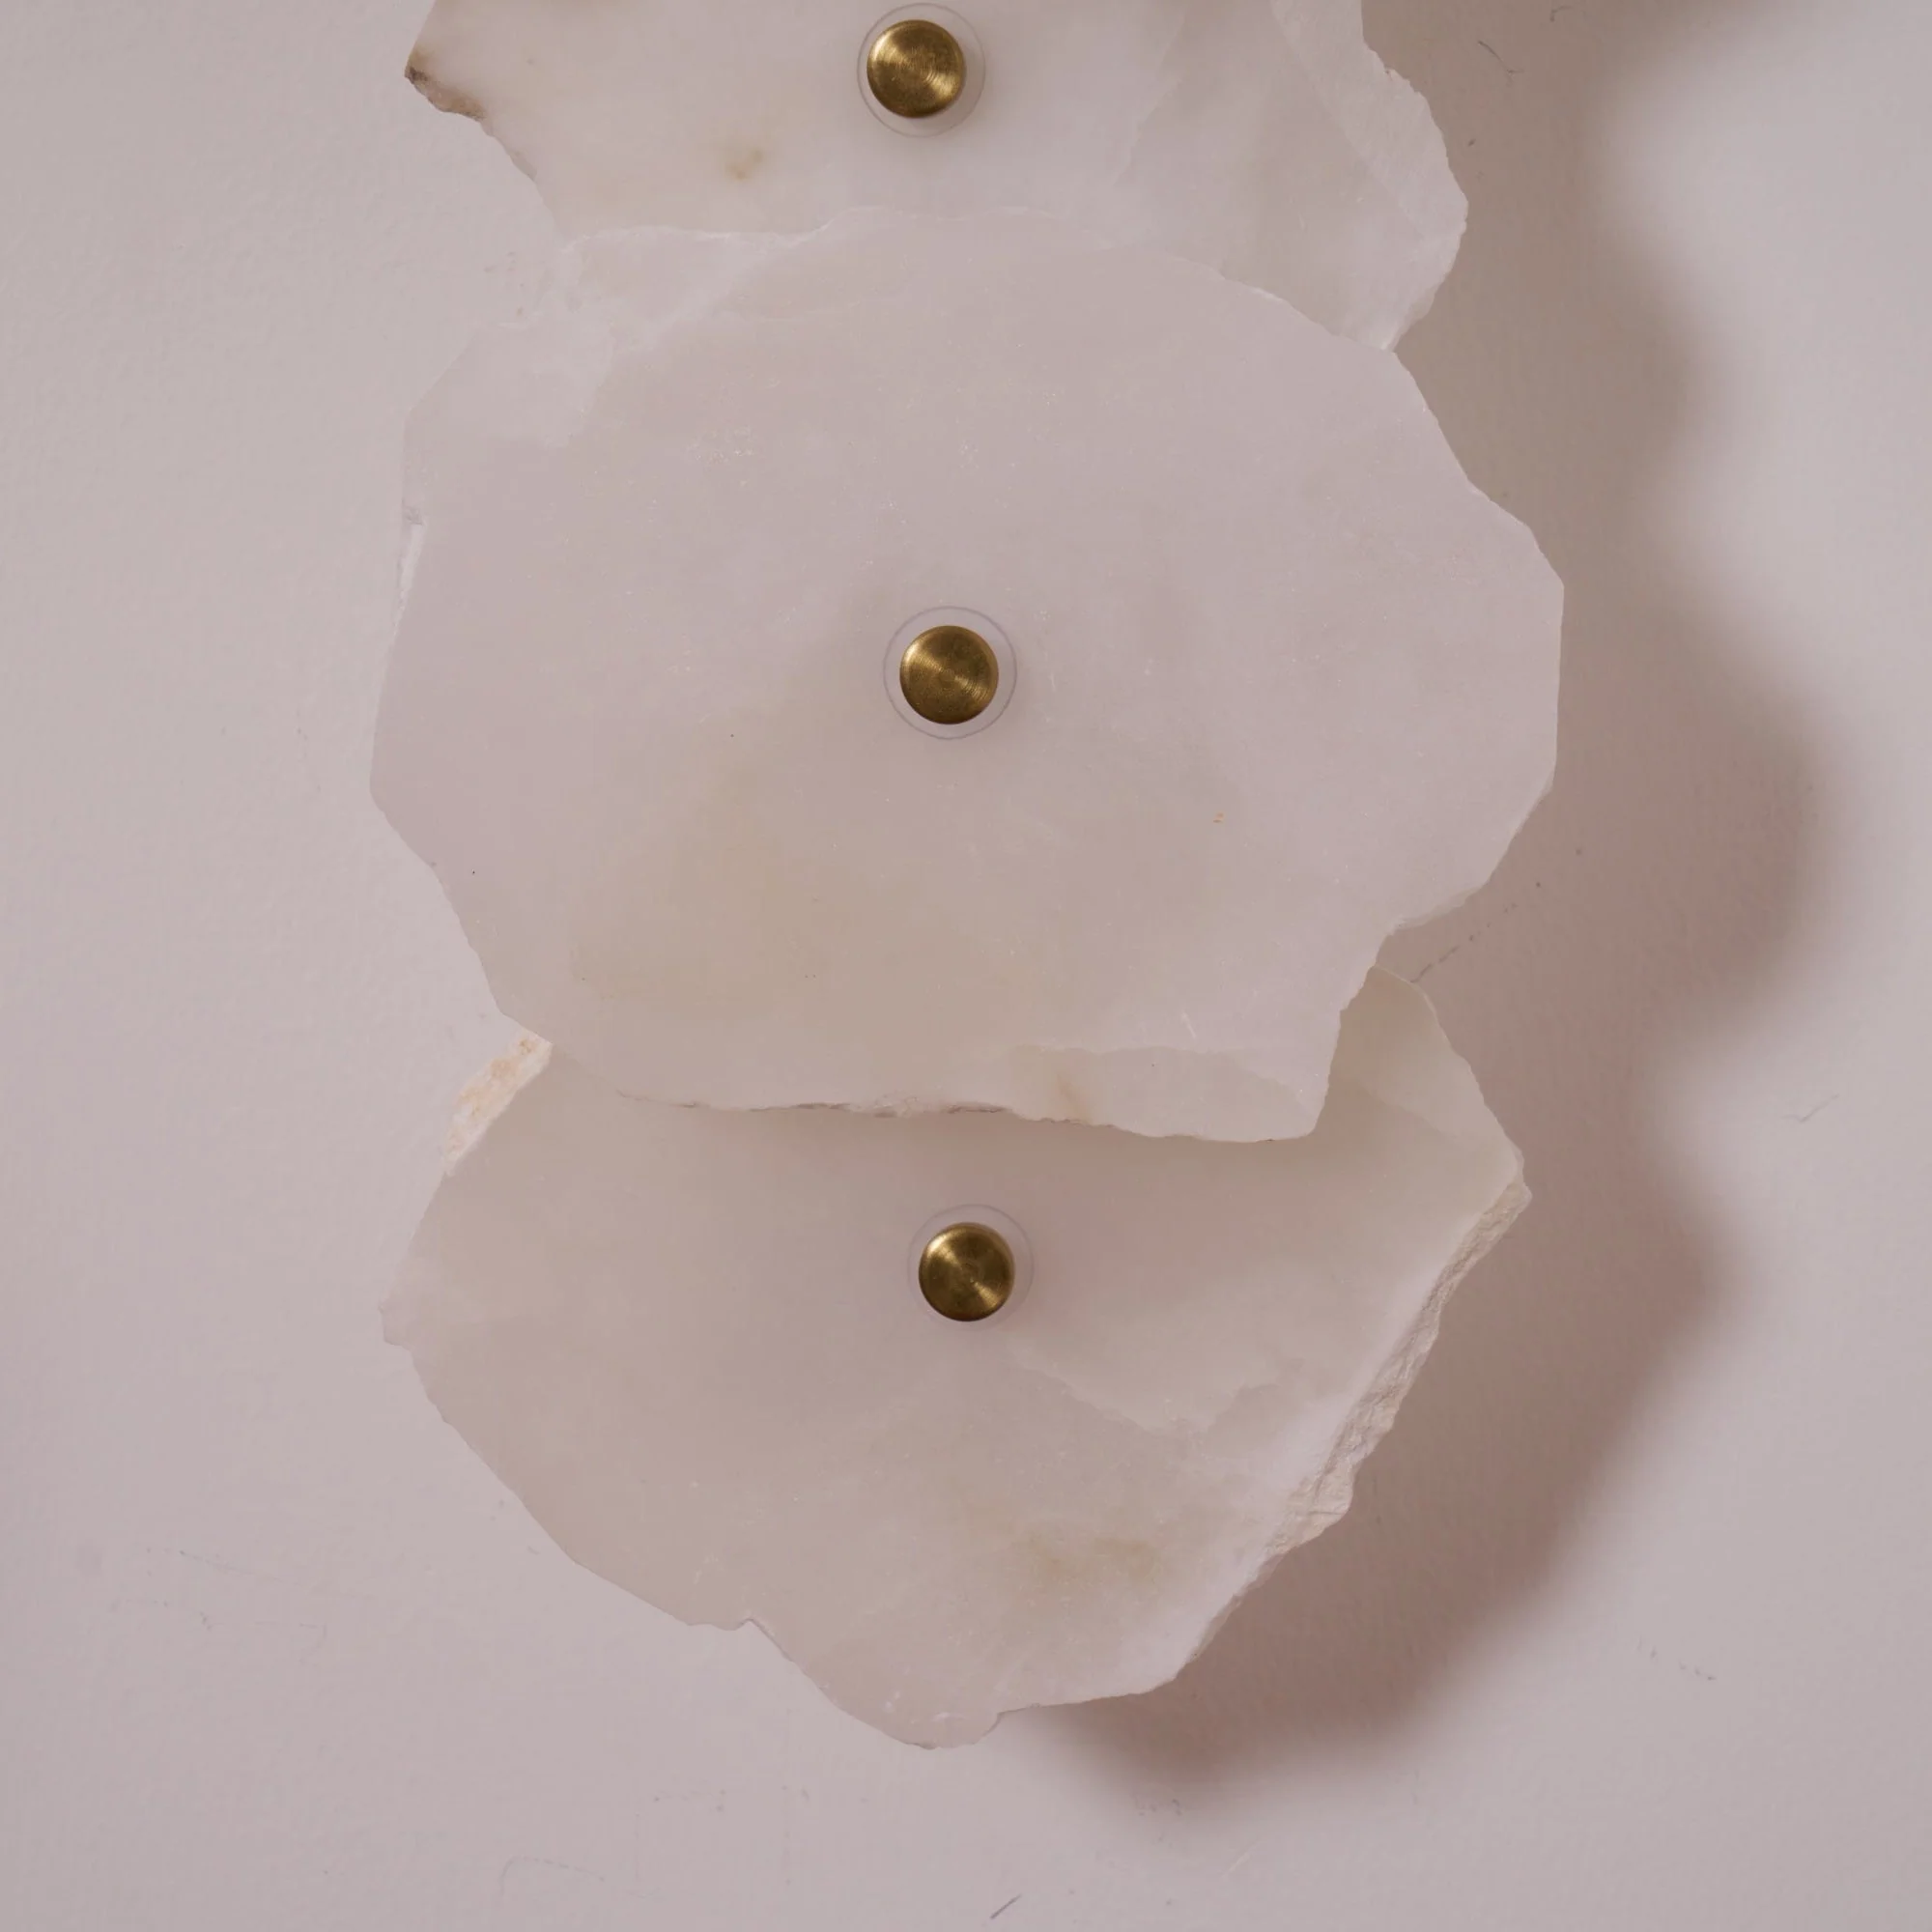
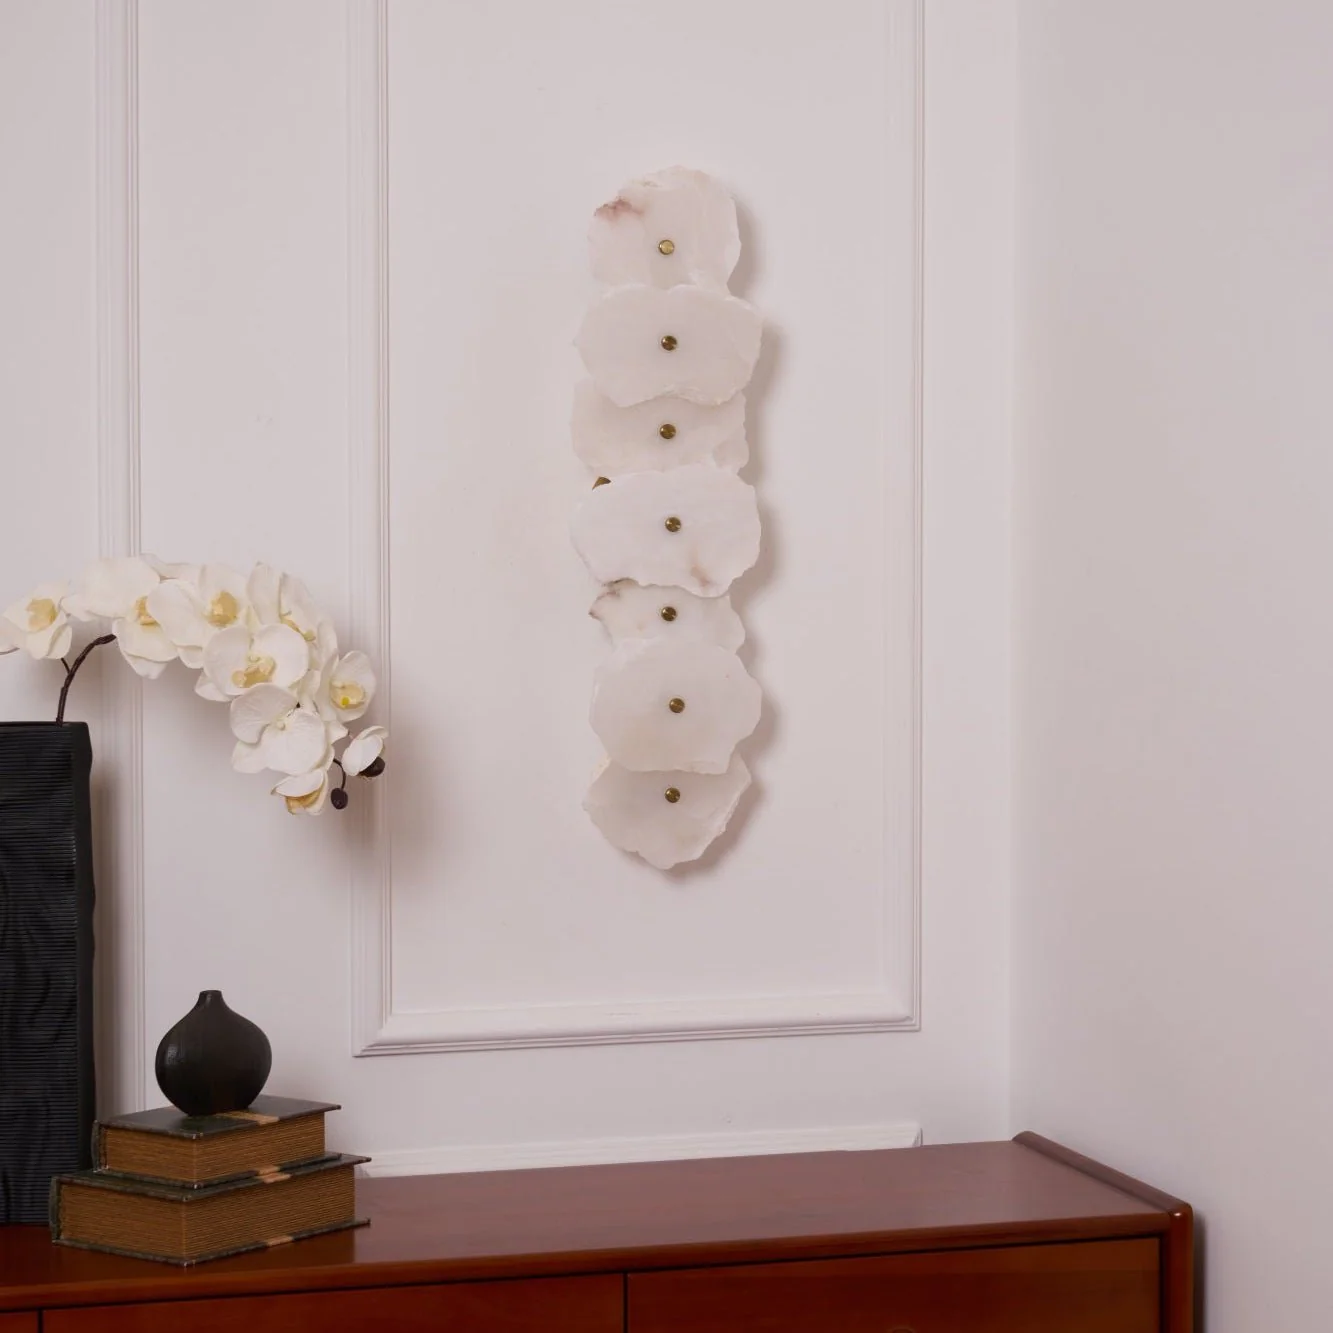
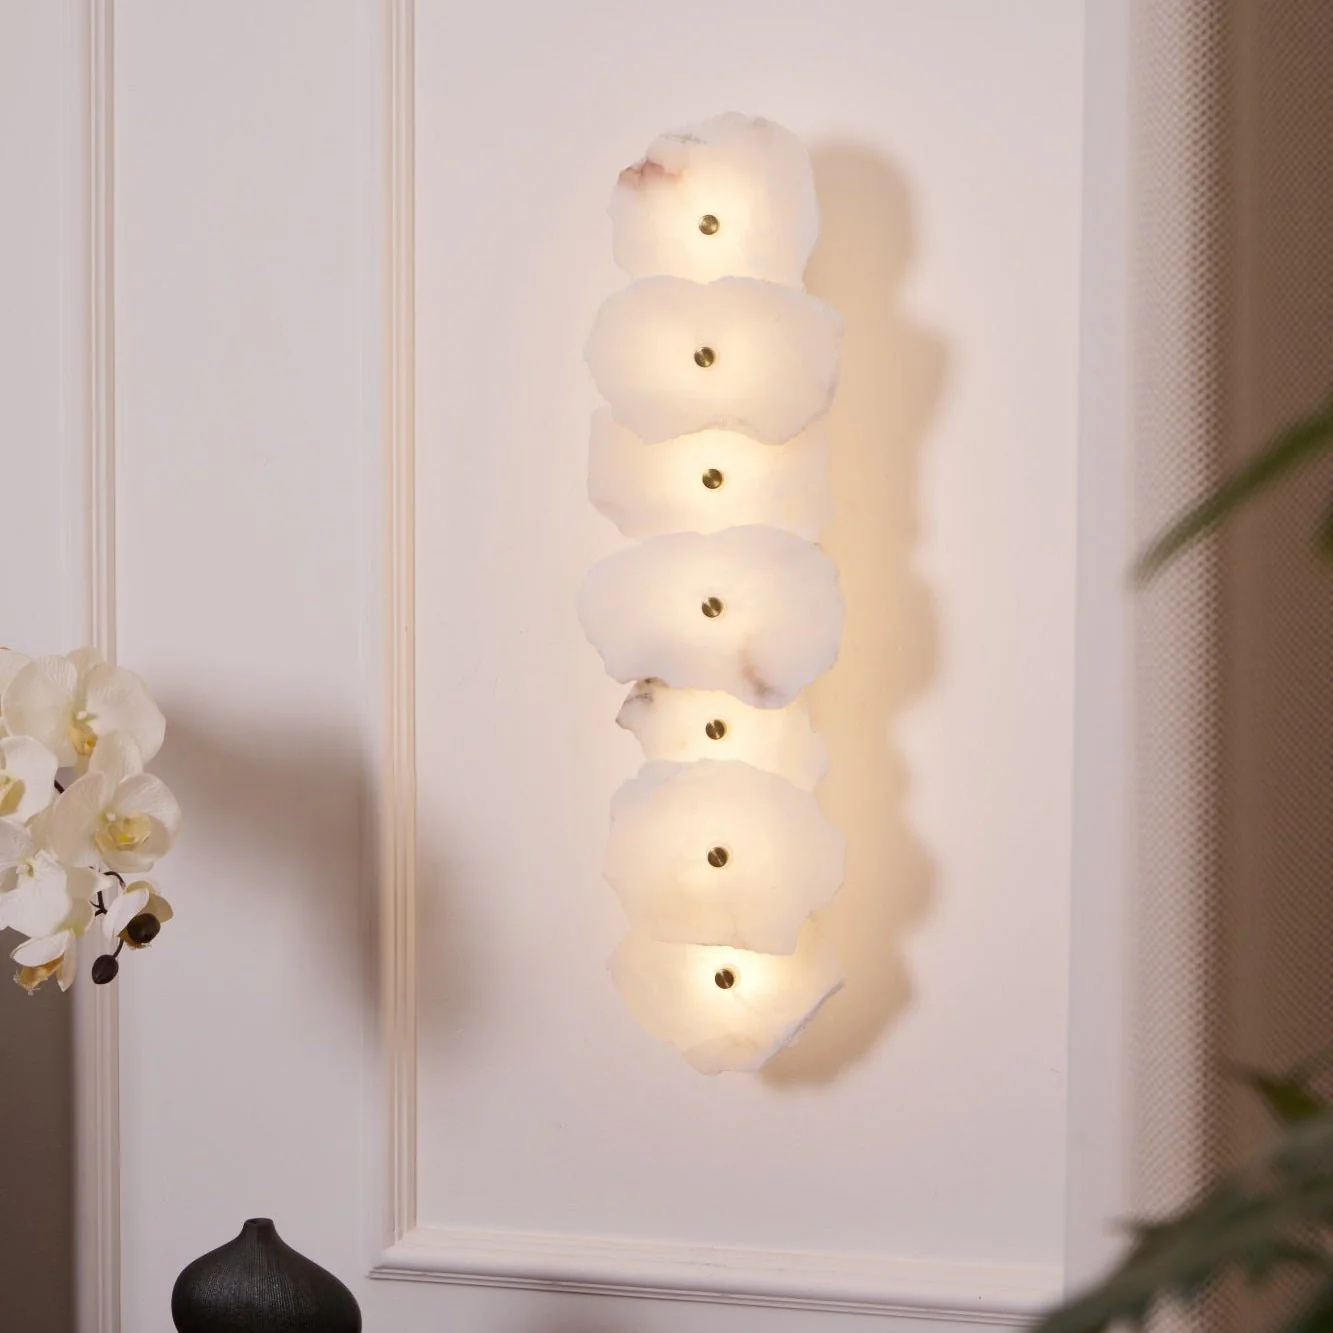
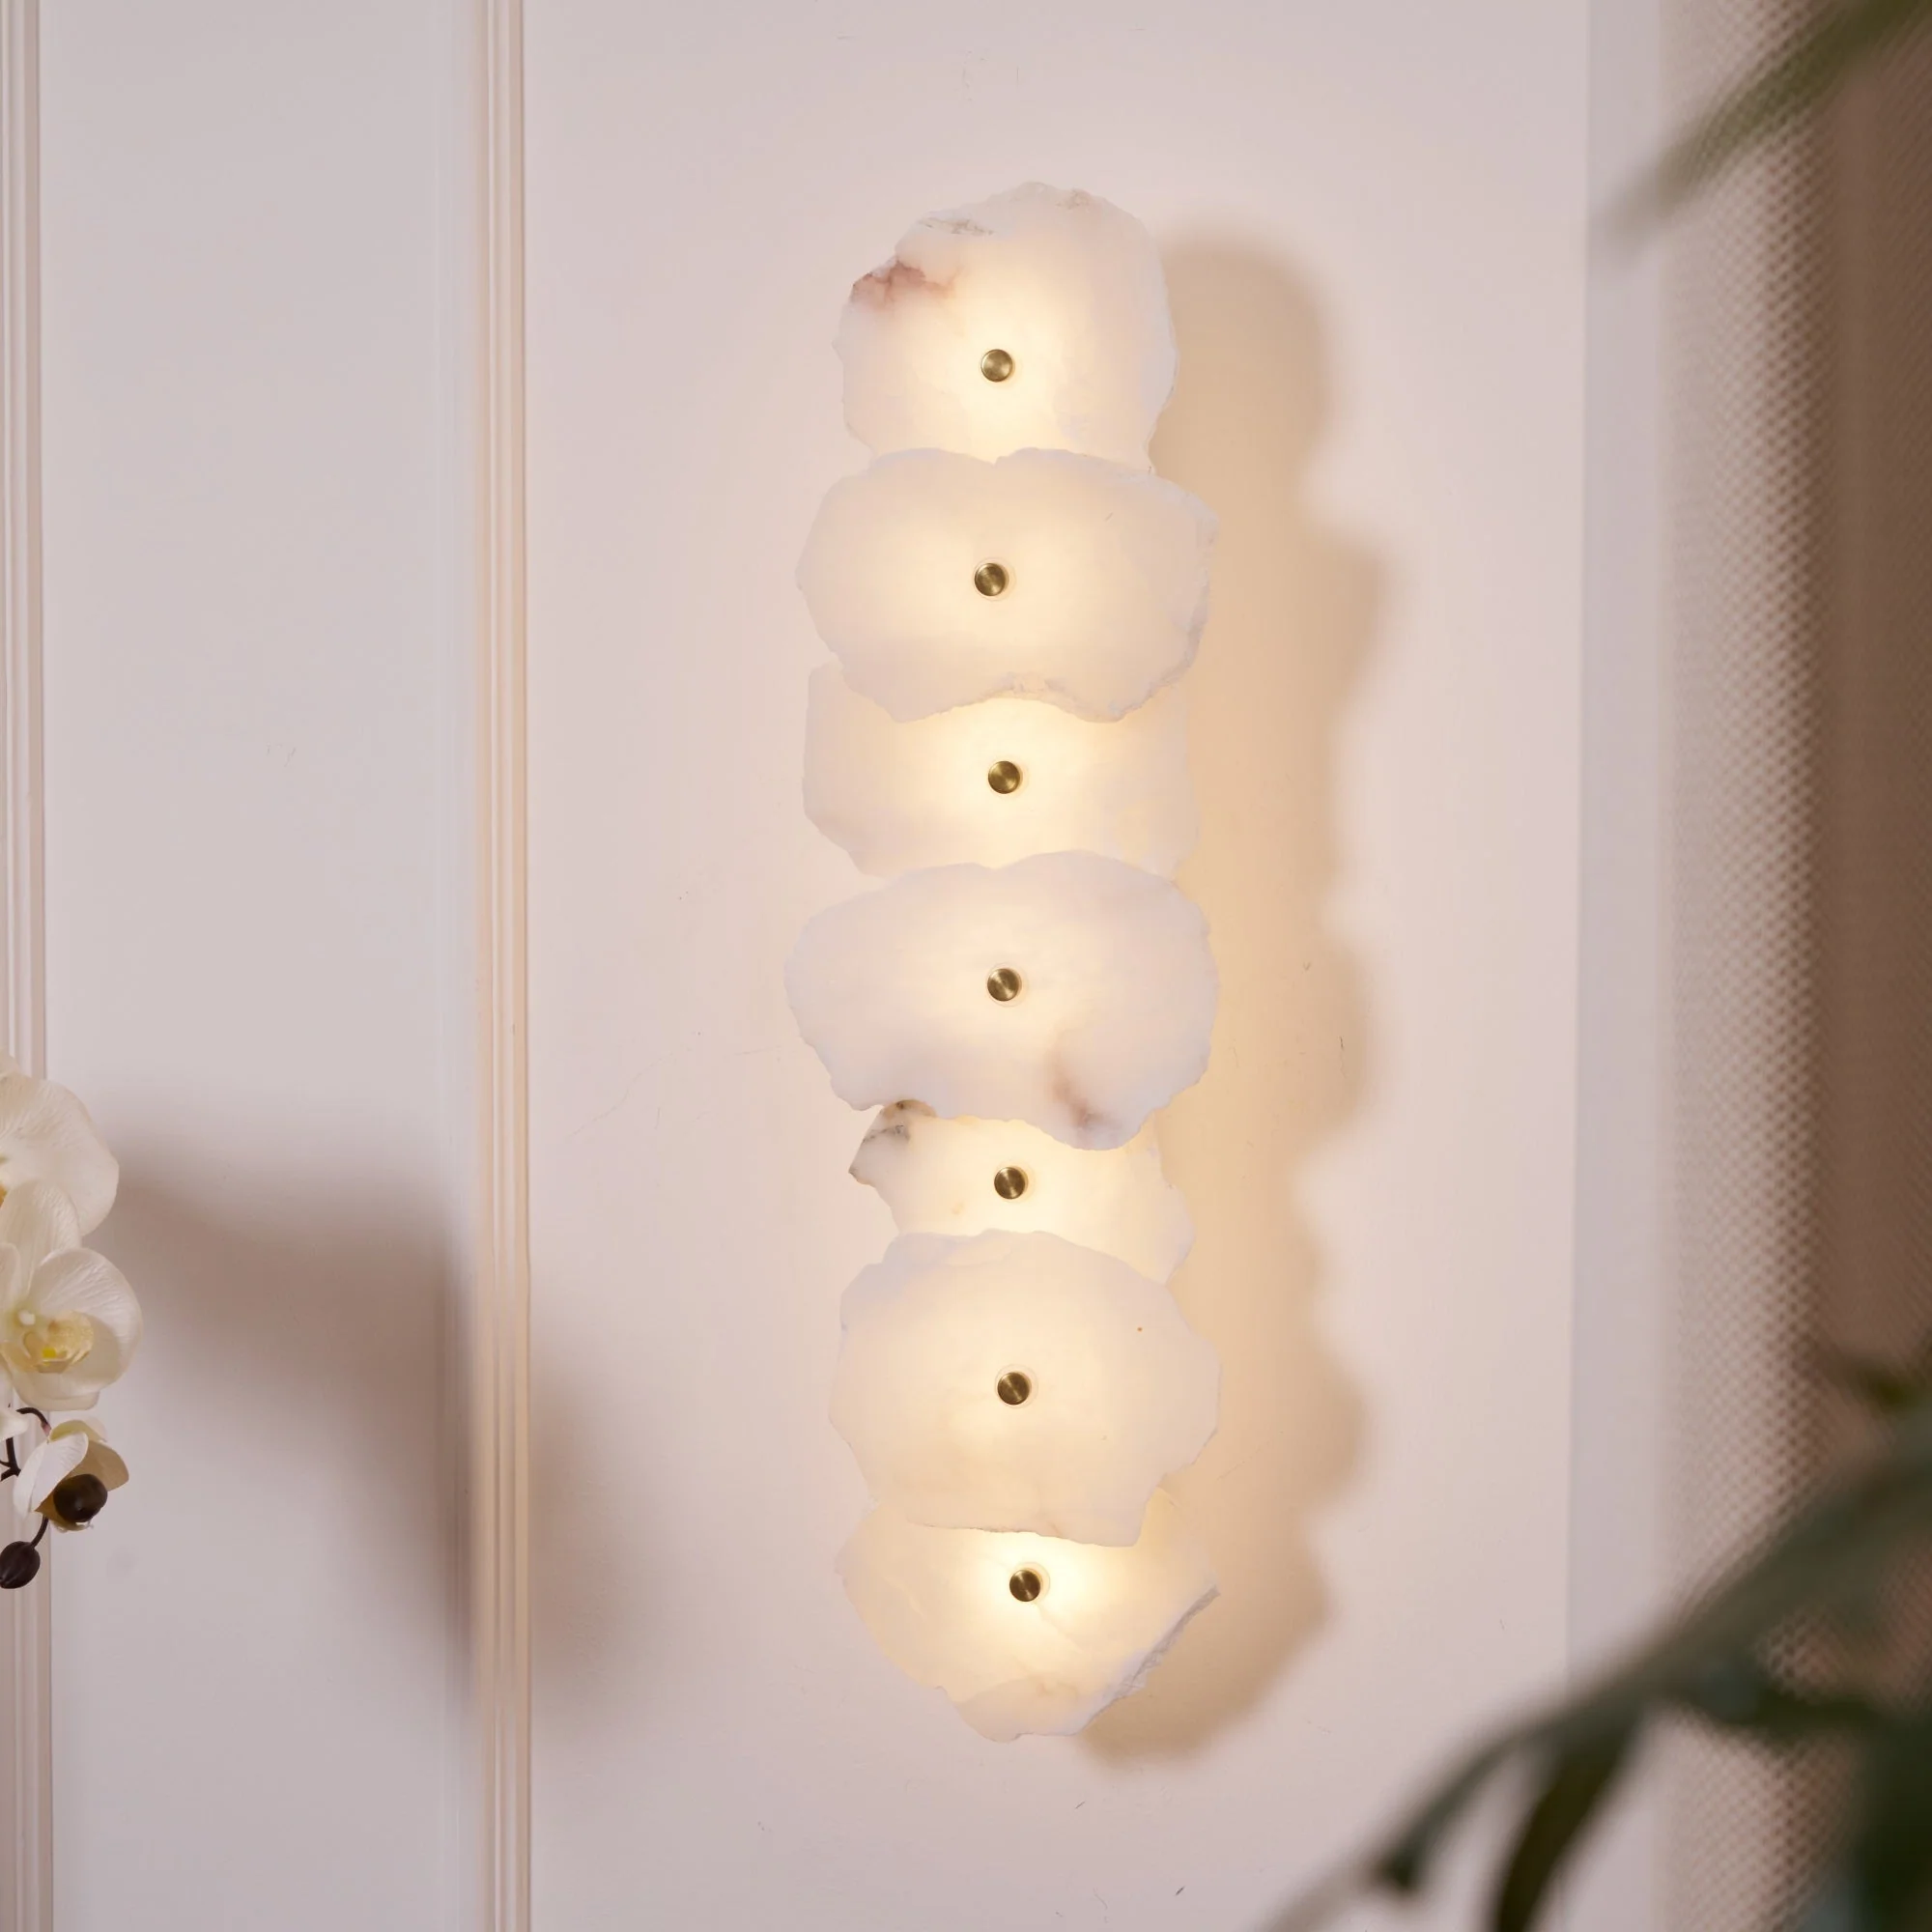
Material: Metal. Alabaster.
Light source: Integrated LED.
Kelvin range: Warm Light (3000K). Neutral Light (4000K). Cool Light (6000K).
Voltage: AC 110-240V.
Mounting: Wall.
Environment: Indoor.
Moisture resistance: IP 20 Damp-rated not waterproof. for indoor use only
Finishes: Gold.
Alabaster Color: White.
Wiring: Hardwired.
Control: Compatible with common wall switch (not included).
Certification: Compatible with North America. Saudi Arabia. Europe. Australia Certification
Dimming: If you purchase the dimmable version. we recommend you purchase a Triac dimmer switch for the best results.
Please Note: Alabaster patterns vary by product. our product and the pictures shown are different.


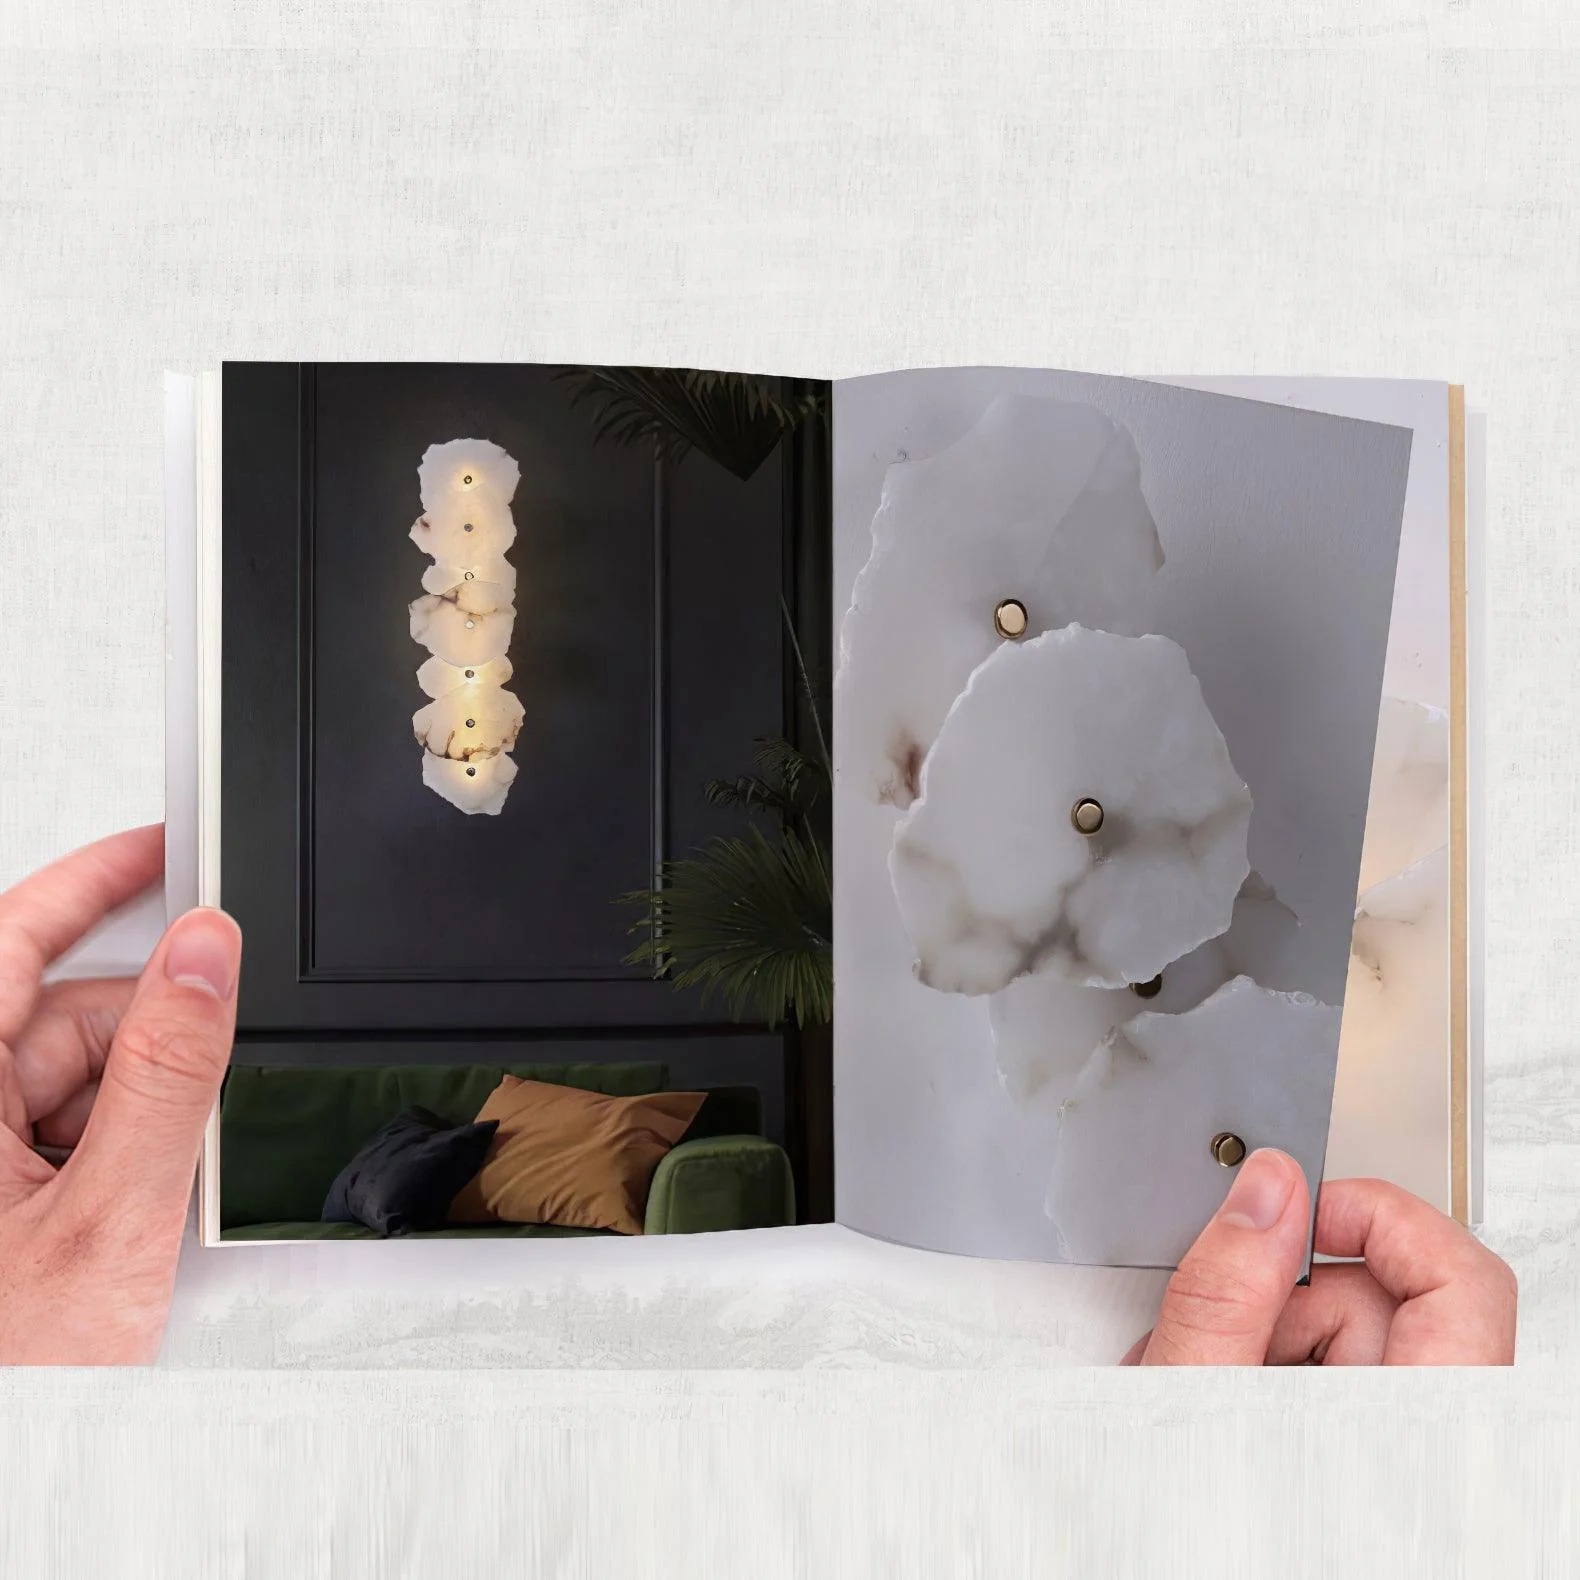
Details & Craftsmanship
Every detail has been carefully considered to bring you the perfect product.
Details & Craftsmanship
Every detail has been carefully considered to bring you the perfect product.

Details & Craftsmanship
Every detail has been carefully considered to bring you the perfect product.

Details & Craftsmanship
Every detail has been carefully considered to bring you the perfect product.
Details & Craftsmanship
Every detail has been carefully considered to bring you the perfect product.
Details & Craftsmanship
Every detail has been carefully considered to bring you the perfect product.
Details & Craftsmanship
Every detail has been carefully considered to bring you the perfect product.
Details & Craftsmanship
Every detail has been carefully considered to bring you the perfect product.

Details & Craftsmanship
Every detail has been carefully considered to bring you the perfect product.
Details & Craftsmanship
Every detail has been carefully considered to bring you the perfect product.
Details & Craftsmanship
Every detail has been carefully considered to bring you the perfect product.
Details & Craftsmanship
Every detail has been carefully considered to bring you the perfect product.
Details & Craftsmanship
Every detail has been carefully considered to bring you the perfect product.
Details & Craftsmanship
Every detail has been carefully considered to bring you the perfect product.

Details & Craftsmanship
Every detail has been carefully considered to bring you the perfect product.
Details & Craftsmanship
Every detail has been carefully considered to bring you the perfect product.
Details & Craftsmanship
Every detail has been carefully considered to bring you the perfect product.
Details & Craftsmanship
Every detail has been carefully considered to bring you the perfect product.

Details & Craftsmanship
Every detail has been carefully considered to bring you the perfect product.
Details & Craftsmanship
Every detail has been carefully considered to bring you the perfect product.
Details & Craftsmanship
Every detail has been carefully considered to bring you the perfect product.
Details & Craftsmanship
Every detail has been carefully considered to bring you the perfect product.
Details & Craftsmanship
Every detail has been carefully considered to bring you the perfect product.
Details & Craftsmanship
Every detail has been carefully considered to bring you the perfect product.

Details & Craftsmanship
Every detail has been carefully considered to bring you the perfect product.
Details & Craftsmanship
Every detail has been carefully considered to bring you the perfect product.
Details & Craftsmanship
Every detail has been carefully considered to bring you the perfect product.
Details & Craftsmanship
Every detail has been carefully considered to bring you the perfect product.
Details & Craftsmanship
Every detail has been carefully considered to bring you the perfect product.
Details & Craftsmanship
Every detail has been carefully considered to bring you the perfect product.
Details & Craftsmanship
Every detail has been carefully considered to bring you the perfect product.
Details & Craftsmanship
Every detail has been carefully considered to bring you the perfect product.
Details & Craftsmanship
Every detail has been carefully considered to bring you the perfect product.
Details & Craftsmanship
Every detail has been carefully considered to bring you the perfect product.
Details & Craftsmanship
Every detail has been carefully considered to bring you the perfect product.
Details & Craftsmanship
Every detail has been carefully considered to bring you the perfect product.
Details & Craftsmanship
Every detail has been carefully considered to bring you the perfect product.
Details & Craftsmanship
Every detail has been carefully considered to bring you the perfect product.
Details & Craftsmanship
Every detail has been carefully considered to bring you the perfect product.
Details & Craftsmanship
Every detail has been carefully considered to bring you the perfect product.
Details & Craftsmanship
Every detail has been carefully considered to bring you the perfect product.
Details & Craftsmanship
Every detail has been carefully considered to bring you the perfect product.
Details & Craftsmanship
Every detail has been carefully considered to bring you the perfect product.
Details & Craftsmanship
Every detail has been carefully considered to bring you the perfect product.
Details & Craftsmanship
Every detail has been carefully considered to bring you the perfect product.

Details & Craftsmanship
Every detail has been carefully considered to bring you the perfect product.

Details & Craftsmanship
Every detail has been carefully considered to bring you the perfect product.

Details & Craftsmanship
Every detail has been carefully considered to bring you the perfect product.

Details & Craftsmanship
Every detail has been carefully considered to bring you the perfect product.
Details & Craftsmanship
Every detail has been carefully considered to bring you the perfect product.

Details & Craftsmanship
Every detail has been carefully considered to bring you the perfect product.
Details & Craftsmanship
Every detail has been carefully considered to bring you the perfect product.

Details & Craftsmanship
Every detail has been carefully considered to bring you the perfect product.
Details & Craftsmanship
Every detail has been carefully considered to bring you the perfect product.
Details & Craftsmanship
Every detail has been carefully considered to bring you the perfect product.
Details & Craftsmanship
Every detail has been carefully considered to bring you the perfect product.
Details & Craftsmanship
Every detail has been carefully considered to bring you the perfect product.

Details & Craftsmanship
Every detail has been carefully considered to bring you the perfect product.
Details & Craftsmanship
Every detail has been carefully considered to bring you the perfect product.
Details & Craftsmanship
Every detail has been carefully considered to bring you the perfect product.
Description
Product Size
1 Heads Size: Dia 13cm x H 18cm / ∅ 5.1″ x H 7.1″ (Power: ~7W)
3 Heads Size: L 40cm x H 13cm / L 15.7″ x H 5.1″ (Power:~12W)
5 Heads Size: L 60cm x H 13cm / L 18.1″ x H 5.1″ (Power:~20W)
7 Heads Size: L 64cm x H 13cm / L 25.2″ x H 5.1″ (Power:~28W)
9 heads Size: L 78cm x H 13cm / L 30.7″ x H 5.1″ (Power:~36W)
Details
Material: Metal. Alabaster.
Light source: Integrated LED.
Kelvin range: Warm Light (3000K). Neutral Light (4000K). Cool Light (6000K).
Voltage: AC 110-240V.
Mounting: Wall.
Environment: Indoor.
Moisture resistance: IP 20 Damp-rated not waterproof. for indoor use only
Finishes: Gold.
Alabaster Color: White.
Wiring: Hardwired.
Control: Compatible with common wall switch (not included).
Certification: Compatible with North America. Saudi Arabia. Europe. Australia Certification
Dimming: If you purchase the dimmable version. we recommend you purchase a Triac dimmer switch for the best results.
Please Note: Alabaster patterns vary by product. our product and the pictures shown are different.